
How to build a serverless app with Gatsby, Netlify and FaunaDB - Part 2
Co-Founder, @CreoWis | Teacher, @tapaScript | Founder, @ReactPlay | YouTuber | Writer | Human
Let's Continue...
Welcome to the Part 2 of the series Go Serverless. Hope you are enjoying it so far by following the steps to develop the serverless testimonial app.
In the last article(Part 1), we have established a ground by,
- Creating an account with the client-serverless data API provider called,
FaunaDB. - Setting up the database, schema, document and the server key.
- Writing the serverless functions using,
Netlifyand finally tested them like APIs
In this article, we will be using the serverless functions to build a user interface of the testimonial app. To do that, we will use Gatsby which is a super cool, react-based static site generator. We will also learn about using Netlify to build and deploy the testimonial app.
We will start where we left off in the last article. Let us continue to develop the app on top of the code implemented so far as part of the previous article.
If you haven't got a chance to go through the part 1 of the series yet, here is the link:
As usual, here is the source code repo link:
Gatsby: Install and initial setup
There are multiple ways to setup a Gatsby based project. There are plenty of starter projects to help you get going. You can check out this quick start guide to learn more.
For a better understanding sake, we will not be using any of the starter projects here. We will build things from the scratch.
Install
gatsby-cliglobally. This tool will help us to work with the Gatsby environment.npm install -g gatsby-cliInstall gatsby, react and react-dom
yarn add gatsby react react-domEdit the
scriptssection of thepackage.jsonfile to add a script for 'develop'."scripts": { "test": "echo \"Error: no test specified\" && exit 1", "develop": "gatsby develop" }Gatsbyprojects need a special configuration file called,gatsby-config.js. At this time, we will need an empty file. Please create a file named,gatsby-config.jswith the following content:module.exports = { // keep it empty }Now it is the time to create our first page with Gatsby. Create a folder named,
srcat the root of the project folder. Create a sub-folder named,pagesundersrc. Create a file named,index.jsundersrc/pageswith the following content:import React, { useEffect, useState } from 'react'; export default () => { const [status, setStatus ] = useState('loading...'); const [testimonials, setTestimonials] = useState(null); return ( <> <h1>Testimonials to load here...</h1> </> ) }The code above is a simple react component. We import
Reactand two in-built hooks called,useStateanduseEffect. We have got a couple of state variables to keep track of the array of testimonials and the API responses.Let's run it. We generally need to use the command,
gatsby developto run the app locally. As we have to run the client side application withnetlify functions, we will continue to use,netlify devcommand.This single command will take care of running the serverless functions locally along with the client side gatsby application. Open a command prompt at the root of the project folder and type,
netlify devThat's all. Try accessing the page at
localhost:8888. You should see something like this,
Gatsby project build creates couple of output folders which you may not want to push to the source code repository. Let us add few entries to the
.gitignorefile so that, we do not get unwanted noise.Add
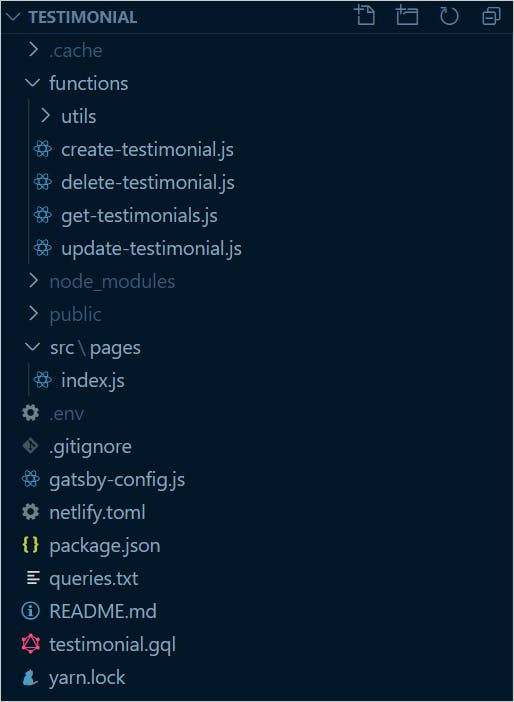
.cacheandpublicto the .gitignore file. Here is the full content of the file:.cache public node_modules *.envAt this stage, your project directory structure should match with the following:
Load all the Testimonials
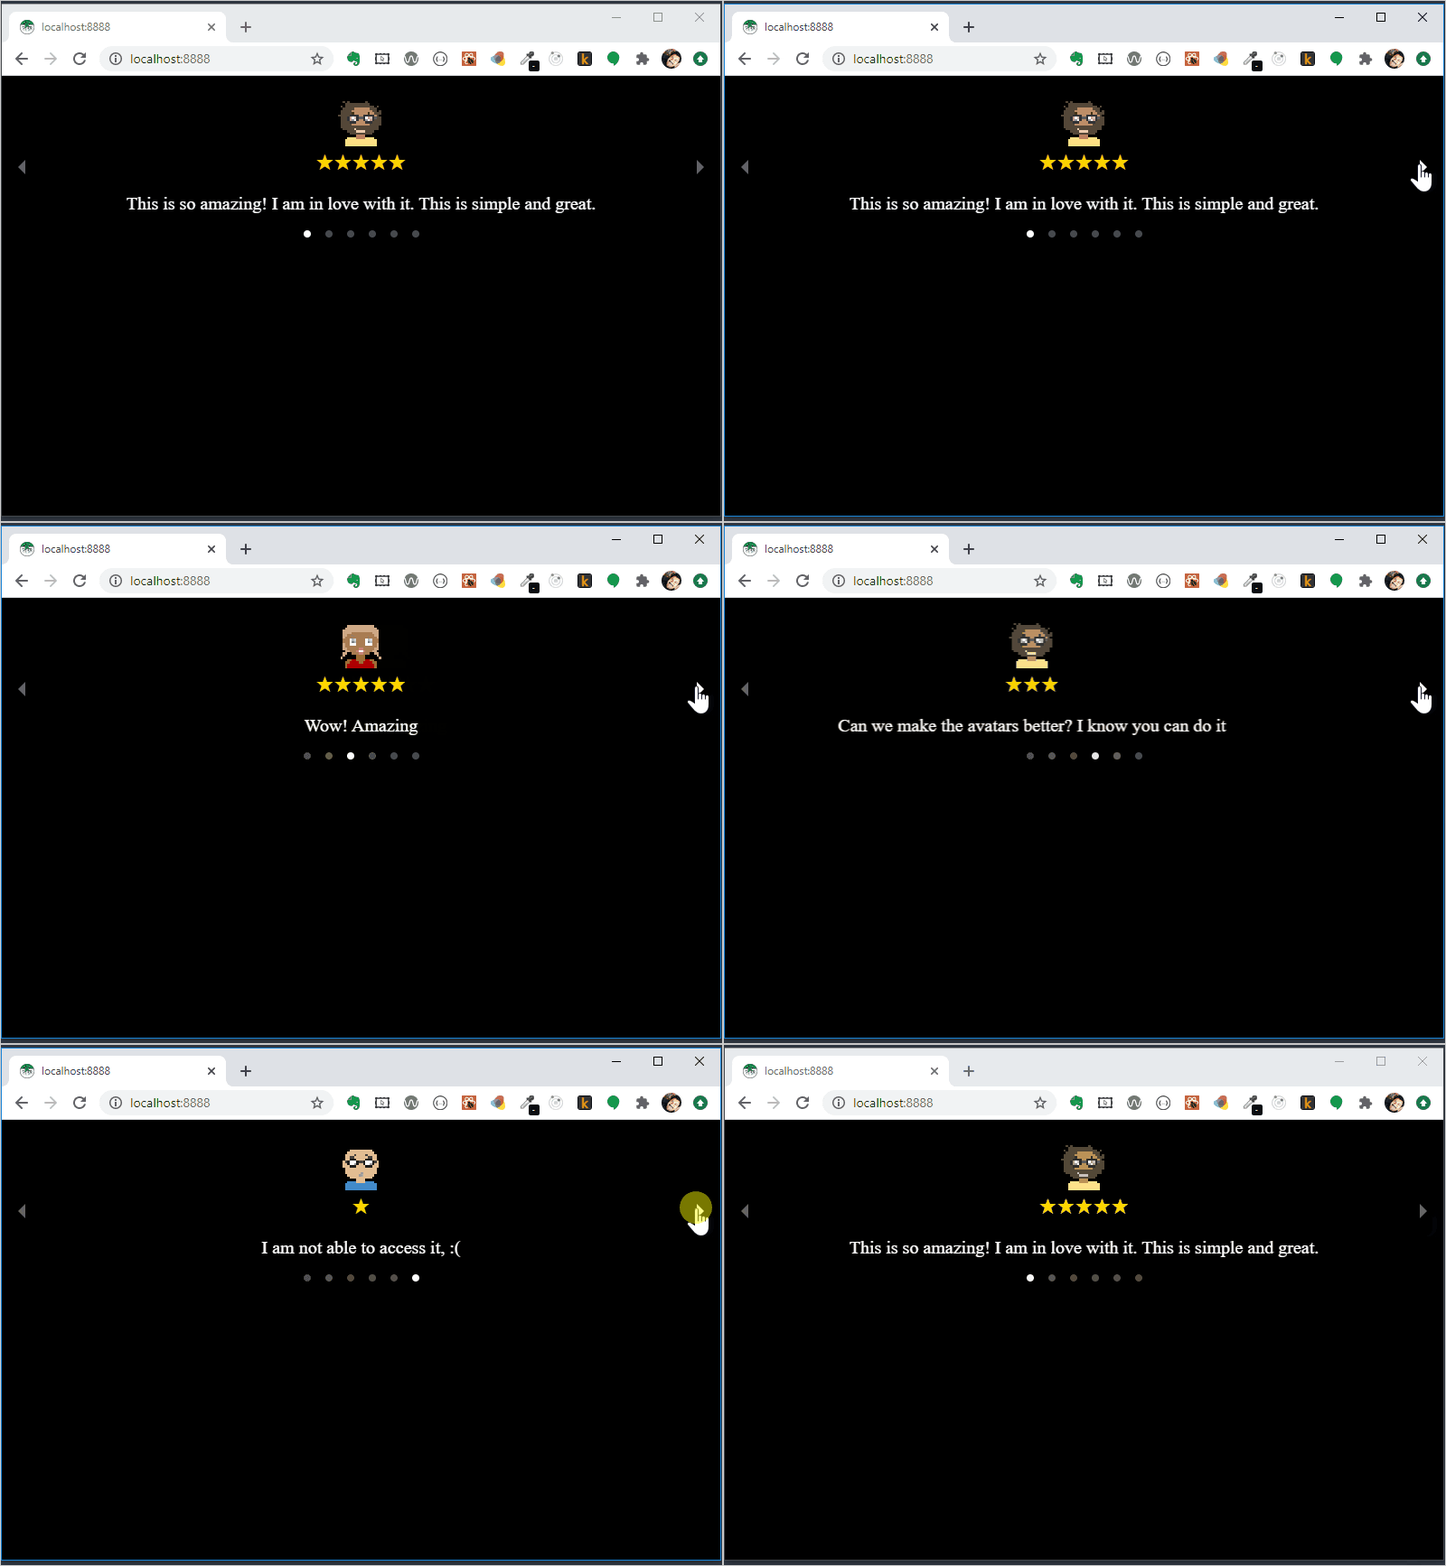
Our goal here is to fetch all the testimonials using, /api/get-testimonials call. We would like to show the fetched testimonials in the following fashion:
First thing first. We need to load all the testimonials using the serverless function and show it to the page we have just created.
Load data
We will follow only a few steps to load all the testimonials. You need to edit the index.js file with the following changes:
Import
axioslibrary so that, we can make the API calls.import axios from "axios";Make a call to the
serverlessfunction using the URI,api/get-tetsimonials. We will use the hook,useEffectto accomplish it. We useaxiosto make this call. On a successful response, testimonials are stored in thetestimonialsstate variable.Note, we also change the status as
loadedto indicate that, the data has been loaded successfully.useEffect(() => { if (status !== "loading...") return; axios("/api/get-testimonials").then(result => { if (result.status !== 200) { console.error("Error loading testimonials"); console.error(result); return; } setTestimonials(result.data.messages); setStatus("loaded"); }); }, [status]);Have you noticed those cool avatars in the testimonial interface above? I am using them from https://avatars.dicebear.com/api/. These avatars are available to fetch for free using the URLs.
We will write a simple util function named,
getAvatar()to fetch some random 'happy' avatars.const getAvatar = () => { const random = Math.floor(Math.random() * (testimonials.length - 0 + 1) + 0); const imgUrl = `https://avatars.dicebear.com/api/human/${random}.svg?mood[]=happy`; return imgUrl; }Last is the
renderfunction to show the testimonial message, rating along with an avatar in the UI. We loop through thetestimonialsarray and render the details with the ui elements.return ( <> {testimonials && testimonials.map((testimonial, index) => ( <div key={ index }> <img src={ getAvatar() } height="50px" width="50px" alt="avatar" /> <div className="testimonial"> <span>{ testimonial.rating }</span> <p className="text"> { testimonial.text } </p> </div> </div> ))} </> );
That's all about it! We have completed the loading of all the testimonials and showing them in the UI. Here is the complete code of index.js:
import React, { useEffect, useState } from 'react';
import axios from "axios";
export default () => {
const [status, setStatus ] = useState('loading...');
const [testimonials, setTestimonials] = useState(null);
 useEffect(() => {
  if (status !== "loading...") return;
  axios("/api/get-testimonials").then(result => {
    if (result.status !== 200) {
      console.error("Error loading testimonials");
      console.error(result);
      return;
    }
    setTestimonials(result.data.messages);
    setStatus("loaded");
  });
}, [status]);
const getAvatar = () => {
  const random = Math.floor(Math.random() * (testimonials.length - 0 + 1) + 0);
  const imgUrl = `https://avatars.dicebear.com/api/human/${random}.svg?mood[]=happy`;
  return imgUrl;
}
return (
  <>
    {testimonials && testimonials.map((testimonial, index) => (
      <div key={ index }>
        <img
          src={ getAvatar() }
          height="50px"
          width="50px"
          alt="avatar" />
        <div className="testimonial">
          <span>{ testimonial.rating }</span>
          <p className="text">
            { testimonial.text }
          </p>
        </div>
      </div>
    ))}
  </>
);
}
How does the UI look now? Well, it looks like this:
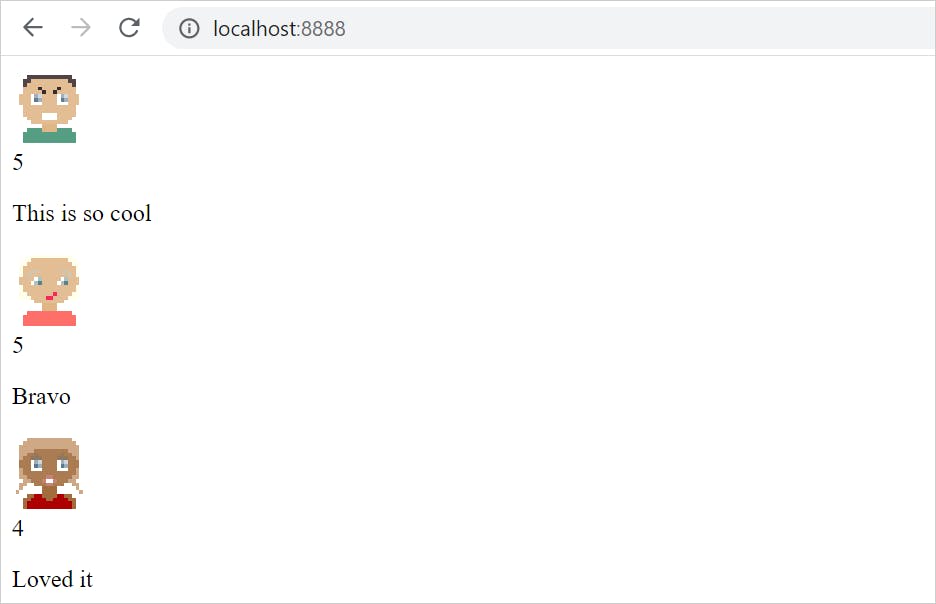
No doubt, we have fetched all the testimonials and showing them in the UI. But it doesn't look great, right?
So, Let's make things look better
Our vision is this,
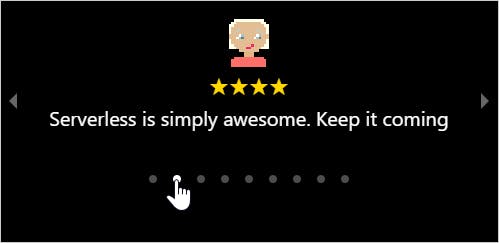
Notice, there is a rating component(with stars) and a carousel component to browse through the testimonials. We will use a couple of react-based npm to achieve these.
Install libraries
Open a command prompt at the root of the project folder. Try this command(or npm i) to install these libraries.
yarn add react-stars react-responsive-carousel
Use the libraries
We have imported ReactStars and Carousel components along with the carousel.min.css to the index.js file.
Only few changes that we have to do are,
- Wrap the
JSXportion of the code with theCarouselcomponent - Use the
ReactStarscomponent for the ratings.
Here is the complete code with the changes:
import React, { useEffect, useState } from 'react';
import axios from "axios";

// import these libraries
import ReactStars from 'react-stars';
import "react-responsive-carousel/lib/styles/carousel.min.css";
import { Carousel } from "react-responsive-carousel";

export default () => {
  const [status, setStatus ] = useState('loading...');
  const [testimonials, setTestimonials] = useState(null);

  useEffect(() => {
    if (status !== "loading...") return;
    axios("/api/get-testimonials").then(result => {
      if (result.status !== 200) {
        console.error("Error loading testimonials");
        console.error(result);
        return;
      }
      setTestimonials(result.data.messages);
      setStatus("loaded");
    });
  }, [status]);

  const getAvatar = () => {
    const random = Math.floor(Math.random() * (testimonials.length - 0 + 1) + 0);
    const imgUrl = `https://avatars.dicebear.com/api/human/${random}.svg?mood[]=happy`;
    return imgUrl;
  }

  return (
    <Carousel
        className="main"
        showArrows={true}
        infiniteLoop={true}
        showThumbs={false}
        showStatus={false}
        autoPlay={false} >

        {testimonials && testimonials.map((testimonial, index) => (
            <div key={ index } className="testimonial">
            <img
                src={ getAvatar() }
                height="50px"
                width="50px"
                alt="avatar" />
            <div className="message">
                <ReactStars
                    className="rating"
                    count={ testimonial.rating }
                    size={24}
                    color1={'#ffd700'}
                    edit={false}
                    half={false} />
                <p className="text">
                { testimonial.text }
                </p>
            </div>
            </div>
        ))}
    </Carousel>
  );
}
Please create a file named, index.css with the following content under the directory, src/pages.
.rating {
    display: flex;
    justify-content: center;
}

.carousel .slide {
    padding: 20px;
    font-size: 20px;
}

body {
    background-color: #000000;
    color: #FFFFFF;
}
Import the index.css file into the index.js file as,
import './index.css';
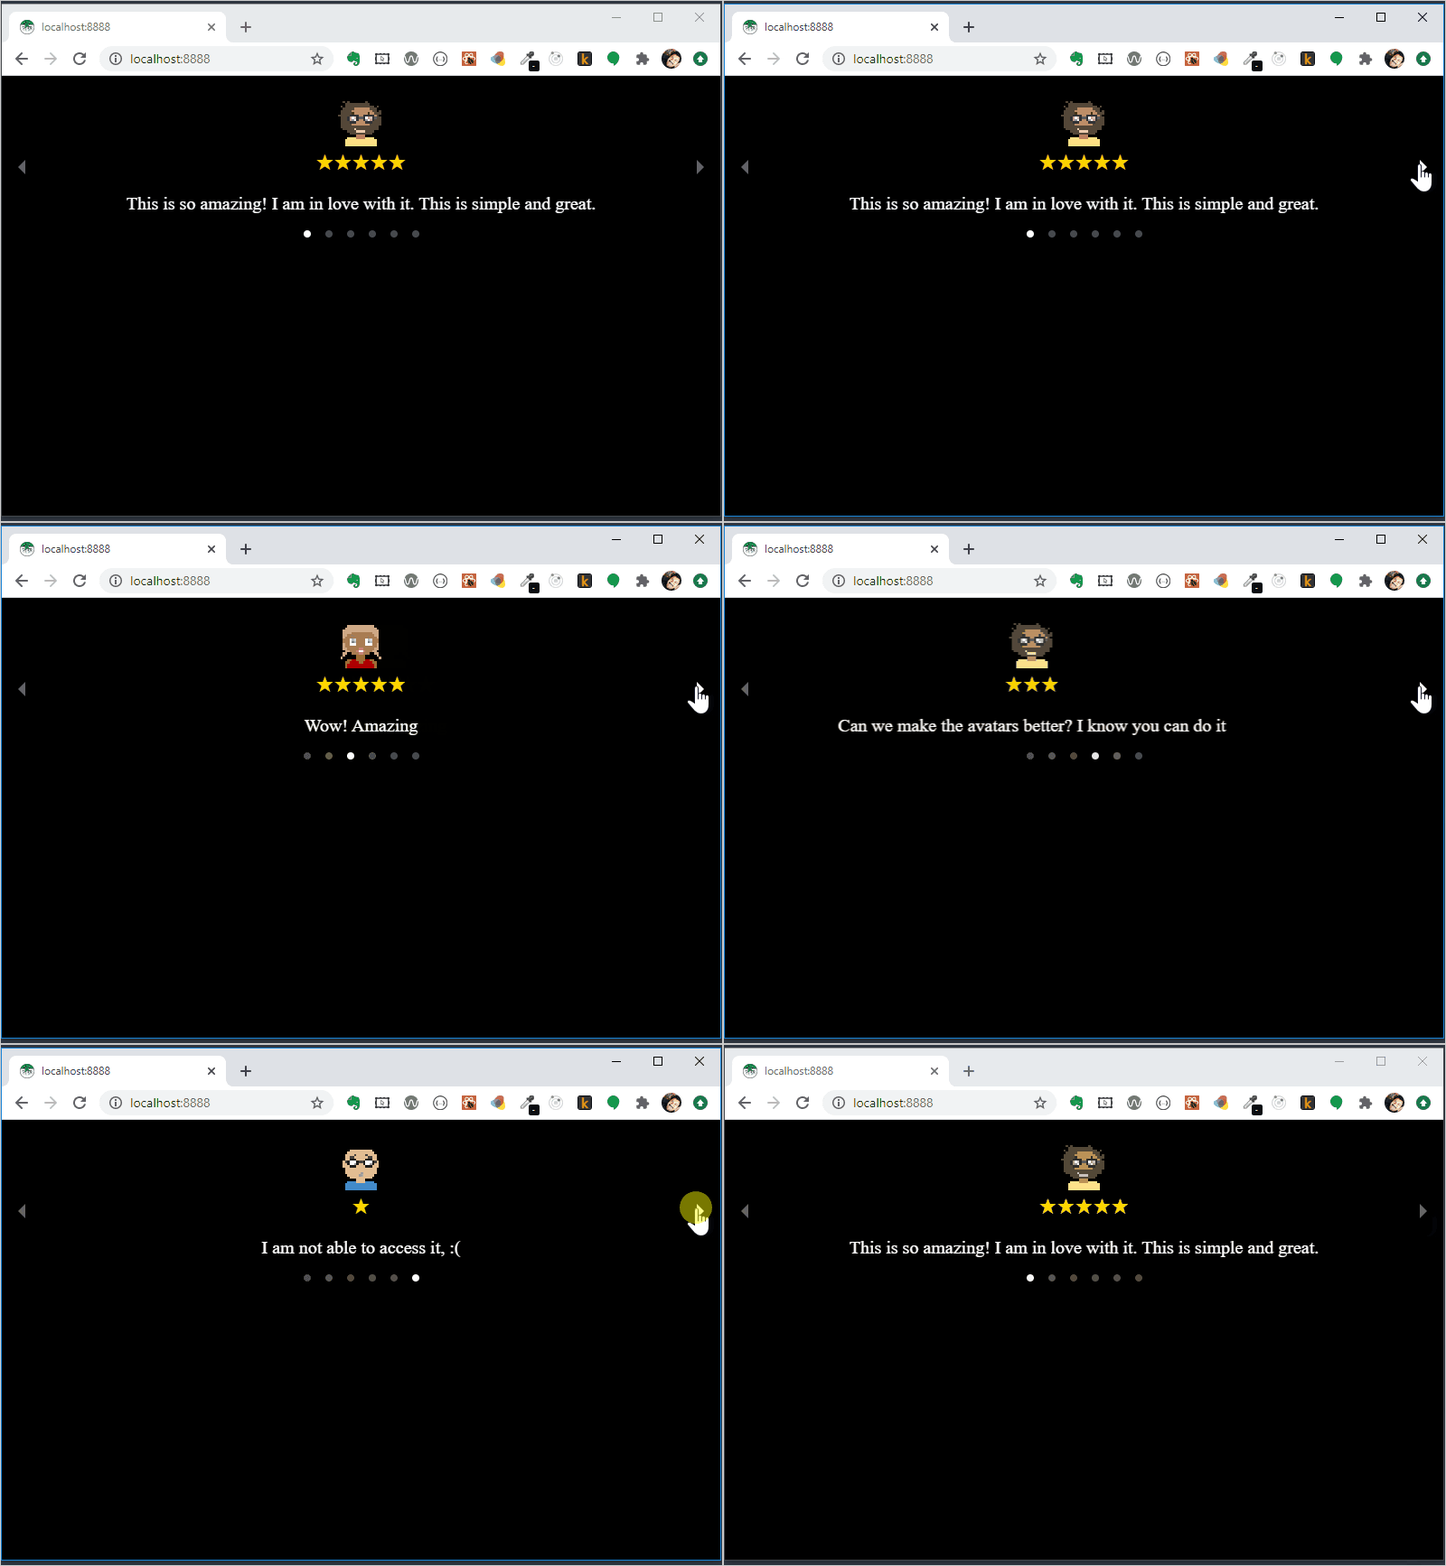
Try netlify dev and access the url localhost:8888. You should see the UI appearing like this:
Deploy and Publish
All Good so far. But there is one issue. We are running the app locally. It is fun but, not as much as we will get by running it publicly. Let's do that with few simple steps.
- Make sure to commit all the code changes to the git repository, say,
testimonial. You have an account with
netlifyalready. Please login and click on the button,New site from Git.
Provide the one-click authorization to your git repo and select the
testimonialrepository.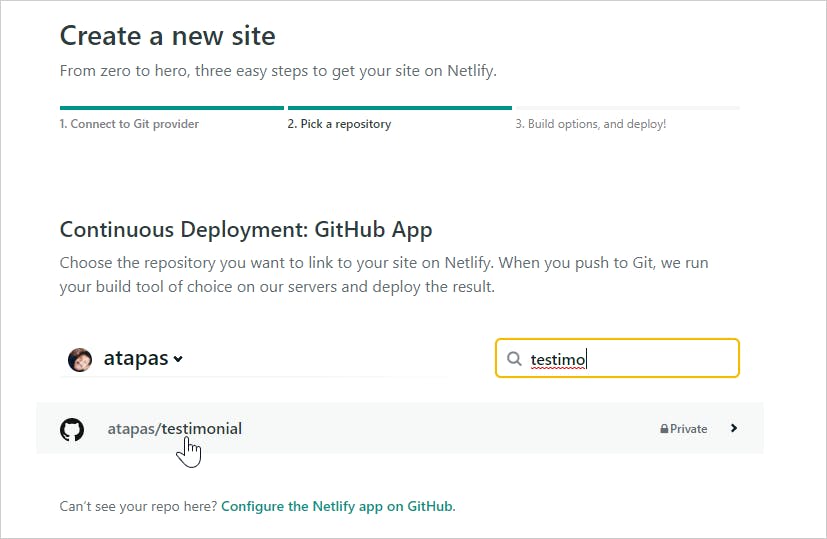
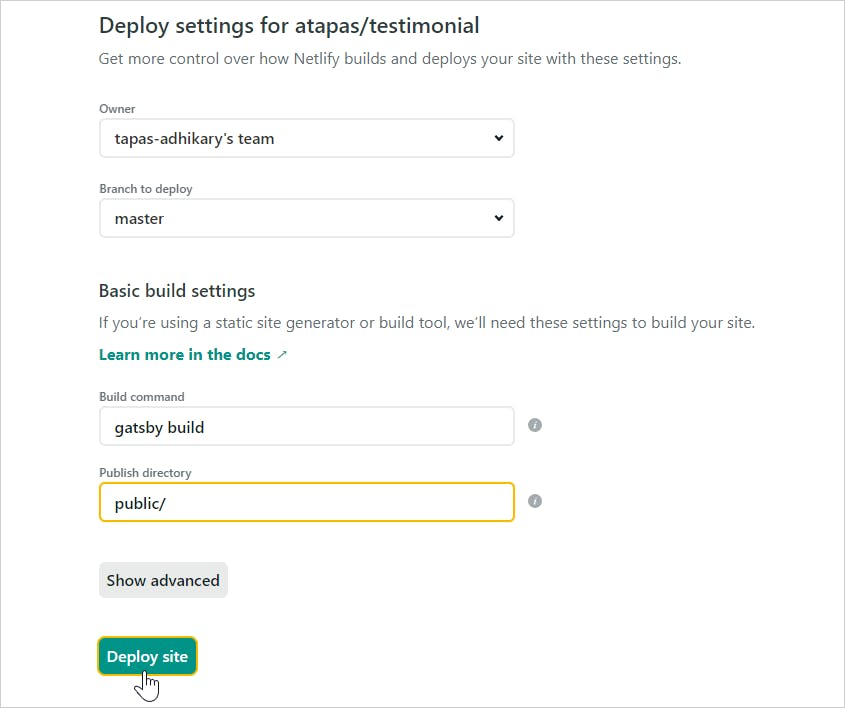
You need to provide few details to deploy the app. Please provide the details as it is shown below and deploy the app.
Do you remember, we have used a
API server keylocally for accessing the data from the database? Now we need to tellnetlifyabout this key. Go to the environment setting underBuild & deployoption to create a new environment variable.Create the new environment variable with the key as,
FAUNA_SERVER_SECRETand value is the actual server key from the.envfile.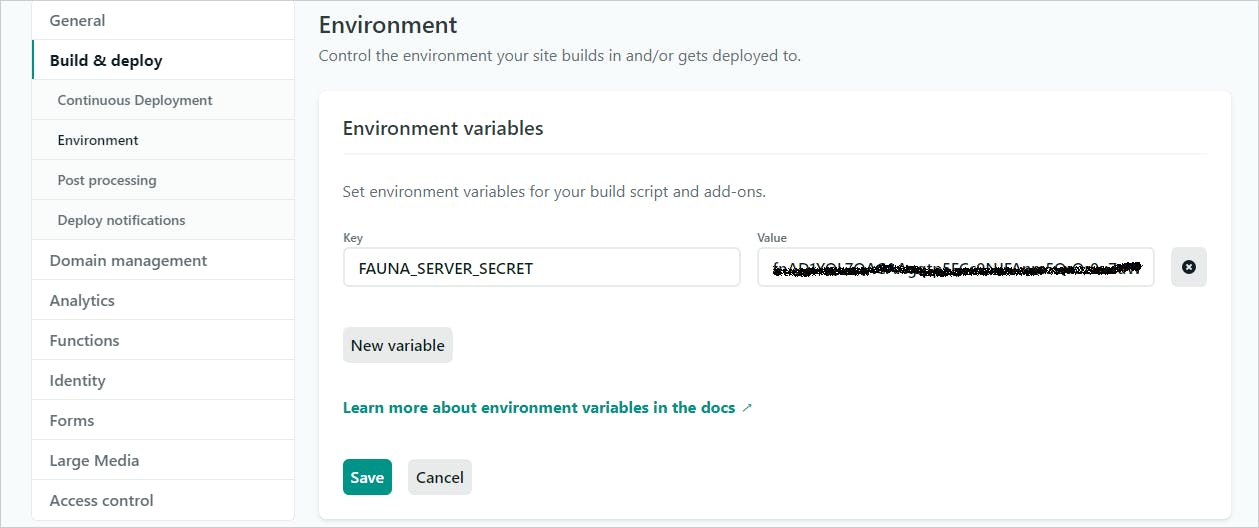
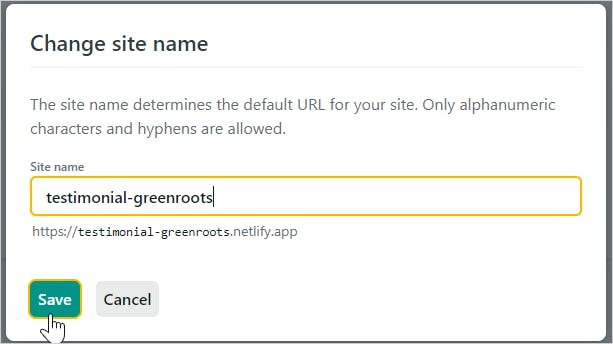
Netlify allocates a domain with a random name for your app/website. You can change it to something more meaningful to you. In my case, I have given the name as,
testimonial-greenroots.Hence the app will be available on this URL: https://testimonial-greenroots.netlify.app/.
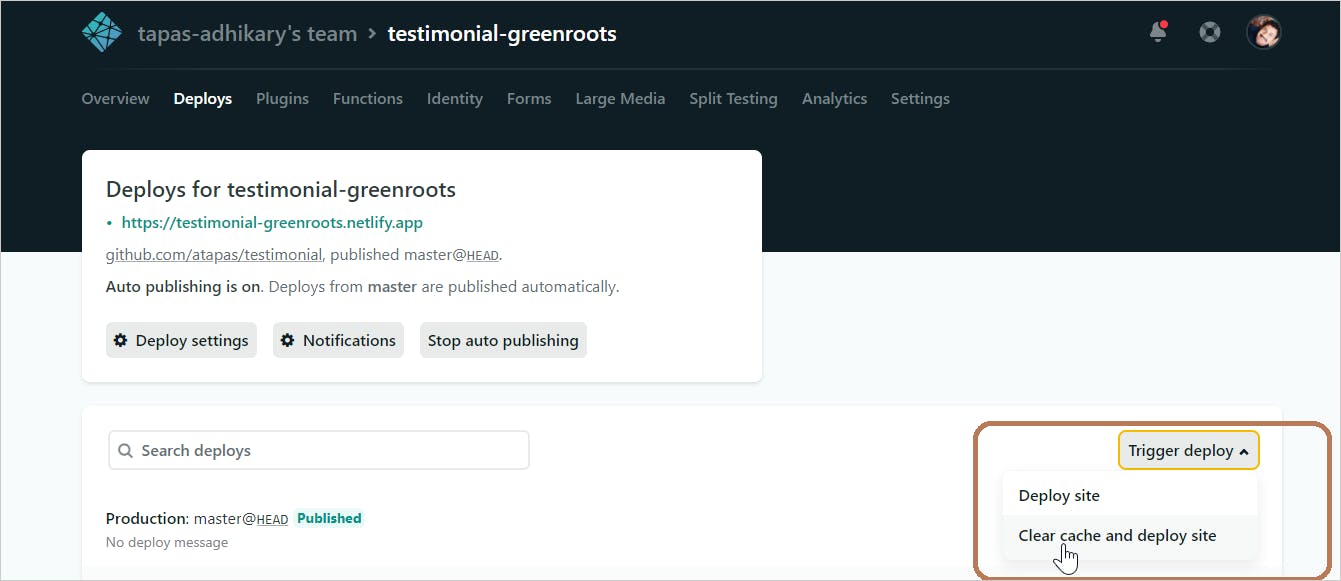
Finally, deploy the app once again by clearing the cache.
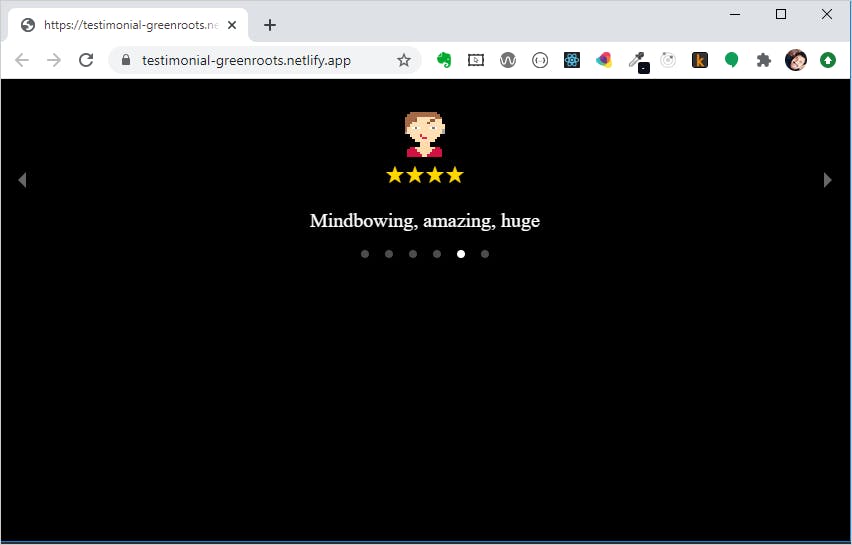
Congratulations!!!! Your app/site is publicly available now.
What's Next?
Up next, the last article of the series is to integrate the authentication module to our app painlessly. We will allow users to create a testimonial only after they authenticate to our application.
Sounds like fun? Yeah, stay tuned to get there soon.
If it was useful to you, please Like/Share so that, it reaches others as well. To get email notification on my latest posts, please subscribe to my blog by hitting the Subscribe button at the top of the page.
Follow me on twitter @tapasadhikary for more updates.


