How to build a serverless app with Gatsby, Netlify and FaunaDB - Part 1

Co-Founder, @CreoWis | Teacher, @tapaScript | Founder, @ReactPlay | YouTuber | Writer | Human
Introduction
Welcome to a brand new series called, Go Serverless. Unlike the previous series, this is going to be a short one and fully focused on doing hands-on app development.
With this series, we will develop a serverless application using, Gatsbyjs, Netlify, and FaunaDB.
The series will be delivered in three articles,
- Part 1: Build a serverless Data API with FaunaDB and access it using Netlify functions.
- Part 2: Build the skin. Make use of the functions and APIs to build something cool using Gatsby.
- Part 3: Painless integration of Authentication and Authorization using Netlify Identity.
This article is Part 1 of the series. Hope you enjoy the journey!
How to follow this series?
I think the best way to follow this series would be, developing the app alongside of it.
Just follow the steps, take a pause to understand what just happen, and move on. I hope you like building it and feel free to improvise on it.
Make sure to keep your favorite beverages(☕, 🍵, 🍺) nearby!
What are we building?
Have you written any testimonials recently? Let us build an app to allow users to write testimonials with a rating. The app should allow any user to read all the testimonials submitted by other users as well.
We will be taking care of the following use-cases while building the app:
- All testimonials to be stored in a database.
- APIs to support creating a testimonial and fetching all testimonials.
- The user interface to make use of these APIs to show all testimonials and create them.
- User needs to authenticate to create a testimonial.
But wait, there are few important aspects,
- We will not be installing or maintaining any database by ourselves.
- We will not be using any server to host APIs.
- We will not be using any application server to host the client-side app. Remember, we are
serverless.
Here is the preview of the testimonial app,
If you want to get to the code first, here is the link:
Alright, let's get started!
Quick Background
Have you heard of JAMstack?
If so, the concept of the serverless app shouldn't be new to you. One of the fundamentals of JAMstack is, it is practically serverless. It means, you as a programmer, code owner, or business owner do not manage and maintain the servers. You just focus on building applications using client-side JavaScript, reusable APIs, and prebuilt Markups.
You do not need any prior experience with JAMstack to follow this article. If you are new to
JAMstack, the link below may be helpful to you.
FaunaDB - Let us set up the database
FaunaDB is the data API for client-serverless applications. It transforms the traditional DBMS into a Data API that gives you all of the capabilities of an old-guard database, without sacrificing flexibility, scale, and performance.
It has multiple APIs for data access, including native GraphQL and a DSL-like functional query language. We will be using GraphQL type for the testimonial app.
- First thing first, sign up using this url. Please select the free plan which is with generous daily usage quota and more than enough for our usage.
- Next, create a database by providing a database name of your choice. I have used
testimonialas the database name.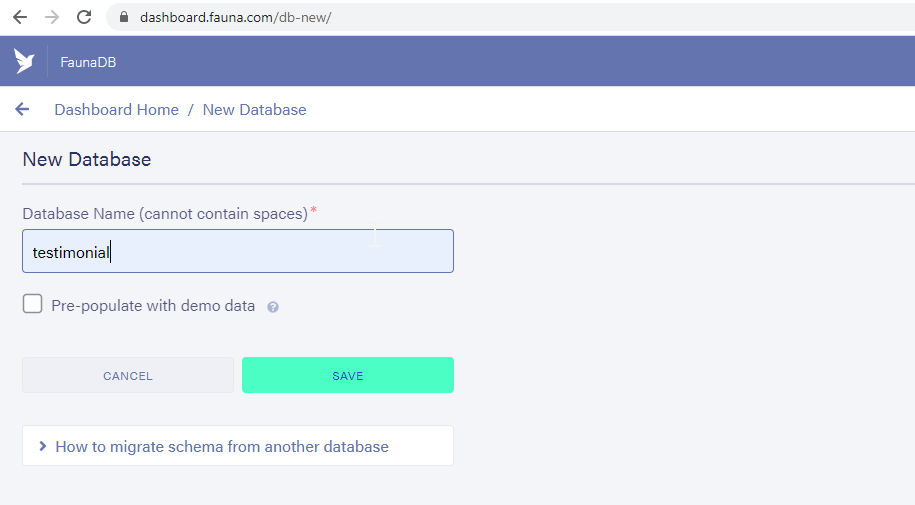
After creating the database, we will be defining the
GraphQLschema and import it into the database.At this stage, let us create our project folder. Create a project folder somewhere on your hard drive with the name,
testimonial. Create a file with the name,testimonial.gqlwith the following content,type Message { text: String! rating: Int! } type Query { allMessages: [Message!]! }Note, we have defined a
Messagetype which consists of a text, i.e, the testimonial message, and a rating. We also have aQuerytype which returns an array of messages.As a next step, upload the
testimonial.gqlfile from the FaunaDB dashboard using theIMPORT SCHEMAbutton,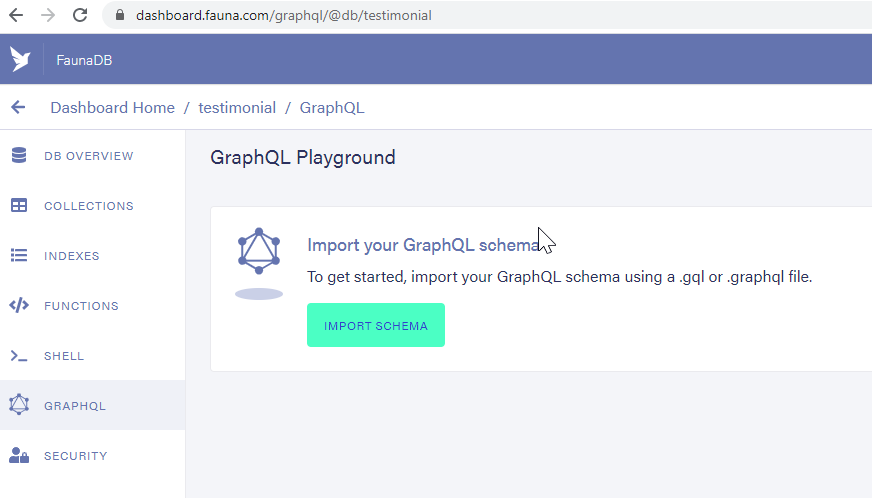
- That's all, our database has been created successfully and it is ready for use.
Let us try some queries
Our testimonial app will allow us to create testimonials and fetch them all at a time. To support that, we will be using mutation(for creating, update and delete) and query(for fetch) of GraphQL.
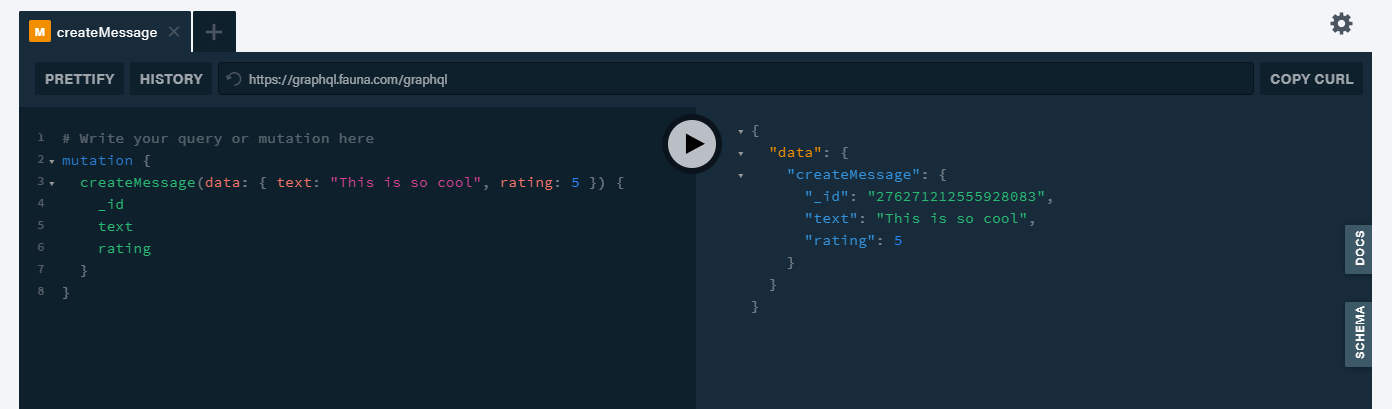
Create a testimonial with the text, "This is so cool" with a rating of 5.
 mutation {
    createMessage(data: { text: "This is so cool", rating: 5 }) {
       _id
        text
        rating
     }
 }
Try the above query in the GraphQL playground of FaunaDb to see the response,
Great, a testimonial has been created. Let us try fetching all the testimonials. Here is the GraphQL query,
 query {
    allMessages {
      data {
         _id
         text
         rating
      }
    }
 }
Let us try the above query in the playground as before,

That's cool, now we have a database with a schema and fully operational with creating and fetch functionality.
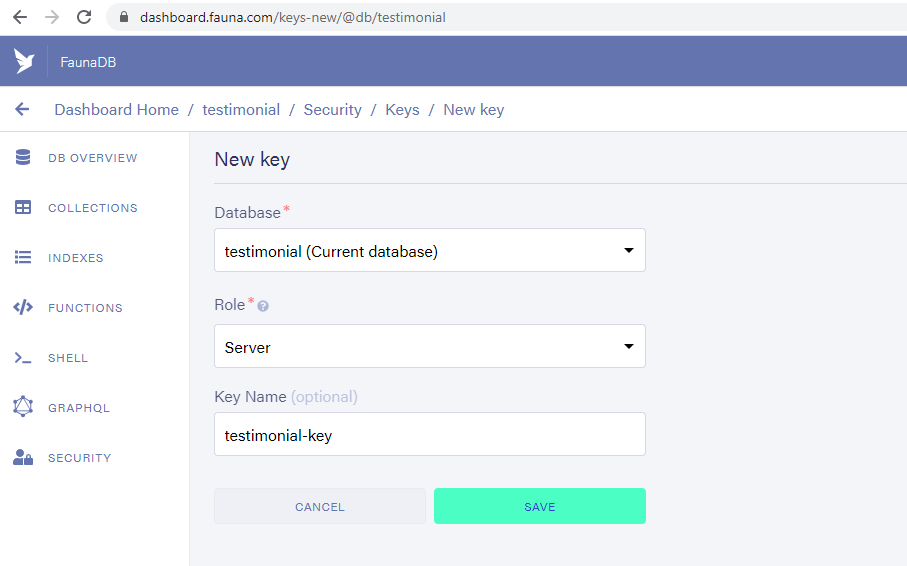
Create a server secret key
Next, we need to create a secured server secret key to make sure the access to the database is authenticated and authorized.
Click on the SECURITY option available in the FaunaDB interface to create the key,
On successful creation of the key, you will be able to view it and make sure to copy and save it somewhere safe.

We do not want anyone else to know about this key. Not even to commit it to the source code repository. To maintain this secrecy, create an empty file called, .env at the root level of your project folder.
Edit the .env file and add the following line to it(paste the generated server key in the place of, <your secret fauna key>).
FAUNA_SERVER_SECRET=<your secret fauna key>
Add a .gitignore file and add the following content to it. This is to make sure, we do not commit the .env file to the source code repo accidentally.
node_modules
*.env
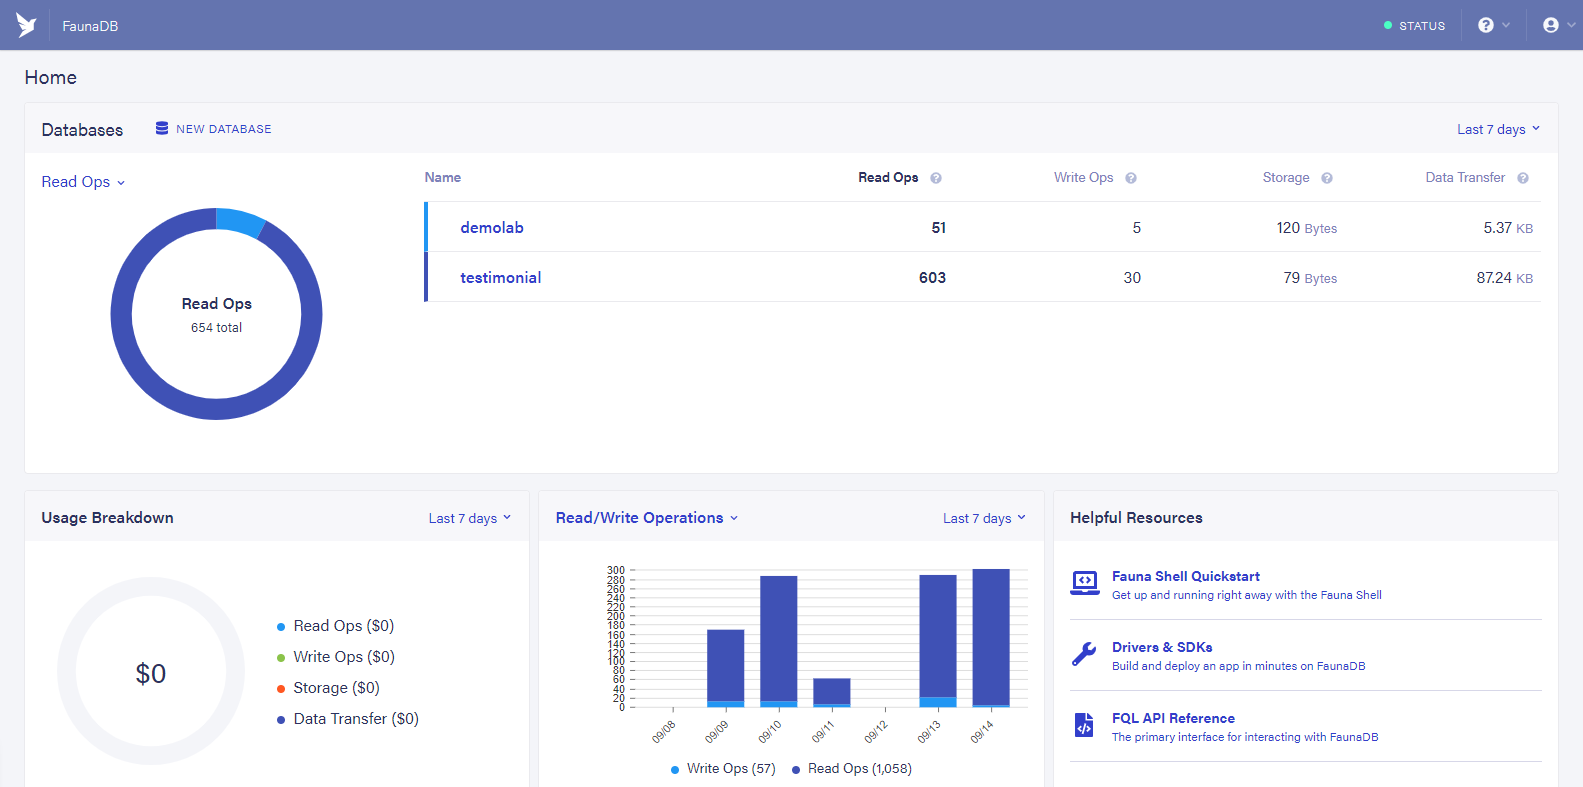
We are done with all that we had to do with the database setup. Let us move to the next phase to create serverless functions and APIs to access data from the FaunaDB database.
This is how the faunadb dashboard may look like based on your usage,
Netlify - Functions and APIs
We have a server key now. Time to make use of it as an API key for invoking the serverless function.
Netlify is a great platform to create hassle-free serverless functions. These functions can interact with databases, file-system, and, in-memory objects.
Netlify functions are Powered by AWS Lambda. Setting up AWS Lambdas on our own can be a fairly complex job. With Netlify, we will simply set a folder and drop our functions. Writing simple functions automatically become APIs.
- First, create an account with
Netlify. This is free and just like theFaunaDBfree tier, Netlify is also very flexible. - Now we need to install a few dependencies using either
npmoryarn. Make sure, you have nodejs installed. - Open a command prompt at the root of the project folder. Use the following command to Initialize the project with node dependencies,
npm init - Install the
netlify-cliutility so that, we can run the serverless function locally.npm install netlify-cli -g - Now we will install two important libraries, axios and dotenv.
axioswill be used for making the HTTP calls anddotenvwill help to load theFAUNA_SERVER_SECRETenvironment variable from the .env file into process.env.yarn add axios dotenv
Create serverless functions
- Create a folder with the name,
functionsat the root of the project folder. We are going to keep all the serverless functions under it. - Now create a sub-folder called,
utilsunder thefunctionsfolder. Create a file called,query.jsunder theutilsfolder. We will need some common code to query the database for all the serverless functions. The common code will be in thequery.jsfile. First we import the axios library functionality and load the
.envfile. Next, we export and async function that takes thequeryandvariables. Inside the async function, we make calls usingaxioswith the secret key. Finally, we return the response.// query.js const axios = require("axios"); require("dotenv").config(); module.exports = async (query, variables) => { const result = await axios({ url: "https://graphql.fauna.com/graphql", method: "POST", headers: { Authorization: `Bearer ${process.env.FAUNA_SERVER_SECRET}` }, data: { query, variables } }); return result.data; };Create a file with the name,
get-testimonials.jsunder thefunctionsfolder. We will perform a query to fetch all the testimonial messages.// get-testimonials.js const query = require("./utils/query"); const GET_TESTIMONIALS = ` query { allMessages { data { _id text rating } } } `; exports.handler = async () => { const { data, errors } = await query(GET_TESTIMONIALS); if (errors) { return { statusCode: 500, body: JSON.stringify(errors) }; } return { statusCode: 200, body: JSON.stringify({ messages: data.allMessages.data }) }; };Time to test the
serverless functionlike an API. We need to do a one time setup here. Open a command prompt at the root of the project folder and type,netlify loginThis will open a browser tab and ask you to login and authorize access to your netlify account. Please click on the
Authorizebutton.Create a file called,
netlify.tomland add this content to it,[build] functions = "functions" [[redirects]] from = "/api/*" to = "/.netlify/functions/:splat" status = 200This is to tell netlify about the location of the functions we have written so that, it is known at the build time.
Netlify automatically provides the APIs for the functions. The URL to access the API is in this form,
/.netlify/functions/get-all-testiminialswhich may not be very user-friendly. We have written aredirectto make it like,/api/get-all-testimonials.Ok, we are done. Now in command prompt type,
netlify dev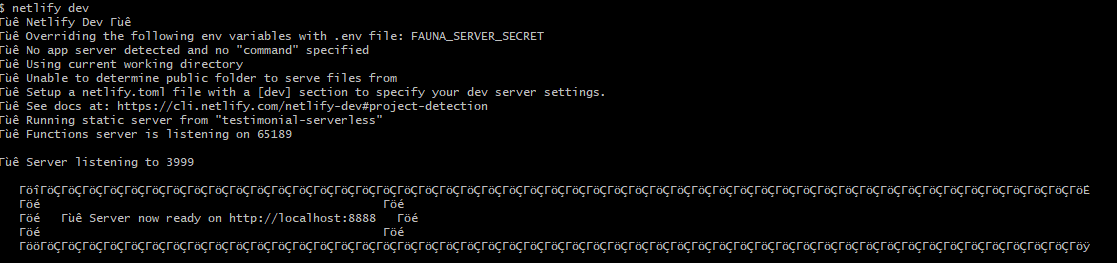
Now the netlify dev server is running locally and you can access the first serverless function. Open a browser tab and try this url,
http://localhost:8888/api/get-testimonials: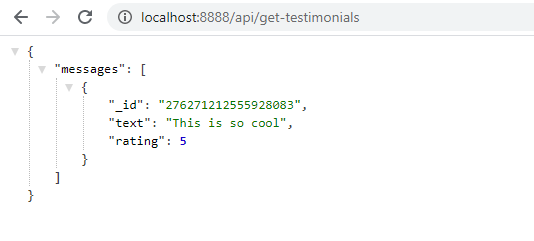
Congratulations!!! You have got your first
serverless functionup and running.
Let us now write the next serverless function to create a testimonial. This is going to be simple. Create a file named,
create-testimonial.jsunder the 'functions` folder. We need to write a query by passing the testimonial message text and rating.// create-testimonial.js const query = require("./utils/query"); const CREATE_TESTIMONIAL = ` mutation($text: String!, $rating: Int!){ createMessage(data: {text: $text, rating: $rating}){ _id text rating } } `; exports.handler = async event => { const { text, rating } = JSON.parse(event.body); const { data, errors } = await query( CREATE_TESTIMONIAL, { text, rating }); if (errors) { return { statusCode: 500, body: JSON.stringify(errors) }; } return { statusCode: 200, body: JSON.stringify({ testimonial: data.createMessage }) }; };What do you think? Yeah right, we have de-structured the payload to get the message text and rating. On getting those, we just call the
querymethod to create a testimonial. Have you noticed, the query, in this case, is themutationquery?Alright, let us test it out. I shall be using the
postmantool to test the API. You can use postman or any other tools of your choice,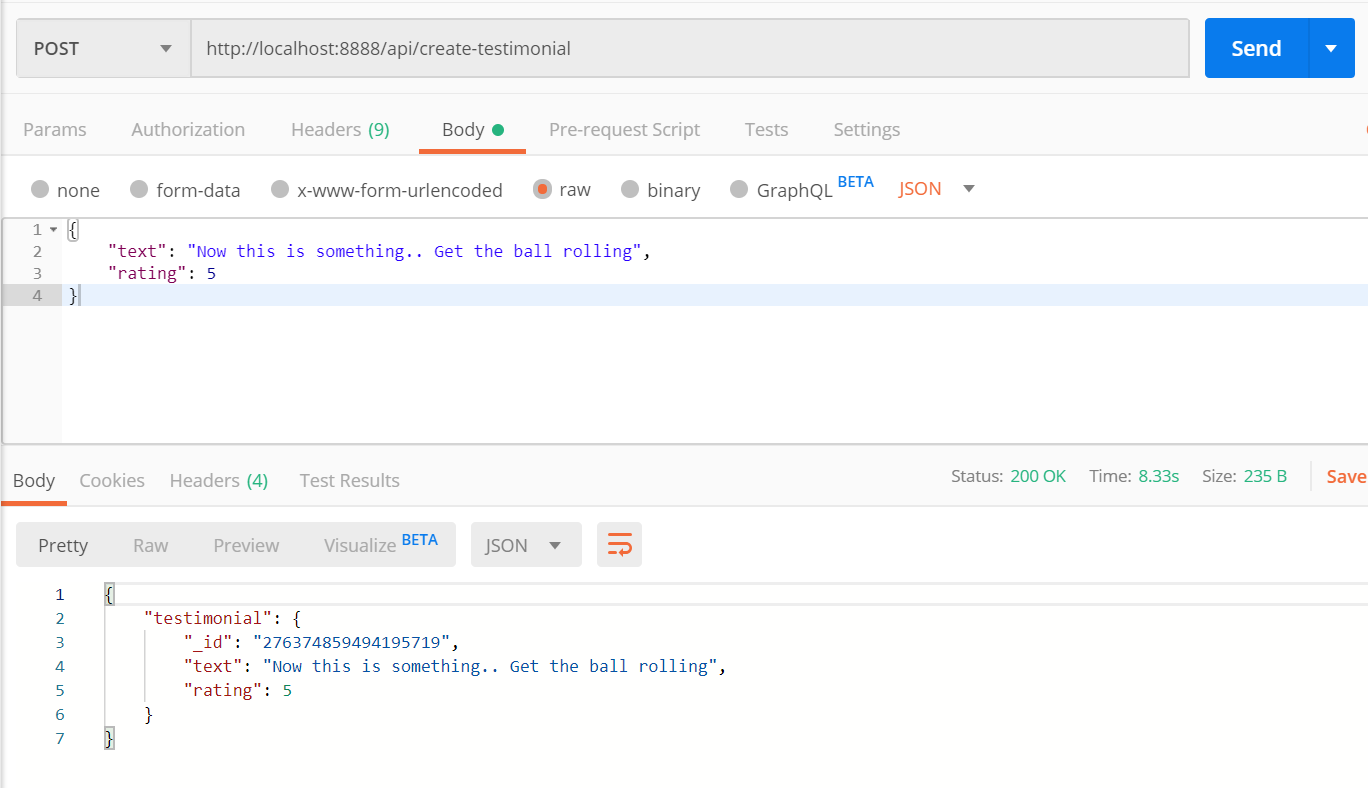
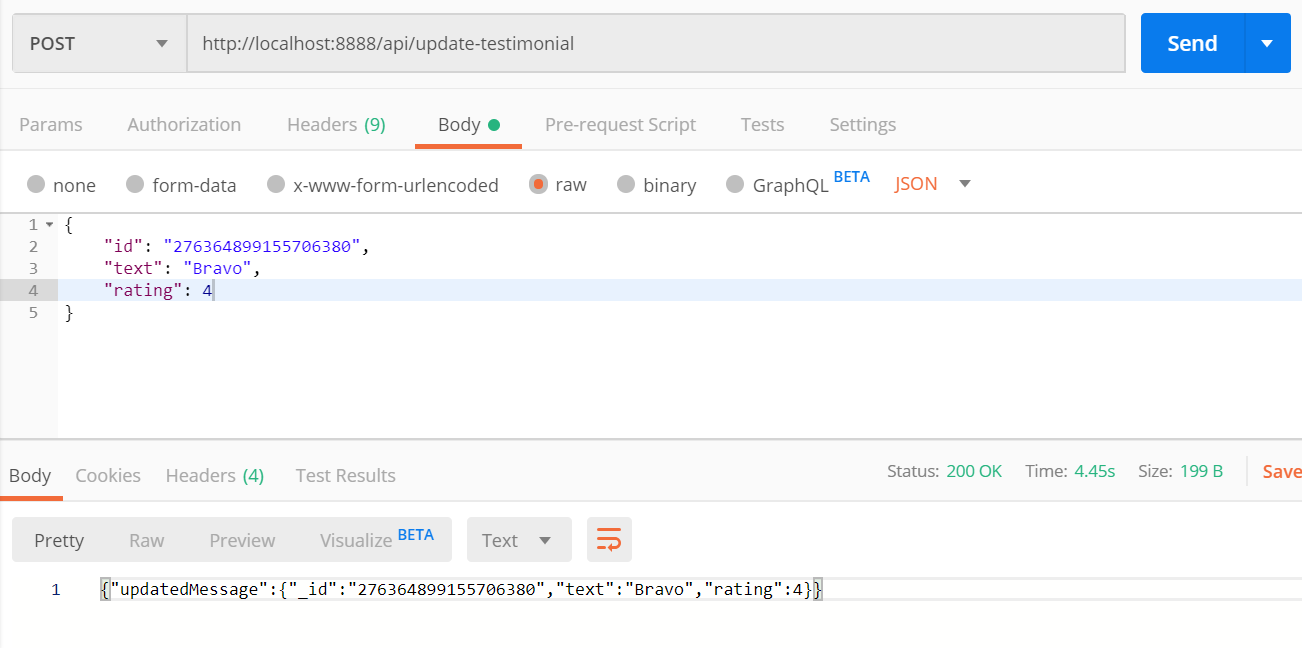
Ok, let us quickly create another serverless function to update a testimonial. Create a file named,
update-testimonial.jsunder thefunctionsfolder. We need to pass theidof the testimonial message we want to update along with the message itself, i.e, thetextand therating.// update-testimonial.js const query = require("./utils/query"); const UPDATE_TESTIMONIAL = ` mutation($id: ID!, $text: String!, $rating: Int!){ updateMessage(id: $id, data: {text: $text, rating: $rating}){ _id text rating } } `; exports.handler = async event => { const { id, text, rating } = JSON.parse(event.body); const { data, errors } = await query( UPDATE_TESTIMONIAL, { id, text, rating }); if (errors) { return { statusCode: 500, body: JSON.stringify(errors) }; } return { statusCode: 200, body: JSON.stringify({ updatedMessage: data.updateMessage }) }; };Let us test this API,
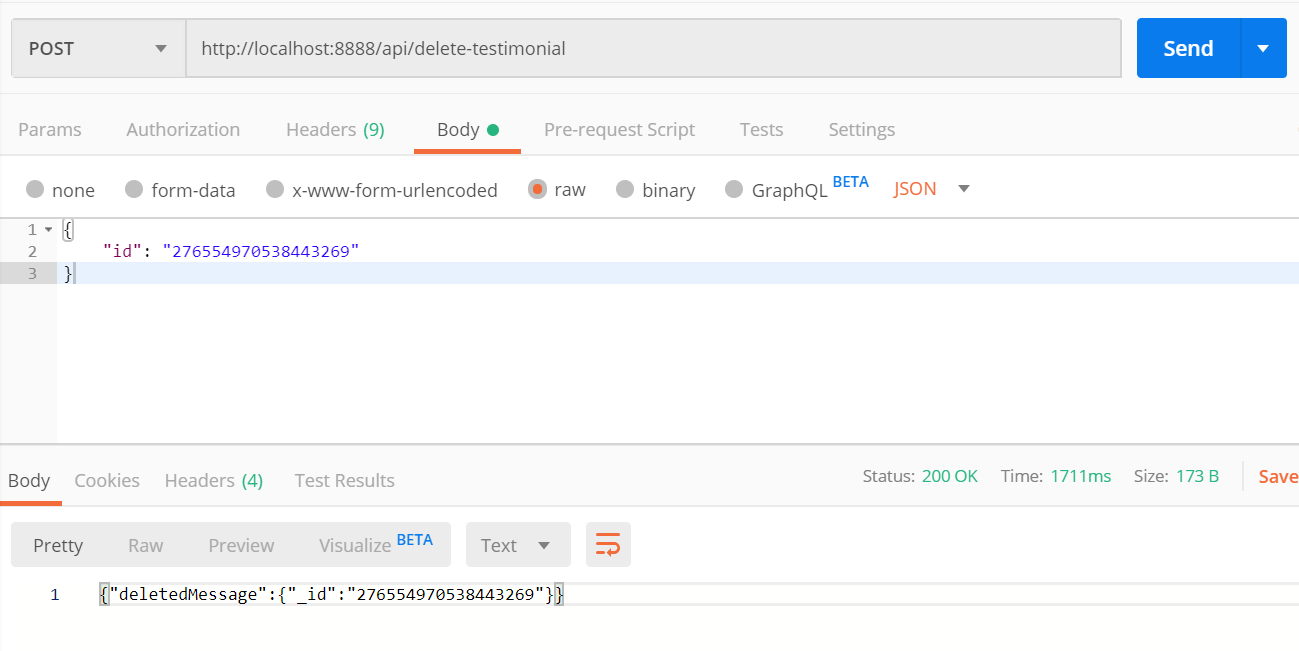
Great, now you have already guessed the
deletepart, isn't it? For deleting a testimonial, we just need the id of it. Here is the function for deleting a testimonial,// delete-testimonial.js const query = require("./utils/query"); const DELETE_TESTIMONIAL = ` mutation($id: ID!) { deleteMessage(id: $id){ _id } } `; exports.handler = async event => { const { id } = JSON.parse(event.body); const { data, errors } = await query( DELETE_TESTIMONIAL, { id }); if (errors) { return { statusCode: 500, body: JSON.stringify(errors) }; } return { statusCode: 200, body: JSON.stringify({ deletedMessage: data.deleteMessage }) }; };Time to test it out,
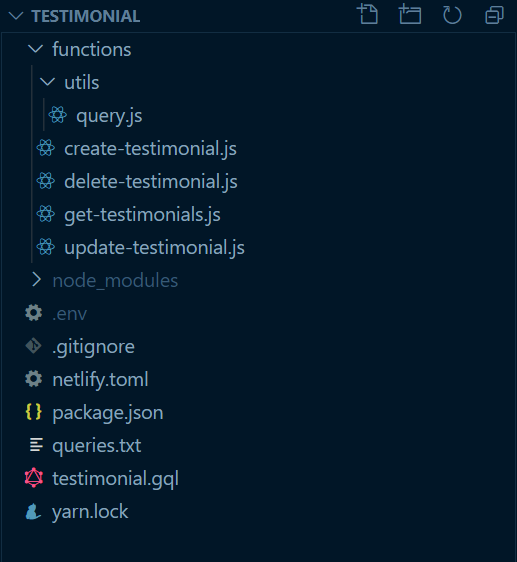
At this stage, you should have a directory structure like this:
That's all for now. You have successfully created a database with the FaunaDB, set it up for use, created serverless functions using Netlify Functions, and tested them as APIs.
Congratulations, you did it and that's awesome!!!
What's Next?
In the next article of the series, we will be using these APIs to develop the client-side of the testimonial app with Gatsby. Until then, keep exploring by forking the github repo. See you soon.
If it was useful to you, please Like/Share so that, it reaches others as well. To get an email notification on my latest posts, please subscribe to my blog by hitting the Subscribe button at the top of the page.
Follow me on Twitter @tapasadhikary for more updates.