
Understanding Next.js Server Actions With Examples
React Server Components are a game changer. Learn Server Actions with Server Components in Next.js with many examples.
Co-Founder, @CreoWis | Teacher, @tapaScript | Founder, @ReactPlay | YouTuber | Writer | Human
Next.js is a React-based framework for building performant, optimized, and scalable full-stack applications. As React developers, we create components, manage state, and handle data communications between them. Then Next.js comes on top of it to provide the required optimizations.
Next.js 13.4 provides us with the stable App Router that includes:
Foundational React Server Components
Nested Routes and Layouts
Various ways of data fetching, caching, revalidation
Built-in SEO
Streaming
Suspense
In this article, we will discuss and learn about an exciting data-fetching technique called Server Action. But before we get there, we must spend some time understanding the concept of React Server Components.
The ReactJS team introduced the server components in 2020, and the Next.js app router has been built using the "Thinking in Server Components" mindset. If you are new to this concept, I strongly suggest you view this beginner-friendly video tutorial to get a firm grip on the server component concept.
Server ComponentsandServer Actionsare NOT the same things. You need to have basic understanding of Server Components to understand Server Actions easily.
The Story of Forms and Actions in React
As a web developer, you must have implemented HTML forms and form actions countless times! Hence, a code snippet like this should not be new to you.
export default function Cart() {

  function addToCart(e) {
    // Read the Form Data
    // Make the API call
    // Change the Component state
  }

  return (
    <form method="post" onSubmit={addToCart}>
      <label>
        Select your favorite brand:
        <select name="selectedBrand" defaultValue="apple">
          <option value="apple">Apple</option>
          <option value="oppo">Oppo</option>
          <option value="samsung">Samsung</option>
        </select>
      </label>
      <label>
        Enter the Count:
        <input
          type="number"
          name="count"
          placeholder="Specify how many do you want" />
      </label>
      <hr />
      <button type="reset">Reset</button>
      <button type="submit">Submit</button>
    </form>
  );
}
It is a simple React component with a form that handles adding a product and its quantity into the cart. Now zoom into the addToCart function in the above code. It is supposed to perform some tasks while adding the selected items to the cart.
Read the form data to capture the user inputs.
Make an API call(using fetch or something equivalent) over the network.
Update the component state(or application state) based on the API call response.
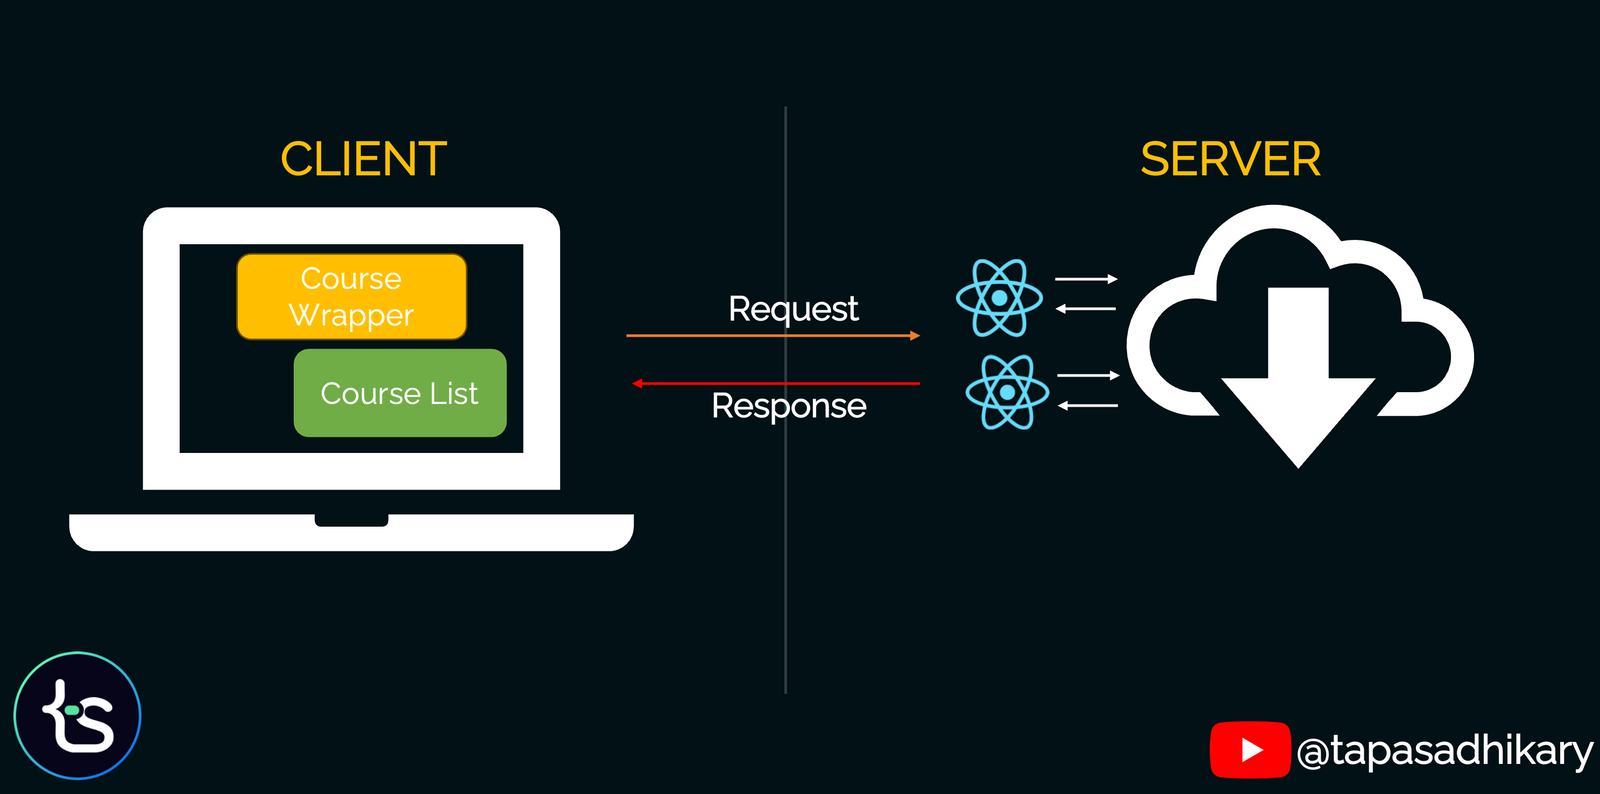
Be mindful that all these happen from the client side of your application. It means the component code gets downloaded as part of the bundle on your user's browser. The component makes an API call over the network and waits for it to get complete. The "wait" can be longer based on the latency, network speed, etc.
A bit about React Server Components
With React Server Components(RSC) we have learned(in case you are new to it, I highly recommend you to go through the video tutorial I mentioned above) that we can move our components to the server and colocate it to our data store so that,
They have backend access without any network roundtrips.
We can avoid network waterfalls.
We improve your app's performance with zero bundle size.
Considering user experience, maintainability, and performance cost, these benefits are huge.
When we move the components to the server with React Server Components, they will most likely be colocated to your application's data store or database. You still need to fetch the data to your components from the database, but the data fetching will be way faster than fetching from a client component.
Next.js App Router has gone the "Thinking in Server Components" way. By default, all the components are server components, and if you want to write a client component, you need to mark them explicitly using the use client directive.
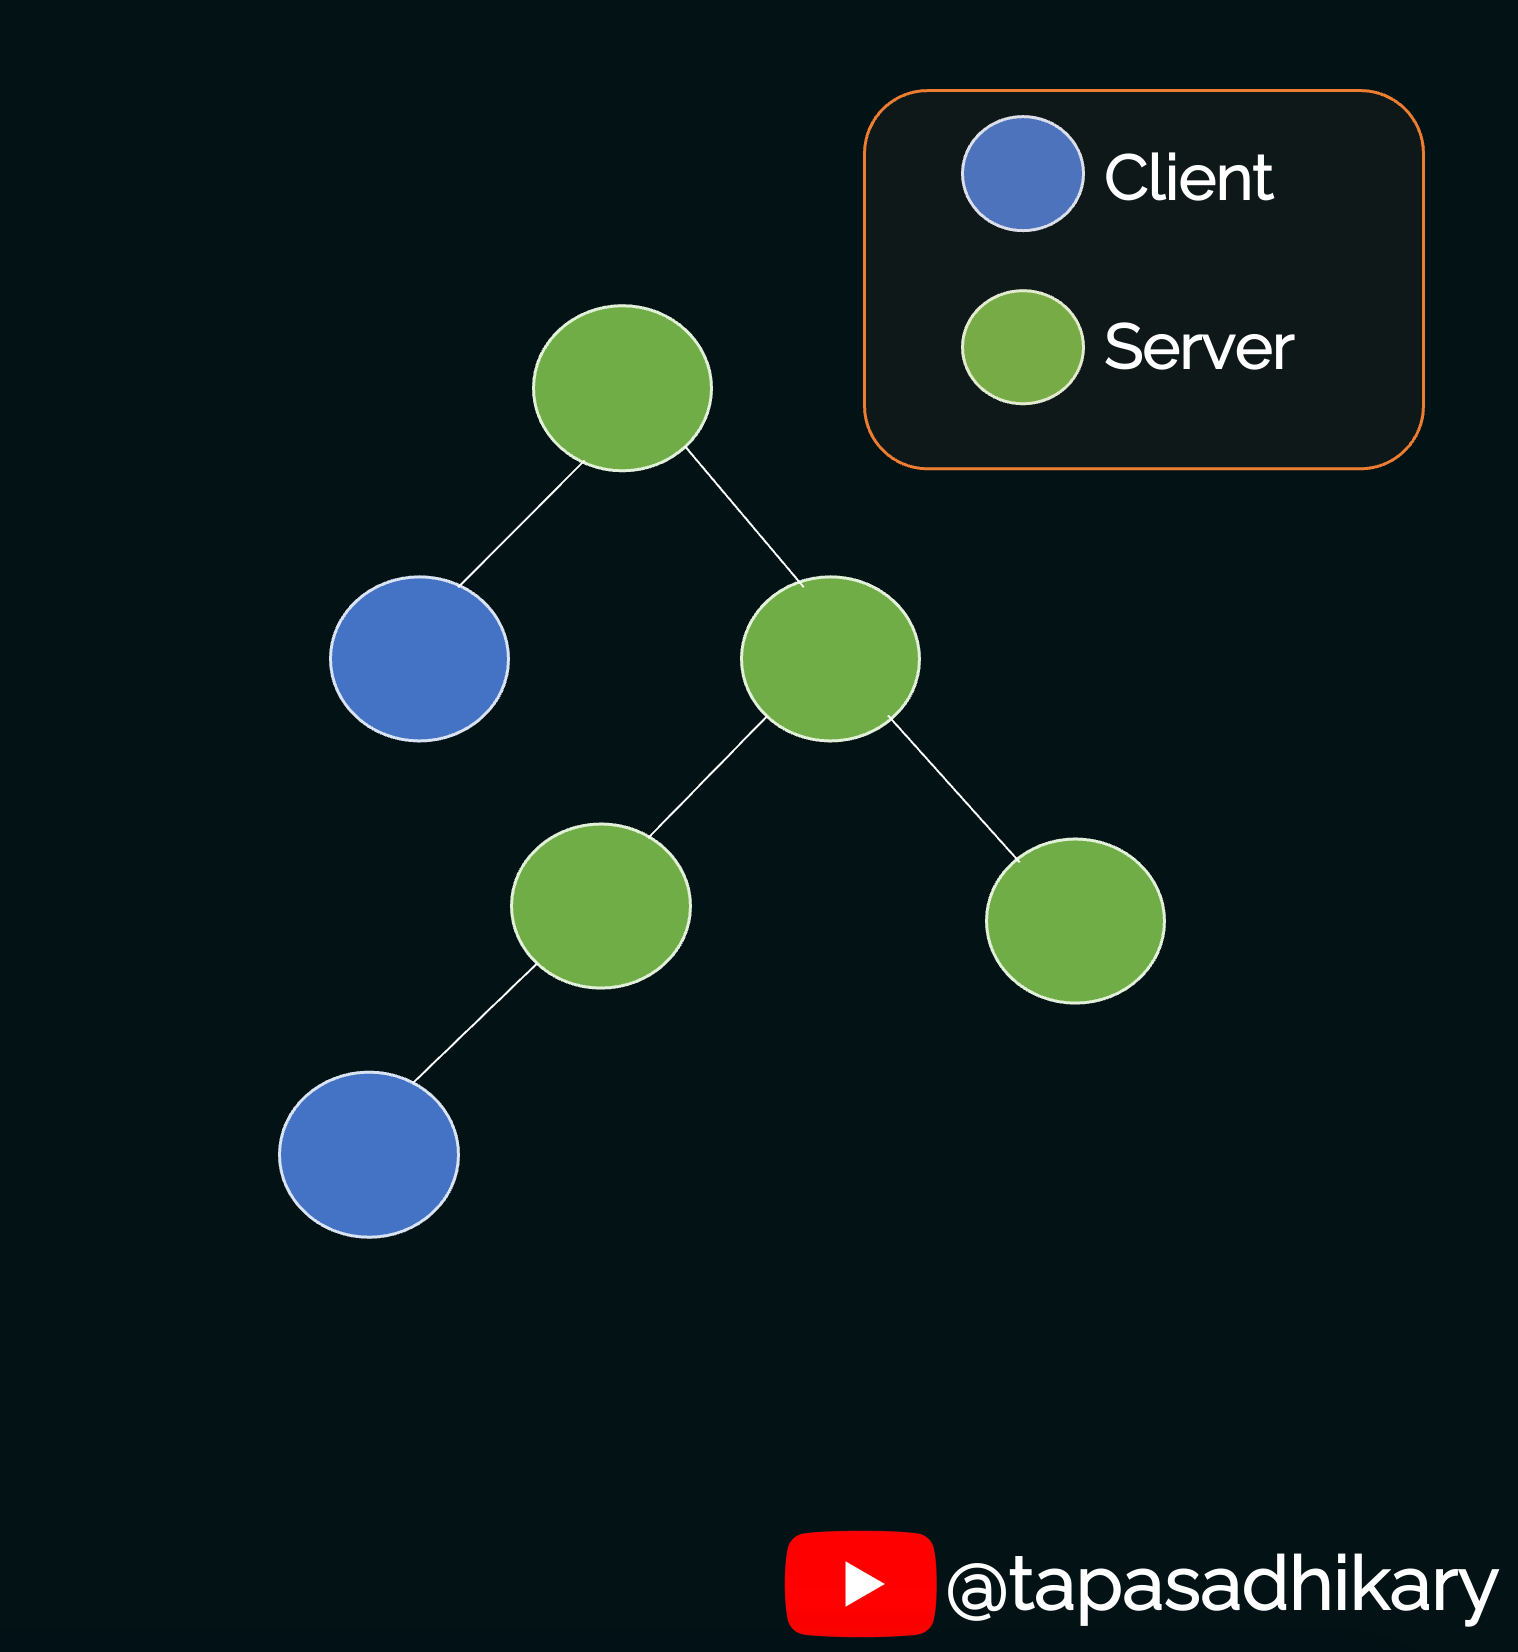
It means a component hierarchy in Next.js can combine server and client components. We can use server components as much as possible and client components wherever we need user interactions or event handling.
What are Server Actions in Next.js?
Next.js provides data fetching techniques and patterns for developers to use. One of the techniques is by using server actions. (While writing this article) server actions are still an experimental alpha feature in Next.js, and you need to enable it explicitly using the serverActions flag in the next.config.js file.
module.exports = {
  experimental: {
    serverActions: true,
  },
}
Server actions are built on React Actions that you can define in server components and/or calls from client components. Server actions are JavaScript async functions that run on the server by the user interactions on the client.
 async function addItemToCart(data) {
    'use server'
    await addToDB(data)
 }
You can invoke server actions using the <form/> element's acion prop in ReactJS.
<form action={addItemToCart}>
...
...
</form>
Alternatively, you can use the formAction prop on the elements(like submit button, input text, etc) inside a <form/>.
<form action={handleSubmit}>
    <input type="text" name="name" formAction={handleName} />
    <button type="submit">Submit</button>
</form>
Now, let us understand the usages of server actions with respect to both server and client components.
How to use server actions in Next.js server components?
To use the server actions inside the server component, first create an async function with the use server directive. You must place the directive on top of the function body.
Then, you can call the server function from the action prop of the <form/> element or use the formAction prop on the elements(like the submit button, input text, etc.) inside a <form/> element.
export default function CourseComments() {
  async function addCommentToCourse(comment, courseId) {
    'use server'

     await saveComment({comment, courseId});
  }

  return(
     <form action={addCommentToCourse}>
       <button type="submit">Add Comment</button>
     </form>
  )
}
How to use server actions from client components in Next.js?
As the component hierarchy can have both server and client components, you may want to use server actions inside the client components as well. For that, create your actions in a separate file, say, add-comments.js.
'use server'

import { addCommentToCourse } from '@/data/course'

export async function addComment(data, courseId) {
  const response = await addCommentToCourse(data, course);
  return response;
}
Please note you still need to use the use server directive at the top of the file(even before the imports) to inform Nex.js about the file that includes server actions.
Now, in the client component, it is just about importing the actions and calling them either from the action prop or the formAction prop, as we have seen before.
'use client'

import { addComment } from '@/actions/add-comment';

export default function CourseComment() {
  return (
    <form action={addComment}>
      <button type="submit">Add Comment</button>
    </form>
  )
}
How to invoke server actions outside of Forms?
So far, we have learned about two invocation methods to call the server actions:
Using the
actionprop.Using the
formActionprop.
Both of these methods are related to the <form/> element. Then, how can we invoke server actions outside of the <form/> elements? You can achieve the custom invocation using startTransition method provided by the useTransition hook.
If you are new to the React 18
useTransitionhook, you can learn it with examples from this video tutorial:
Let's assume we have our server action in a separate file like before, and we want to invoke it from a client component without a <form/> element.
'use client'

import { useTransition } from 'react'
import { addComment } from '@/actions/add-comment';

export default function CourseComment() {
  let [isPending, startTransition] = useTransition()

  return (
    <button onClick={() => startTransition((comment, courseId) => {
           addComment(comment, courseId)})}>
      Add Comment
    </button>
  )
}
Conclusion & What's Next?
That's an introduction to the Next.js server actions. You can read further from the Next.js official documentation to learn more. I hope you understand the concept and the usage of server actions well.
Also, feel free to check out this crash course to learn about patterns and project building with Next.js server actions
Next, you should explore the following topics:
Server mutations with
redirect,revalidatePath, andrevalidateTag.About the
useOptimistichook and how it helps to make the app more responsive.What is
Progressive Enhancements?How
useFormStatushook comes in handy with server actions and progressive enhancements.
I'll cover all these topics on my YouTube channel and this blog in the coming days. So, If you like my explanation and teaching, don't forget to subscribe to my channel and blog newsletter so that you do not miss out on any new content.
Before We End...
That's all. Thanks for reading it. I hope it was insightful. If you liked the article, please post likes and share it in your circles.
Let's connect. I share web development, content creation, Open Source, and career tips on these platforms.