Integrate SuperTokens Passwordless Authentication with Next.js
Learn how to integrate SuperTokens Passwordless authentication using OTP and magic link with Next.js applications.

Co-Founder, @CreoWis | Teacher, @tapaScript | Founder, @ReactPlay | YouTuber | Writer | Human
A Quick Introduction
Authentication is the mechanism to validate a user's identity for an application. Authenticating a user with userId and password is the most common mechanism we use in many applications. However, there are other famous approaches to it. We can authenticate users using social logins, one-time passwords (OTP), or a magic link that helps authenticate directly.
SuperTokens is an open-source, highly customized user auth provider framework that helps with all these forms of authentication mechanisms for your web applications. It is straightforward to integrate with a back-end framework like NodeJS, GoLang, Python and the front-end side with ReactJS, React Native, Plain Old JavaScript.
Next.js is a popular React framework to build rapid web applications. In this article, we will learn how to integrate the power of the SuperTokens authentication mechanism with Next.js applications. We will focus on the passwordless authentication, but other recipes like using social logins or userId/password will be similar.
What Are We Building Today?
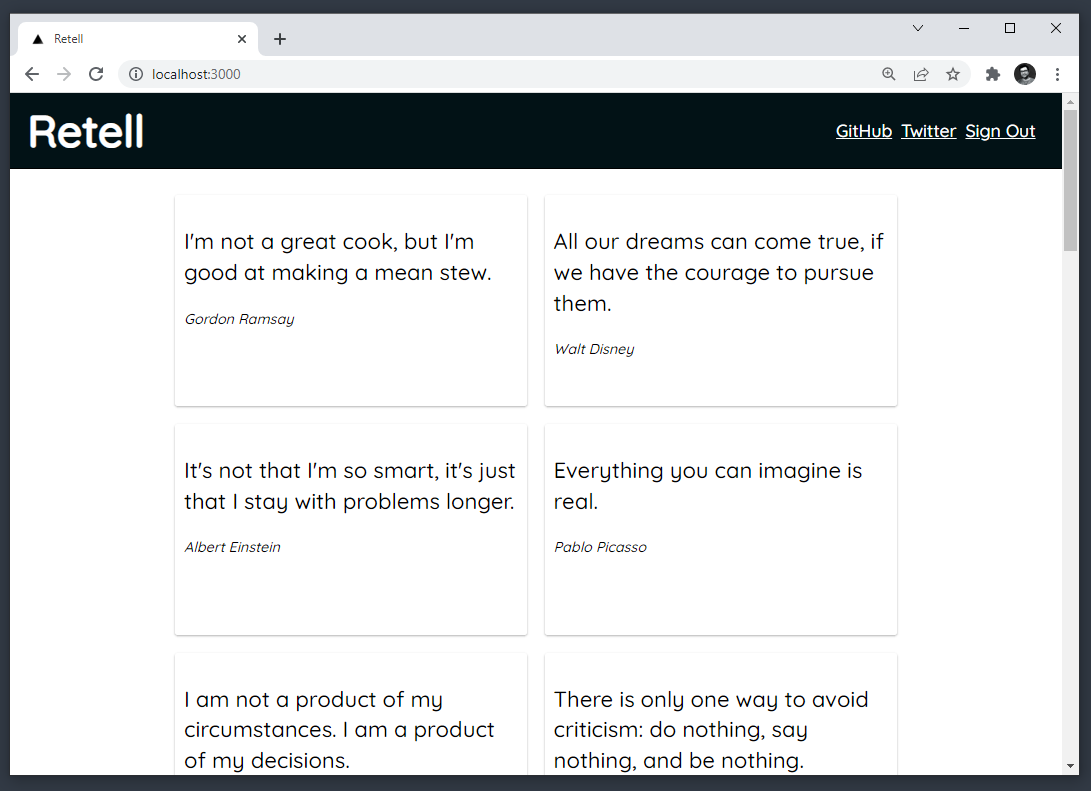
We will start with a simple but effective Next.js app and integrate the power of SuperTokens into it. The app is called Retell, which shows famous people's famous quotes around the globe. Please open your favourite code editor and follow along with this article. Enjoy building it.
At any point in time, if you want to refer to the source code, you can find it here:
Please give a ⭐ to the repo if you liked the work. It motivates me.
Setting Up the Retell Project UI
This article assumes you have a basic understanding of React.js and can follow the Next.js source code. Please follow these steps to run the Retell project user interface locally,
- Fork or clone this repo: https://github.com/atapas/quotes
- Switch to the branch only-ui
Install dependencies using this command from the terminal,
npm install
# or
yarn
Then, run the development server,
npm run dev
# or
yarn dev
Now access the application using the URL http://localhost:3000 to see the quotes rendered successfully.
You can also access the quotes API using the URL: http://localhost:3000/api/quotes
Congratulations!!! You have got the UI running. Let us now integrate the SuperTokens Passwordless auth with it.
Setting Up SuperTokens Auth
SuperTokens Passwordless auth recipe helps you authenticate using OTPs(one-time passwords) and magic links. We will configure this auth type with our Next.js app with a few steps,
- Create the front-end and back-end configurations.
- Show the Login UI
- Add Auth APIs
- Protect website routes
- Perform session verification on API calls
We need to install a few dependencies for all the above steps. Please install the dependencies using the following command,
yarn add supertokens-auth-react supertokens-node dotenv nodemailer
Front-end and Back-end Configurations
Create a .env.local file at the root of the project with the following content,
NEXT_PUBLIC_NODEMAILER_USER=<YOUR_GMAIL_ID>
NEXT_PUBLIC_NODEMAILER_PASSWORD=<YOUR_GMAIL_PASSWORD>

NEXT_PUBLIC_APP_URL=http://localhost:3000
Important Note: The Gmail id and password is required to send OTP and Magic Link over email. Please do not use your personal Gmail id for this purpose. You can create a fake Gmail id and lower the security settings to use it for testing purposes.
Create a config folder at the root of your project. Now create an appInfo.js inside the config folder with the following content,
const port = process.env.APP_PORT || 3000

const apiBasePath = '/api/auth/'

export const websiteDomain =
  process.env.APP_URL ||
  process.env.NEXT_PUBLIC_APP_URL ||
  `http://localhost:${port}`

export const appInfo = {
  appName: 'Retell',
  websiteDomain,
  apiDomain: websiteDomain,
  apiBasePath,
}
The appInfo.js file contains a special object that specifies the variables for the front-end and back-end configurations. Please read more about the appInfo object from here.
Next, create a frontendConfig.js file inside the config folder with the following content,
import PasswordlessReact from "supertokens-auth-react/recipe/passwordless";
import SessionReact from "supertokens-auth-react/recipe/session";
import { appInfo } from "./appInfo";

export const frontendConfig = () => {
  return {
    appInfo,
    recipeList: [
      PasswordlessReact.init({
        contactMethod: "EMAIL_OR_PHONE",
      }),
      SessionReact.init(),
    ],
  };
};
Here we create a function to provide the config for the SuperTokens' front-end SDK. Later on, we will see how to use this function. Please notice the contact method is EMAIL_OR_PHONE. It means passwordless authentication will occur by sending the OTP and Magic Link to the email or phone number the user will specify to log in.
Now let's create the back-end configurations. Please create a file called backendConfig.js inside the config folder with the following content,
require("dotenv").config();

import Session from "supertokens-auth-react/recipe/session";
import PasswordlessNode from "supertokens-node/recipe/passwordless";
import SessionNode from "supertokens-node/recipe/session";
import { appInfo } from "./appInfo";
let { getEmailBody } = require("../util/mailer");

export const backendConfig = () => {
  const nodemailer = require('nodemailer');

  const mailTransporter = nodemailer.createTransport({
    host: "smtp.gmail.com",
    port: 465,
    secure: true,
    auth: {
        user: process.env.NEXT_PUBLIC_NODEMAILER_USER,
        pass: process.env.NEXT_PUBLIC_NODEMAILER_PASSWORD,
    },
  });

  return {
    framework: "express",
    supertokens: {
      connectionURI: "https://try.supertokens.com",
      // apiKey: "IF YOU HAVE AN API KEY FOR THE CORE, ADD IT HERE",
    },
    appInfo,
    recipeList: [
      PasswordlessNode.init({
        flowType: "USER_INPUT_CODE_AND_MAGIC_LINK",
        contactMethod: "EMAIL_OR_PHONE",
        createAndSendCustomEmail: async (input, context) => {
          try{
            let htmlBody = getEmailBody(
              appInfo.appName,
              Math.ceil(input.codeLifetime / 1000),
              input.urlWithLinkCode,
              input.userInputCode,
              input.email
            );
            await mailTransporter.sendMail({
              html: htmlBody,
              to: input.email,
              from: `Team Supertokens <${appInfo.appName}>`,
              sender: process.env.NEXT_PUBLIC_NODEMAILER_USER,
              subject: `Login to ${appInfo.appName}`,
            });
          } catch (err) {
            console.log(err);
          }
        },
        createAndSendCustomTextMessage: async (input, context) => {
          // Creating a Twilio account and set it up.
        },
      }),
      SessionNode.init(),
    ],
    isInServerlessEnv: true,
  };
};
We have used the try.supertokens.com as the connectionURI value above. Please note the URI try.supertokens.com is for demo purposes. You need to set up your own core and replace the core address above.
You can set up your own core in two ways,
By self-hosting SuperTokens: You can self-host the SuperTokens core with your own database(MySQL or PostgreSQL). You can sel-host either manually installing SuperTokens or via docker.By using the managed service option: To set up SuperTokens core on managed service, please create a free account and log in. Next, create a new app from the dashboard. Once done, you will find the connectionURI and the API key from the app details page.
Alright, now let's talk about the two delivery methods we specified in the code above:
createAndSendCustomEmail: It is the email-based delivery method that uses the Gmail credentials from the environment variables. Please note we use thegetEmailBody()method to format the email message.Please create a folder called
utilat the root of the project folder. Now create a file namedmailer.jsthat exports thegetEmailBody()method. Here is a sample implementation of the mailer.js file. You can copy-paste the entire content.createAndSendCustomTextMessage: It is the SMS-based deliver method. You can create a Twilio account and set it up with a few simple steps. You can find an example of it from here.
Please find more on the delivery method attributes from here.
Now we will call the front-end init functions from the _app.js file. Please open the _app.js file under the pages folder and replace the content with the following,
import React from 'react'
import SuperTokensReact from 'supertokens-auth-react'
import { frontendConfig } from '../config/frontendConfig'
import '../styles/globals.css'


if (typeof window !== 'undefined') {
  // we only want to call this init function on the frontend, so
  // we check typeof window !== 'undefined'
  SuperTokensReact.init(frontendConfig())
}

function MyApp({ Component, pageProps }) {
  return <Component {...pageProps} />
}

export default MyApp
So, now we are done with all the configurations. Let us now show the Login user interface.
Show the Login UI
Please create an auth folder inside the pages folder. Now create a [[...path]].js file inside the auth/pages folder with the following content,
import dynamic from 'next/dynamic'
import React, { useEffect } from 'react'
import SuperTokens from 'supertokens-auth-react'
import { redirectToAuth } from 'supertokens-auth-react/recipe/passwordless'

const SuperTokensComponentNoSSR = dynamic(
  new Promise((res) => res(SuperTokens.getRoutingComponent)),
  { ssr: false }
)

export default function Auth() {

  // if the user visits a page that is not handled by us (like /auth/random),
  // then we redirect them back to the auth page.
  useEffect(() => {
    if (SuperTokens.canHandleRoute() === false) {
      redirectToAuth()
    }
  }, [])

  return (
      <SuperTokensComponentNoSSR />
  )
}
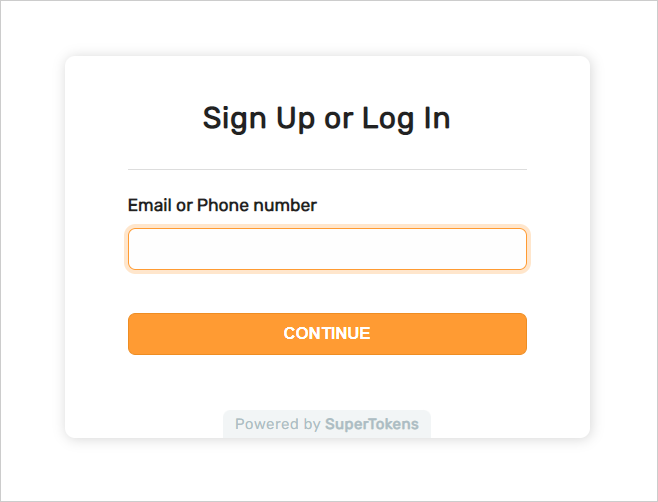
It is our Auth component. Alright, let us test it out. Open a browser tab and access the app's /auth URL, http://localhost:3000/auth. At this stage, you should see the Login user interface.
The main app page(localhost:3000) and the quotes API(localhost:3000/api/quotes) are still not protected with the Auth. Let's do them one by one.
Add Auth APIs
Now we will add all the backend APIs for auth on /api/auth. Please create the auth folder in the pages/api/ folder. Now create a file [[...path]].js with the following content,
require("dotenv").config();
import supertokens from 'supertokens-node';
import { middleware } from 'supertokens-node/framework/express';
import { superTokensNextWrapper } from 'supertokens-node/nextjs';
import { backendConfig } from '../../../config/backendConfig';

supertokens.init(backendConfig())

export default async function superTokens(req, res) {

  await superTokensNextWrapper(
    async (next) => {
      await middleware()(req, res, next)
    },
    req,
    res
  )
  if (!res.writableEnded) {
    res.status(404).send('Not found')
  }
}
The [[...path]].js file uses the middleware exposed by supertokens-node, which exposes all the APIs like sign in, sign up etc.
Now update the quotes API to have only authorized access. Please update the content of the quotes.js file with the following content,
import supertokens from 'supertokens-node';
import { superTokensNextWrapper } from 'supertokens-node/nextjs';
import { verifySession } from 'supertokens-node/recipe/session/framework/express';
import { backendConfig } from '../../config/backendConfig';
import quoteList from '../../data/quotes.json';

supertokens.init(backendConfig())

export default async function quotes(req, res) {
  await superTokensNextWrapper(
    async (next) => {
      return await verifySession()(req, res, next)
    },
    req,
    res
  )

  return res.json(quoteList.quotes)
}
Now access the quotes API, http://localhost:3000/api/quotes. You will see the unauthorized error.
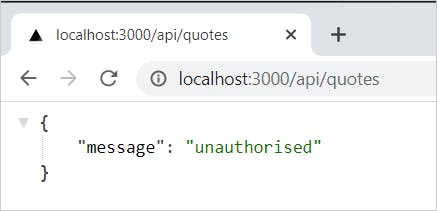
Don't worry. We will fix the entire workflow now.
Protect Routes
So to make everything work, let us protect the routes. Please open the index.js file under the pages folder and replace the content with the following content,
import dynamic from 'next/dynamic';
import Head from 'next/head';
import React from 'react';
import Passwordless from "supertokens-auth-react/recipe/passwordless";
import supertokensNode from 'supertokens-node';
import Session from 'supertokens-node/recipe/session';
import Footer from '../components/Footer';
import Header from '../components/Header';
import QuoteList from '../components/QuoteList';
import styles from '../styles/Home.module.css';

const PasswordlessAuthNoSSR = dynamic(
  new Promise((res) =>
    res(Passwordless.PasswordlessAuth)
  ),
  { ssr: false }
)

export default function Home(props) {
  return (
    <PasswordlessAuthNoSSR>
      <ProtectedPage />
    </PasswordlessAuthNoSSR>
  )
}

function ProtectedPage({ userId }) {
  async function logoutClicked() {
    await Passwordless.signOut()
    Passwordless.redirectToAuth()
  }

  return (
    <div className={styles.container}>
      <Head>
        <title>Retell</title>
        <link rel="icon" href="/favicon.ico" />
      </Head>
      <Header />
      <main className={styles.main}>
        <QuoteList />
      </main>
      <Footer />
    </div>
  )
}
That's it. You access the app or the quotes API, and the login page protects both. You must provide your phone number or email id to get the OTP and authorize yourself before accessing the quotes.
A Task For You
Alright, a small task for you. Can you implement the logout functionality? In the index.js page, you have a function called logoutClicked(). How about invoking the method when someone clicks on the Sign Out link in the header? Please give it a try!
Once again, the entire source code is available here on my GitHub: https://github.com/atapas/quotes. If you face any issues following this article or errors in implementing the workflow, please reach out to SuperTokens on Discord.
Before We End...
That's all for now. I hope you found this article insightful.
I share my knowledge on,
- 🌐 Web Development(JavaScript, ReactJS, Next.js, Node.js, so on...)
- 🛡️ Web Security
- 💼 Career Development
- 🌱 Opensource
- ✍️ Content Creation
Let's connect,