
How to create React form with a single change event handler?

Co-Founder, @CreoWis | Teacher, @tapaScript | Founder, @ReactPlay | YouTuber | Writer | Human
An HTML form allows users to enter data using input fields that accept text, password, email, number, color, telephone number, date, etc. Users can type lengthy texts in the textarea, can select one or many items from a select box, can check or uncheck items using a checkbox, or select one of the many options using a radio button. Once all the inputs are collected, the form can send it for further processing by using a submit button.
Here is an example of how an HTML form may look like with elements,
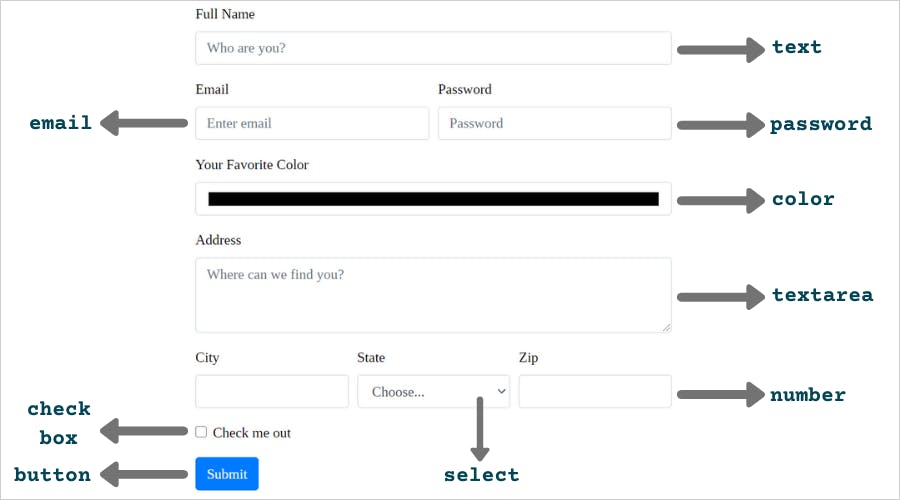
Each of the form elements(<input>, <textarea>, <select>, etc.) can respond to DOM events. These events occur when a particular action takes place. For example, an onchange event occurs when the value of an element has been changed. We as web developers, listen to these changes to get the most updated values from the elements by associating a function. This function will not be executed before the event occurs.
In the example below, we have the handleChange function that will be executed when the value of the input textbox changes.
<html>
  <body>
    <input type="text"
            name="uname"
            placeholder="Enter Username"
            onchange="handleChange(this.value)">

    <script>
      function handleChange(val) {
        console.log(`The value is ${val}`);
      }
    </script>
  </body>
</html>
Usually, an HTML form may have more than one element. Some forms(like the one we have seen above) may have many. Associating different onchange event handler function with each of the elements to get the updated value, may result in too much code to maintain. In this article, we will see how to handle it with one function for multiple input fields in a React Form.
React Form
The HTML form elements maintain their own state. In React, the mutable state is maintained by the state property of the component. Any update to this state property is possible only using the setState() method. The in-built react hook, useState() makes it, even more, easier to manage.
A good programming practice is to treat the React state as the "single source of truth". A React component with a form in it should handle everything that happens to the form when the input value changes.
An input form element whose value is controlled by React in this way is called a “controlled component”. - From React Docs
Handle Change Events of Multiple Controlled Components
A common trick in handling value changes of multiple controlled components is by adding the name attribute to each of the elements. The handler function can use the event.target.name to maintain the states. Let us understand it with examples.
Let's assume, we have a form with the following elements to capture user inputs,
| Field | Type |
| fullName | <input type='text'> |
<input type='email'> | |
| password | <input type='password'> |
| address | <textarea> |
| color | <input type='color'> |
| city | <input type='text'> |
| state | <select> |
| zip | <input type='number'> |
| checkMe | <checkbox> |
1. Create the State as an Object
Initialize the state with default values.
const [state, setState] = useState({
    fullName: "",
    email: "",
    password: "",
    address: "",
    color: "",
    city: "",
    state: "",
    zip: 0,
    checkMe: false
  })
2. Add the name attribute to the elements
Add the name attribute to all the form elements. This name attribute value should be the same as the key defined while initializing the state. Here are a few examples.
Textbox
<input type="text"
       name="fullName"
       value={ state.fullName }
       onChange={ handleChange } />
<input type="email"
       name="email"
       value={ state.email }
       onChange={ handleChange } />
Color
<input type="color"
       name="color"
       value={ state.color }
       onChange={ handleChange } />
Select
<select name="state"
       onChange={ handleChange } value={ state.state }>
       <option ...>...</option>
       .....
</select>
CheckBox
<input type="checkbox"
       name="checkMe"
       checked={ state.checkMe }
       onChange={ handleChange } />
3. Define the handler function
Last is to define the handler function, handleChange to change the state of the component.
const handleChange = evt => {
    const name = evt.target.name;
    const value =
    evt.target.type === "checkbox" ? evt.target.checked : evt.target.value;
    setState({
      ...state,
      [name]: value
    })
  }
Notice, we get the name of the element using evt.target.name. The value can be queried using the property, evt.target.value. As we have the checkbox element, we also take care of it using the evt.target.checked. We can also improvise further by adding another condition for the number type to get the value using, evt.target.valueAsNumber.
See it in Action & the Source Code
Here is an example where we update the component state when the input value changes. You can see the state updates visually in the Preview section. The updated state is also applied to another component to provide user feedback.
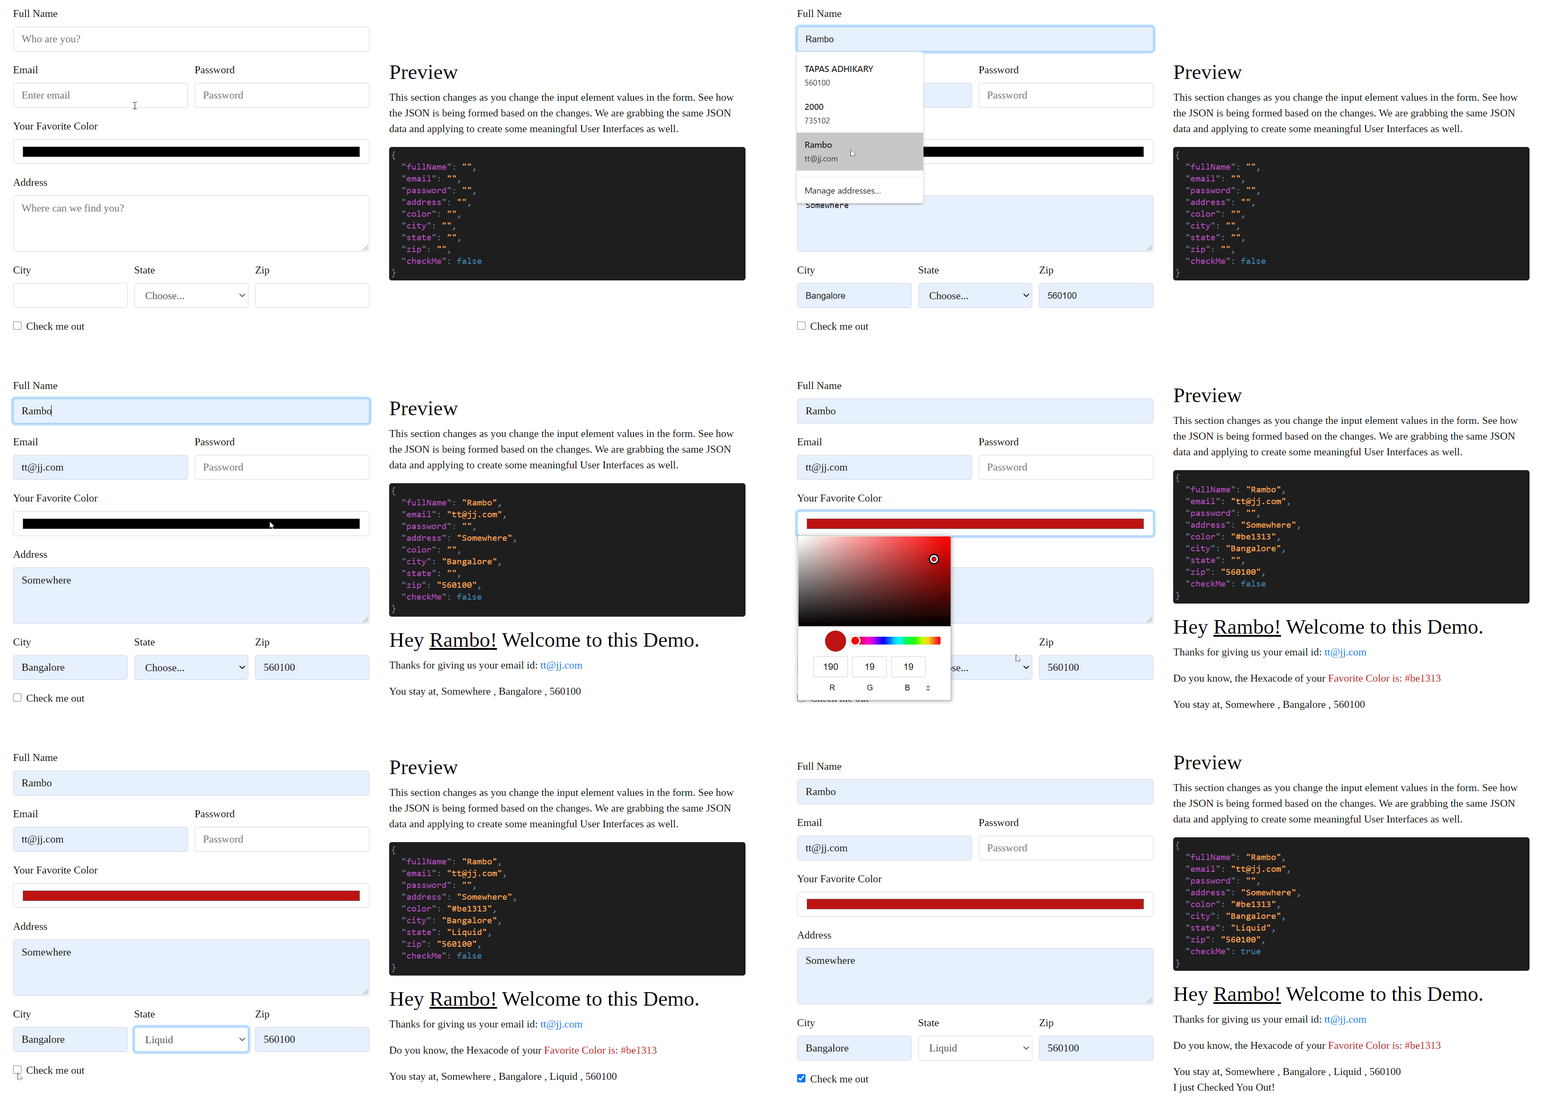
- You can play around it from here: https://react-single-change-hadler.stackblitz.io
Find the Source code here,
Here is something for you:
Learn React, Practically
I've been developing professional apps using ReactJS for many years now. My learning says you need to understand ReactJS fundamentally, under the hood to use it practically.
With that vision, I have created a ReactJS PlayLIst that is available for the developer community for FREE. Take a look:
Before We End...
That's all for now. I hope it was useful for you. Thank you for reading this far! Let’s connect. You can @ me on Twitter (@tapasadhikary) with comments, or feel free to follow.
Please like/share this article so that it reaches others as well. You may also like,


