Create an e-learning platform using caisy and next.js app router
Let us build a full-stack e-learning platform using caisy - a headless CMS, GraphQL, and Next.js app router.
Co-Founder, @CreoWis | Teacher, @tapaScript | Founder, @ReactPlay | YouTuber | Writer | Human
Developers learn better when they build or create something out of their learnings. We need to put our learnings into practice and try problem-solving. When we attempt to learn multiple technologies together or try out a tech stack, it makes sense to create meaningful applications that touch all the layers of the tech stack.
Recently, I have been super excited about the Next.js app router. The paradigm of React Server Components and the flexibility in data fetching with composable layouts and routes made it a framework to try out. Also, I stumbled upon an excellent, headless content management system caisy and fell in love with its capabilities and simplicity.
Yes, you are guessing it right! I combined the Next.js app router and caisy to create a fun project. This tutorial takes you through the steps of creating the same so that you get aware of both technologies and have fun creating something meaningful while learning about them.
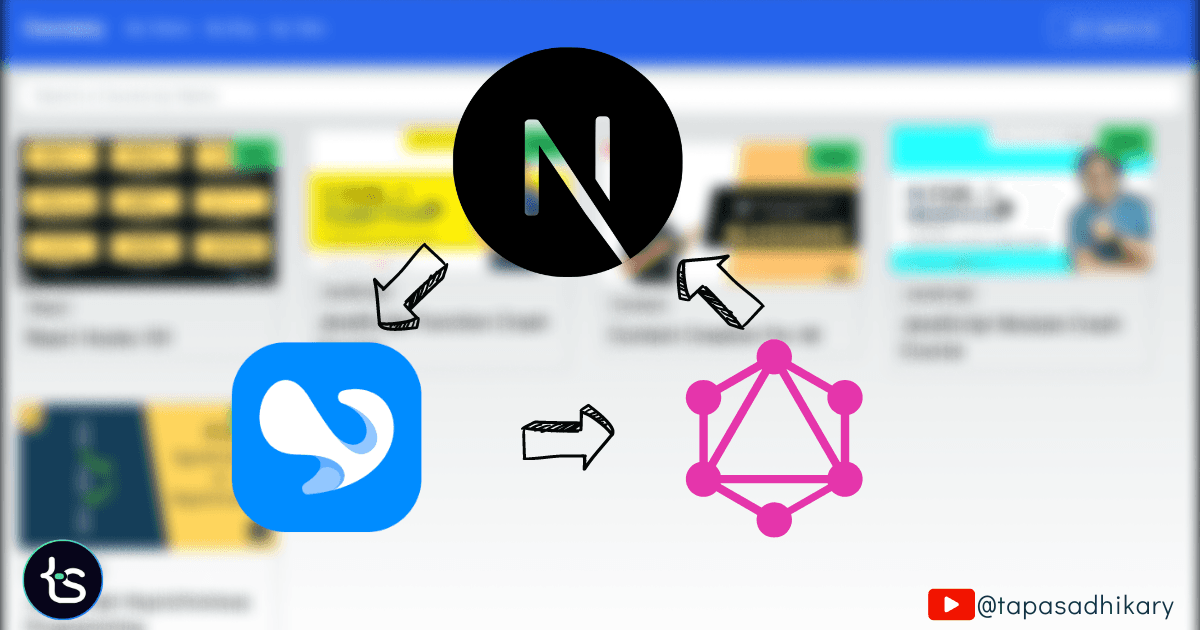
Let's create an e-learning platform while learning about a trendy tech stack like Next.js app router, GraphQL, and a headless CMS platform called caisy.
⚡ It will be a lengthy tutorial, but it will be fun, I promise. Please take adequate breaks while going through it. Towards the end, I have given a few tasks for you. If you happen to complete them, I will be very glad 😃.
If you like to learn from a video tutorial, this tutorial is also available as a video on my YouTube channel, tapaScript 😀.
What are we building today?
We will build an e-learning platform Coursery listing many courses users can look into, learn about, purchase, and provide comments and ratings.
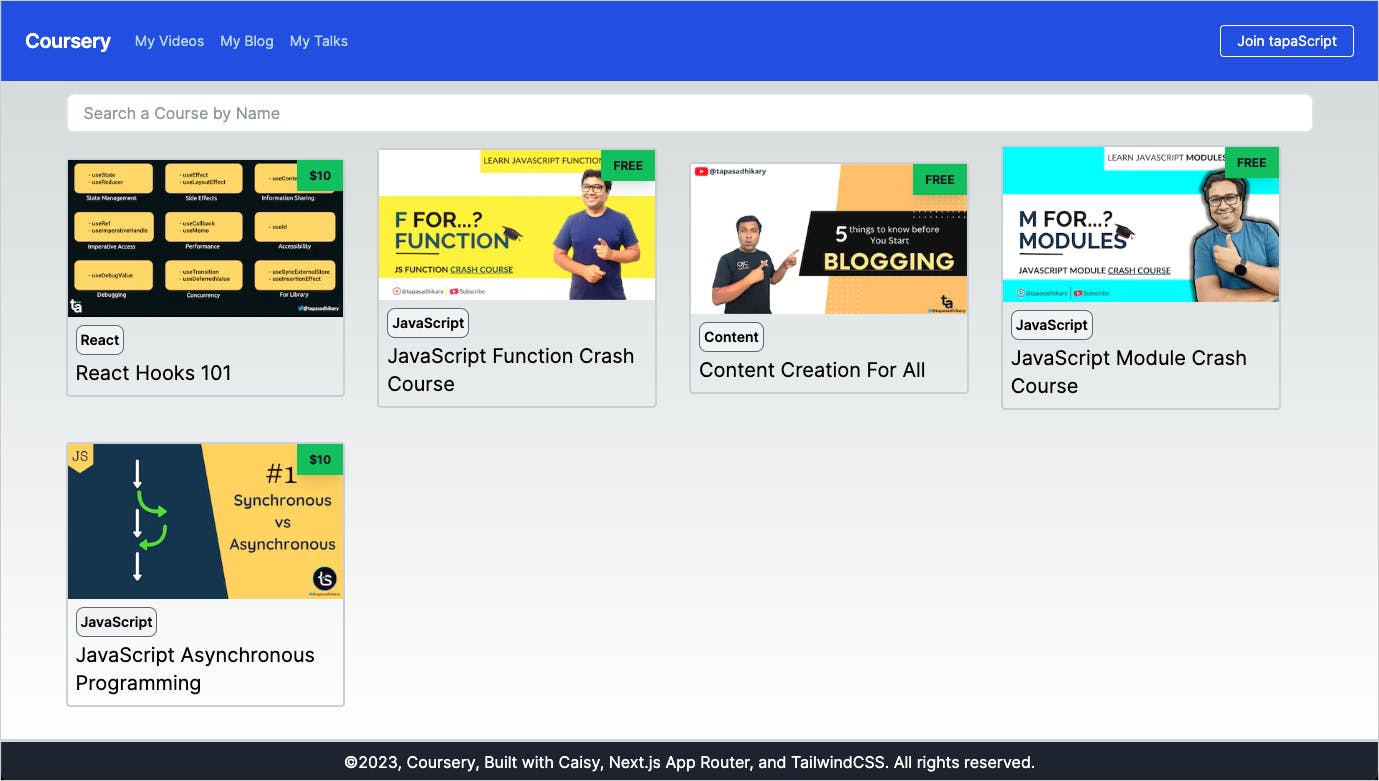
You can access the deployed version of the app from here: https://coursery.vercel.app/
Also, the application's source code is an open source that you can refer to and use anytime while reading this tutorial.
Tech Stack
We will use the following technology stack to build the application:
Caisy Headless CMS as a backend data store.
Next.js App router for the user interface implementation.
TailwindCSS for styling the app.
GaphQL as API endpoint
Caisy - a modern headless CMS
Caisy is a headless CMS that makes content management easy. You can create multiple projects and can switch between them seamlessly. It is easy to tailor your content structure using data models and connections.
It provides a GraphQL API to fetch and mutate content. This provides the control to the developer community to build any app with any tech stack on top of the content in the caisy.
We will learn to use caisy as a data store and content manager for our e-learning platform.
Setting up caisy
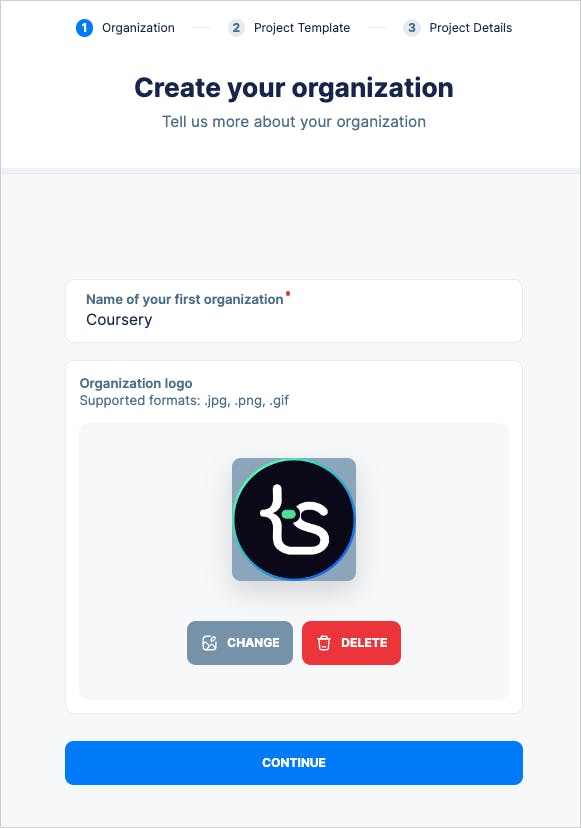
First, create an account with caisy using this link and then follow a few simple steps to set up your profile and log in. Now, you must set up your project by following a simple wizard.
- First, create an organization with a name and an optional logo. Here, I have given the organization name as
Coursery. You can provide any name of your choice. Click on continue.
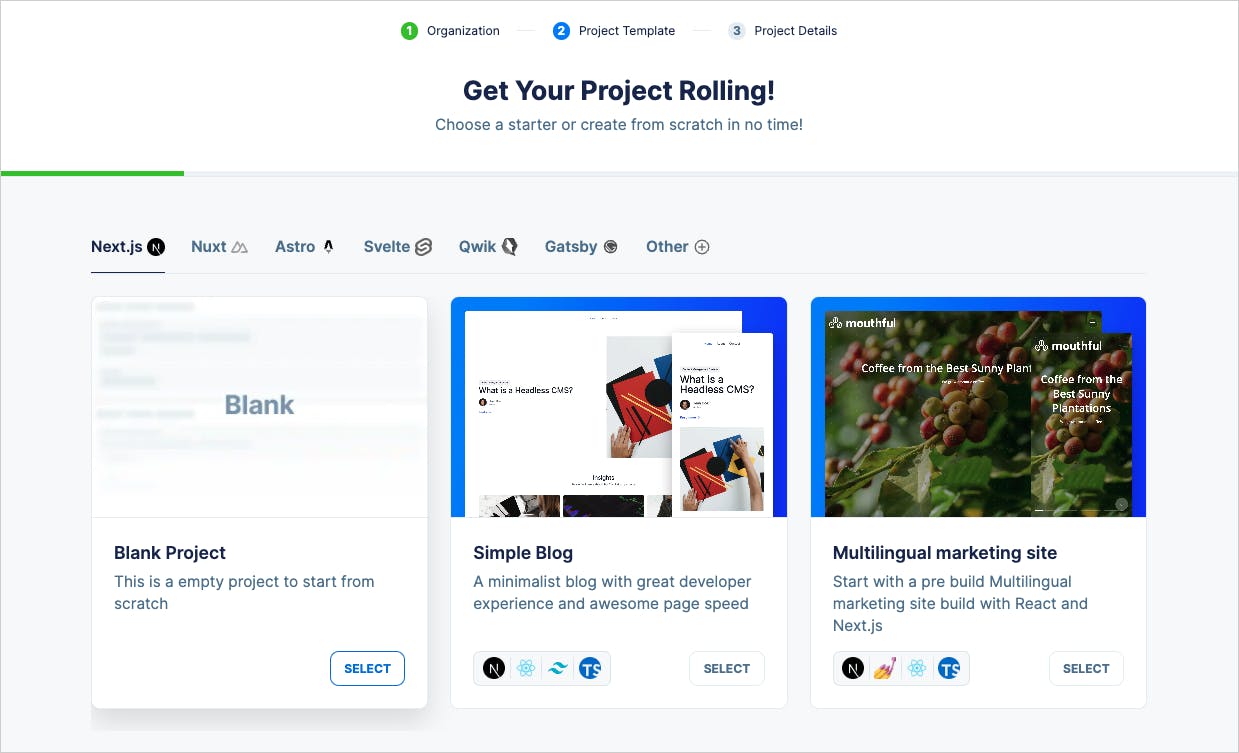
- Next, we will create a project under the organization. Caisy provides you with many out-of-the-box templates to create the project. Creating a project based on a template of Next.js, Nust, Astro, Qwik, and many more is a matter of a few quick clicks. In our case, we will create the project from scratch. So, select the
Blank Projectoption.
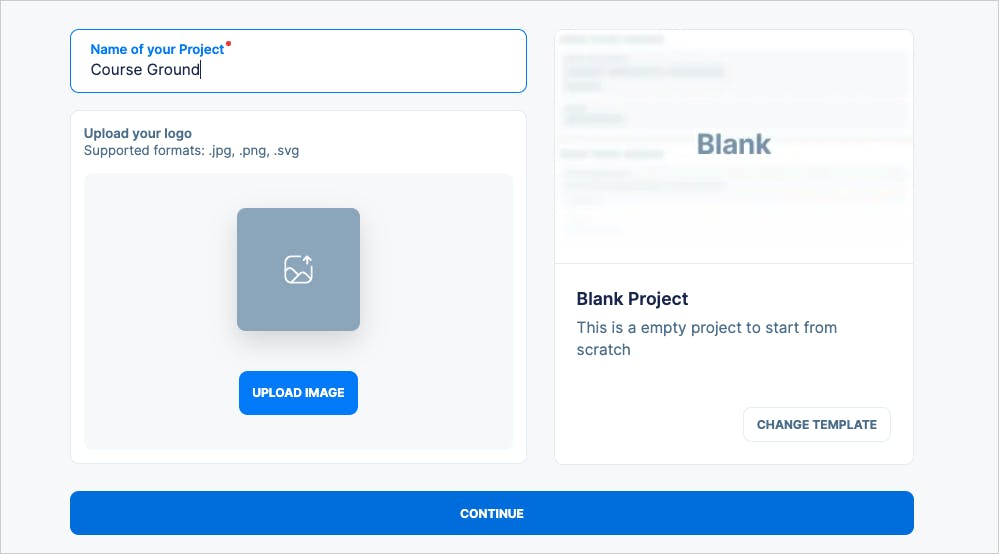
- Give the name of the project and continue.
That's it! You are done with all the basic setups. Now, we will focus on creating content in caisy and utilizing it for our application.
Setting up the content blueprint
We must create the content structure before adding any content to the caisy. A structure is like the schema we create in a database context. We can define fields, their types, validation, and connections in the blueprint.
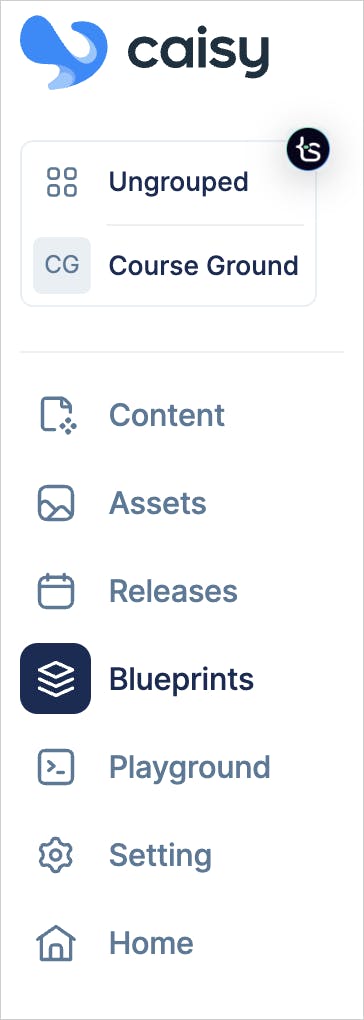
The blueprints bring consistency to your content. As you will be creating the content based on a blueprint, all the content for a blueprint will be structurally consistent. To create a blueprint, click on the Blueprints option from the sidebar.
You can create two types of blueprints in caisy,
Documents: Use it to create the structure for the generic content of your application. For example, we need to create content for the courses in our app. So we can create adocumentstype blueprint for it.Components: Components are reusable entities. Our app will have a comment section for users to provide a rating and comment on the courses. Our comment section will be reusable for all the courses. We can create the content structure of the comment section ascomponentsblueprint.
By default, caisy provides a system-generated blueprint called Asset to create various assets like media files and images.
To create a blueprint, click the CREATE button at the top-right of the Blueprints page and select a blueprint type.
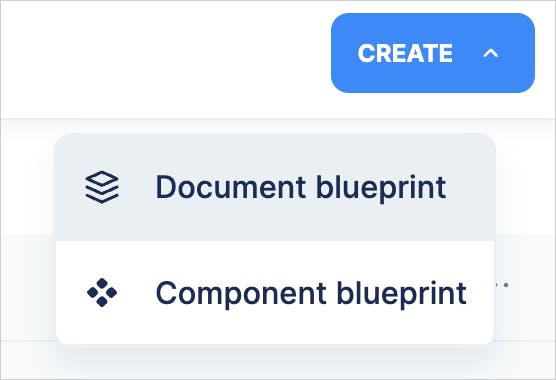
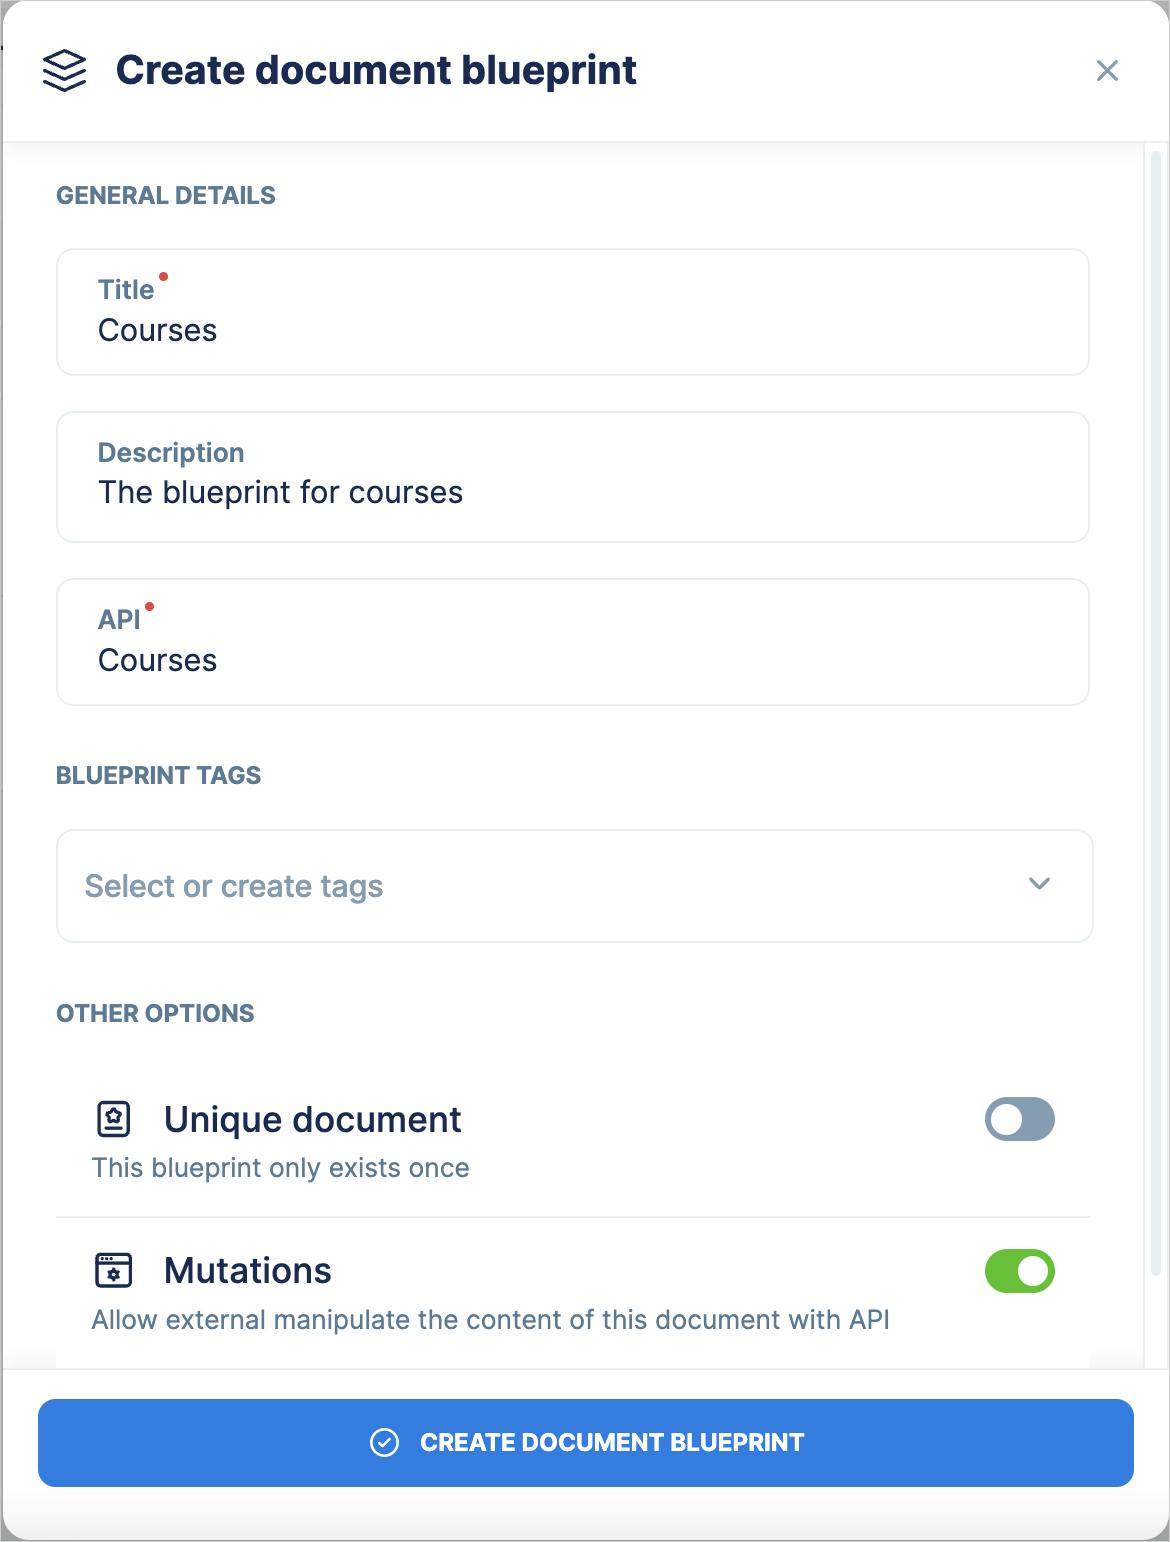
We will create the course blueprint, so select the Document blueprint option. It will open up a form to fill in the details. Provide the title and description of the blueprint. You can also turn on the Mutations option if you want any external API like GraphQL to manipulate(Create/Update/Delete) content for this document.
Also, notice that an API endpoint name gets associated with the blueprint to refer to it using the external API.
Go ahead and create the blueprint. Now, you will get an interface to drag and drop fields to create the content structure. A course may have a name, description, category, cover image, link, and many other fields. So, drag and drop the relevant type of fields to create them.
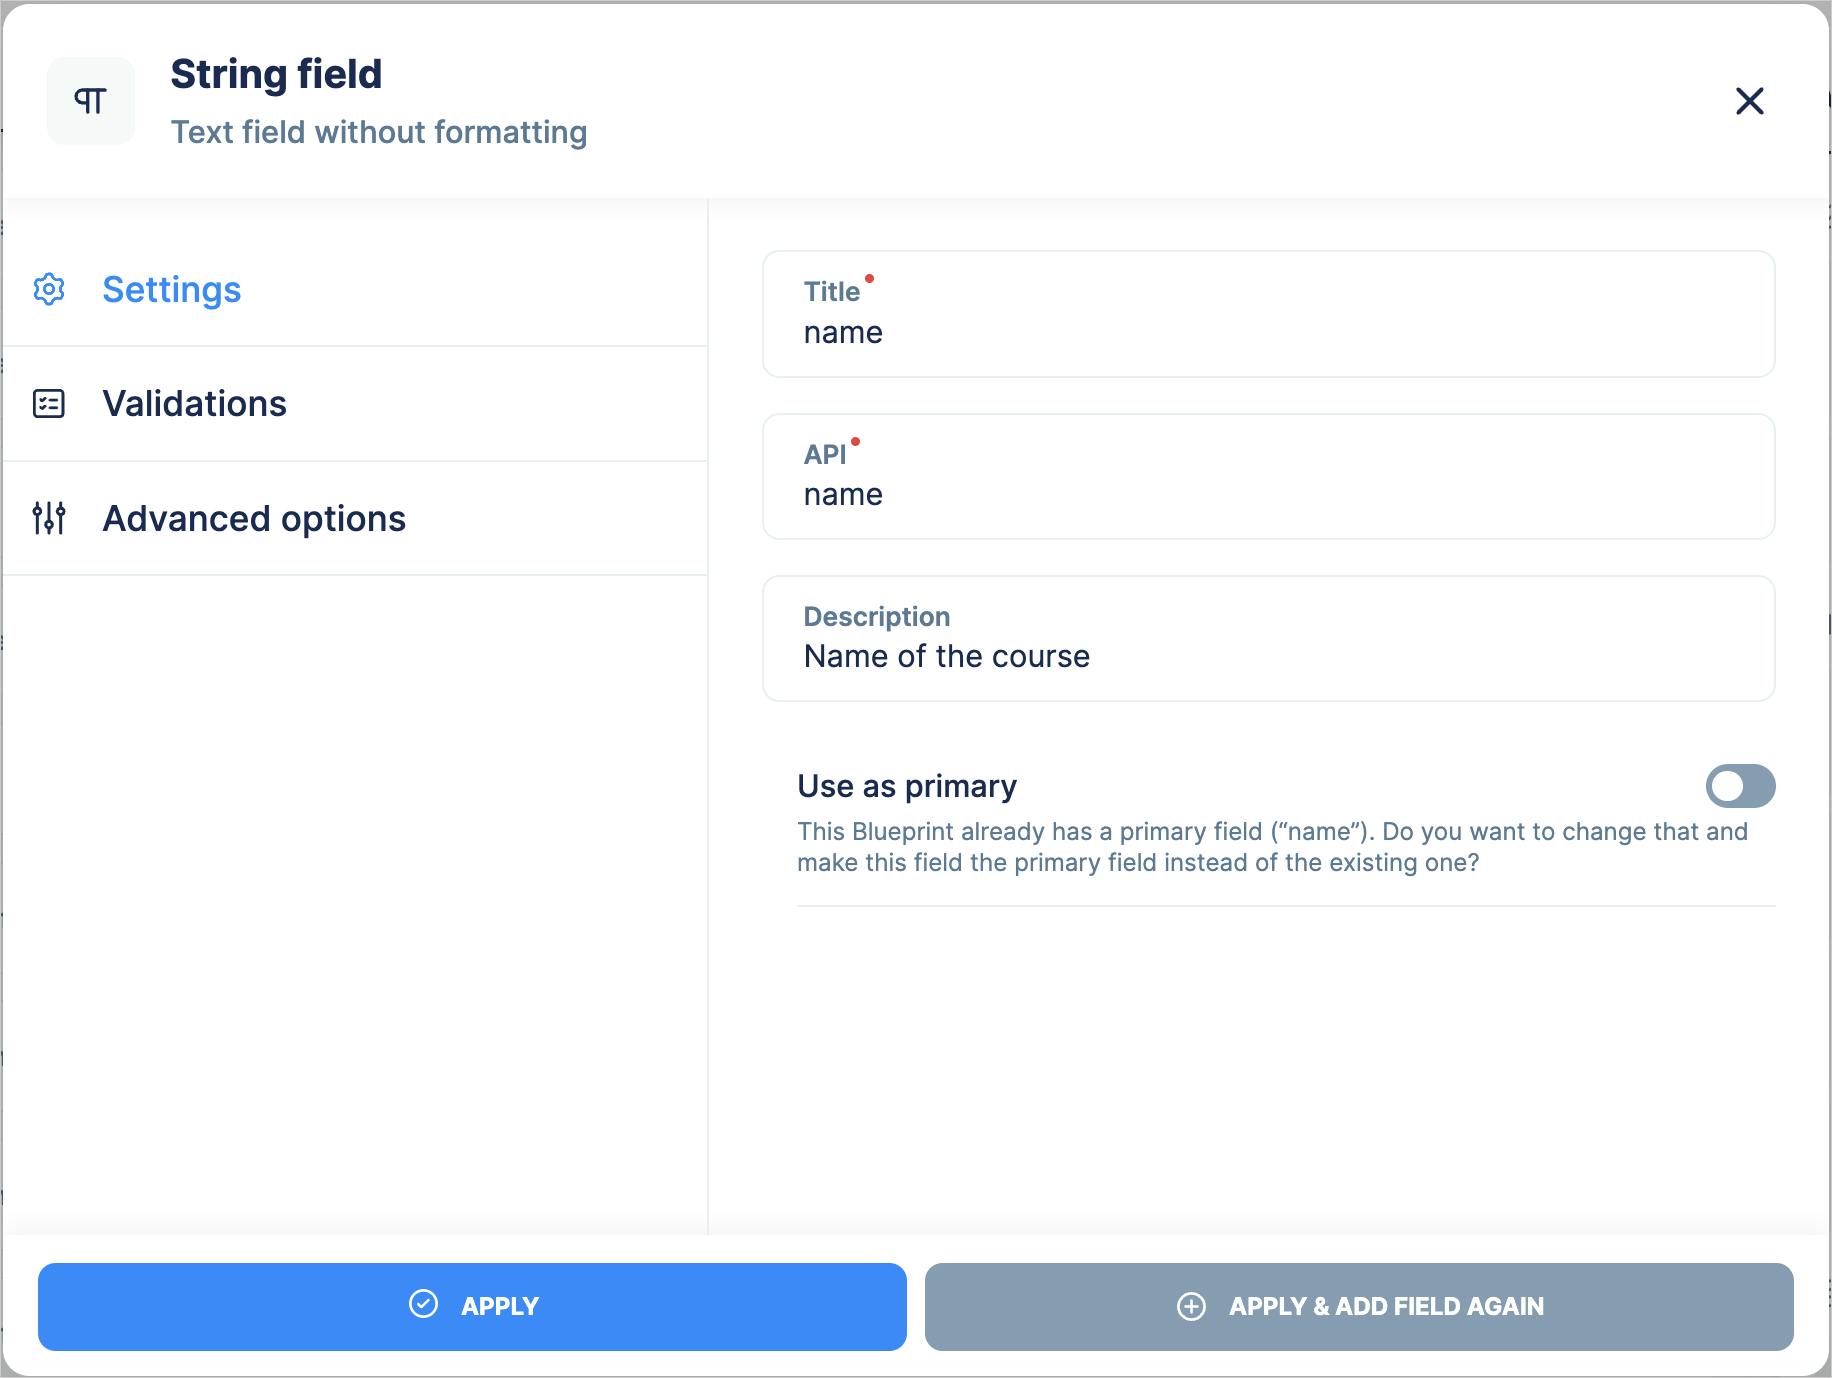
For example, the course name could be a string-type field. Drag and drop, and String field to provide the required details on the settings page. You can also add a few validation options to the field. Also, notice the API name to refer to this field when you want to fetch/mutate using the GraphQL API.
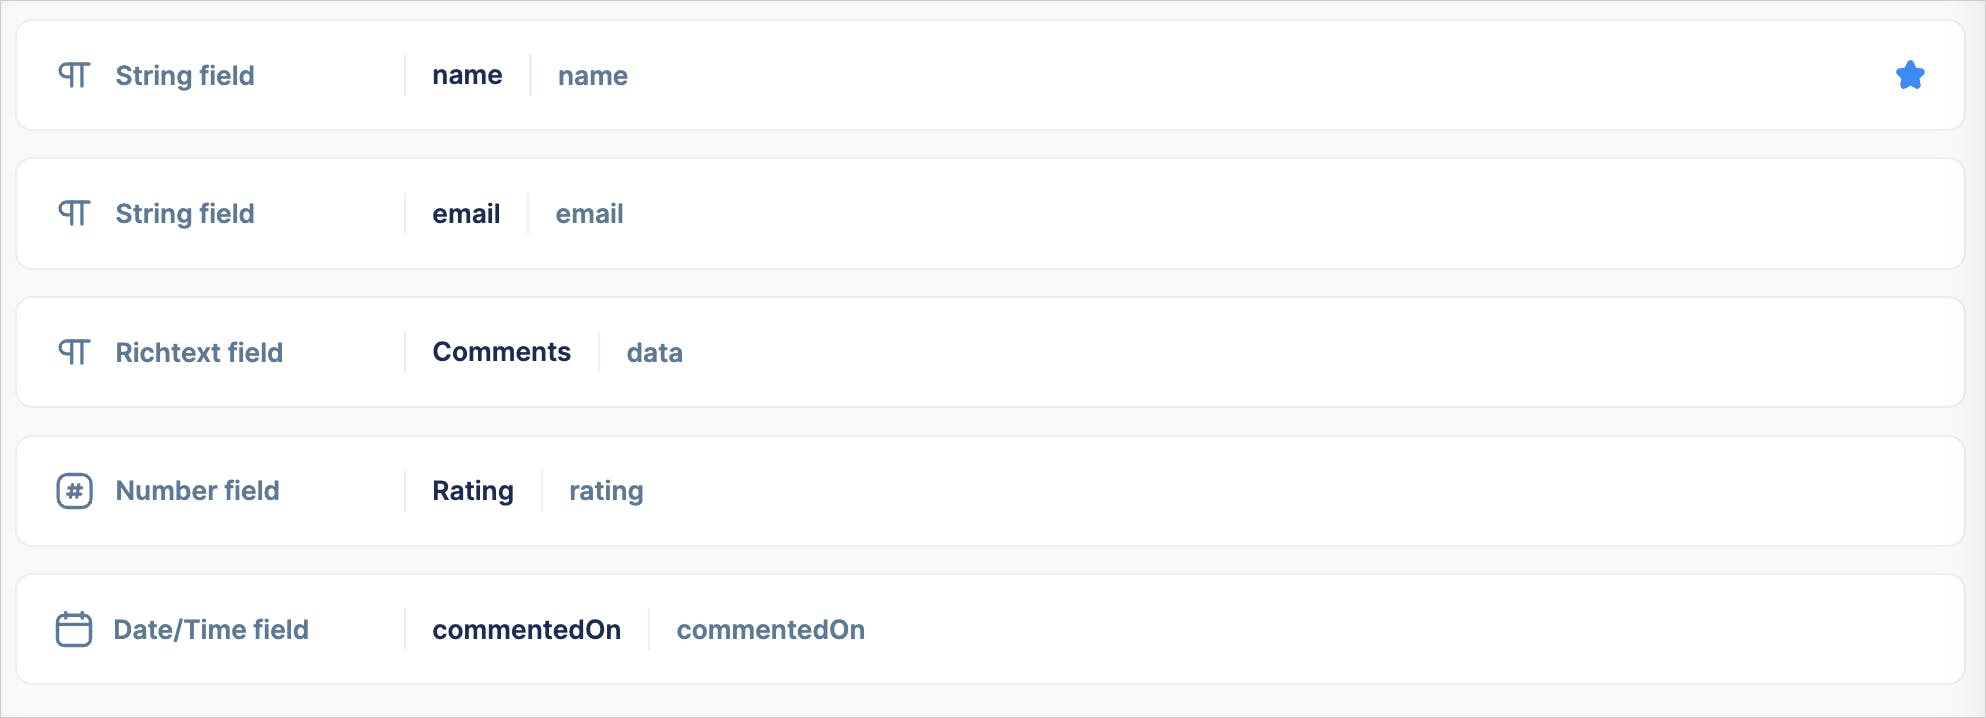
This is what the courses document blueprint may look like.
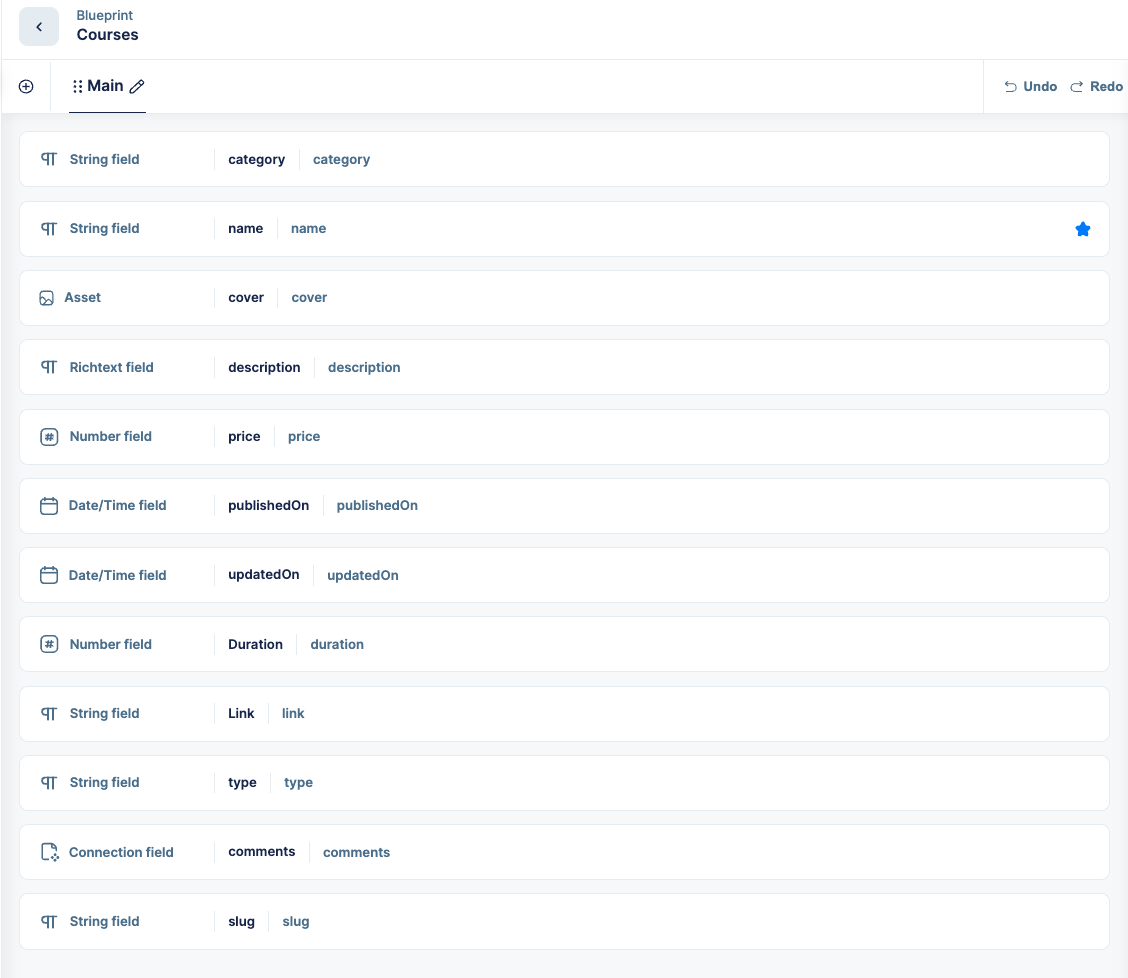
Please pay attention to the type of fields we have created above. Apart from regular string types, price is a number-type field, and there are a couple of Date/Time fields. Also, three types are of special importance:
The
coverfield is of typeAsset. If you recall,Assetis a system-generated document. We are now extending it as a type to create another document.The
descriptionis aRichtextfield. It means you can provide formatted texts, images, and rich content for the course description.The
commentsis aConnectionfield. A connection field helps connect multiple blueprints in a relation. It is like establishing relationships between tables in the RDBMS. As a course can have multiple comments, we have created a 1:N connection here.
We have not created the Comments blueprint yet. We are going to do it next. However, after creating the Comments blueprint, please edit the Courses document and add a connection field for comments, as shown below.

Now, let us create the Comments blueprint. Again, click on the CREATE button on the blueprints page and, this time, select the Component blueprint option. A similar interface to the courses blueprint appears. Please drag and drop the fields like the last time and create the Comments blueprint.
Managing the content in caisy
We are done with creating the content structure. Now, we will create and manage the content. In caisy, we can manage content in a couple of ways:
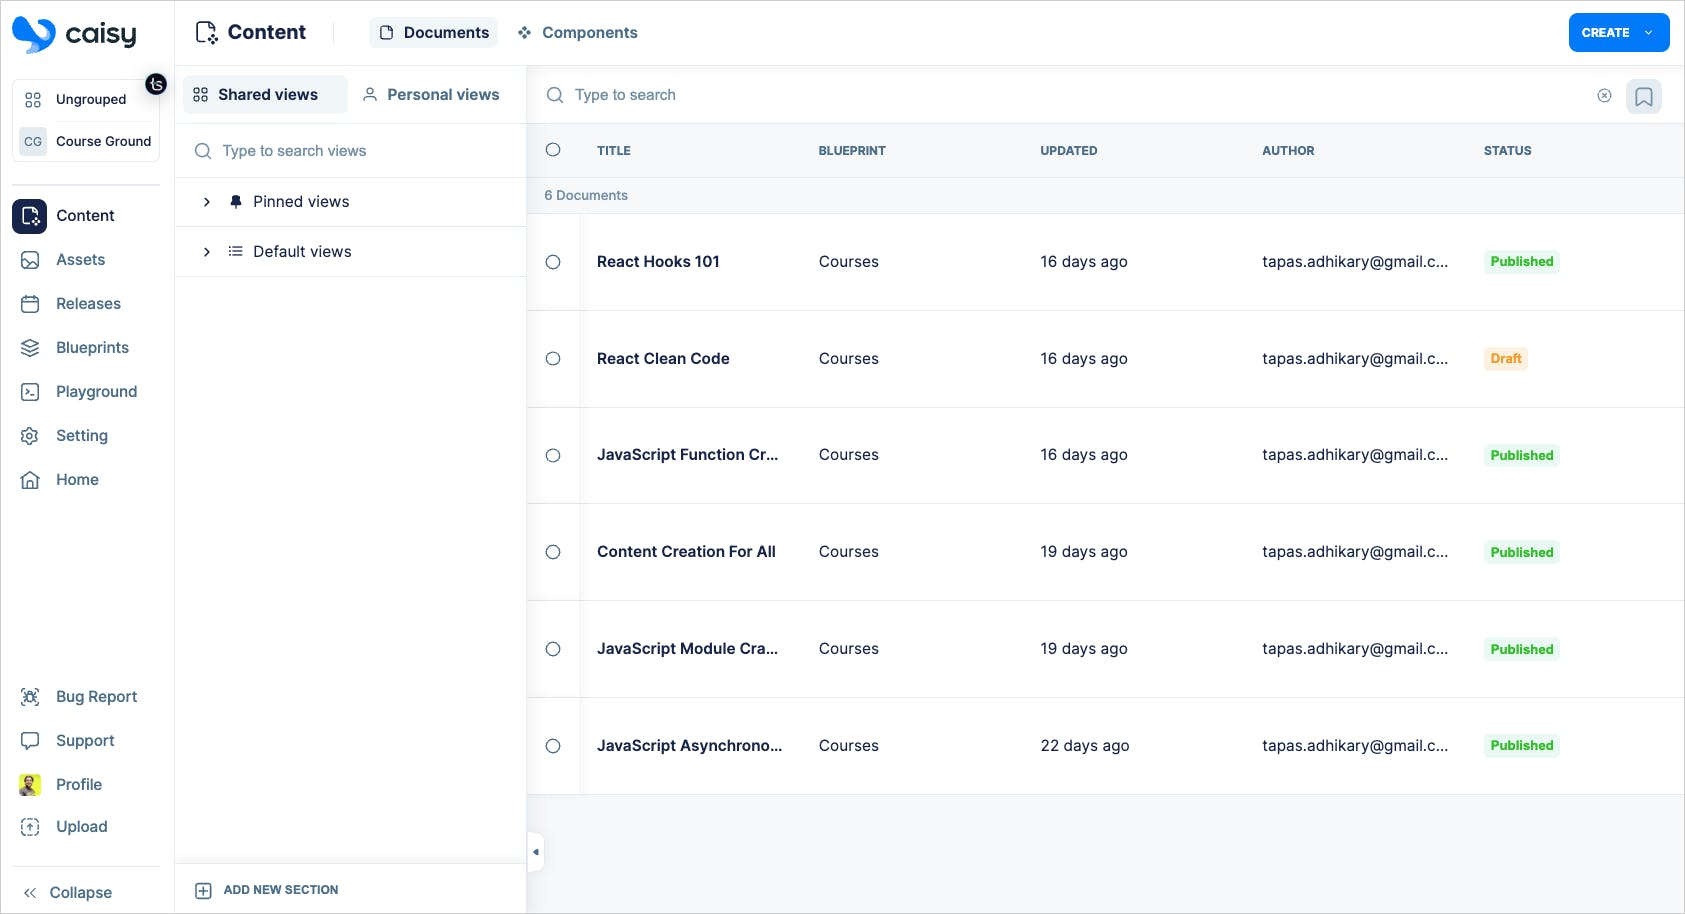
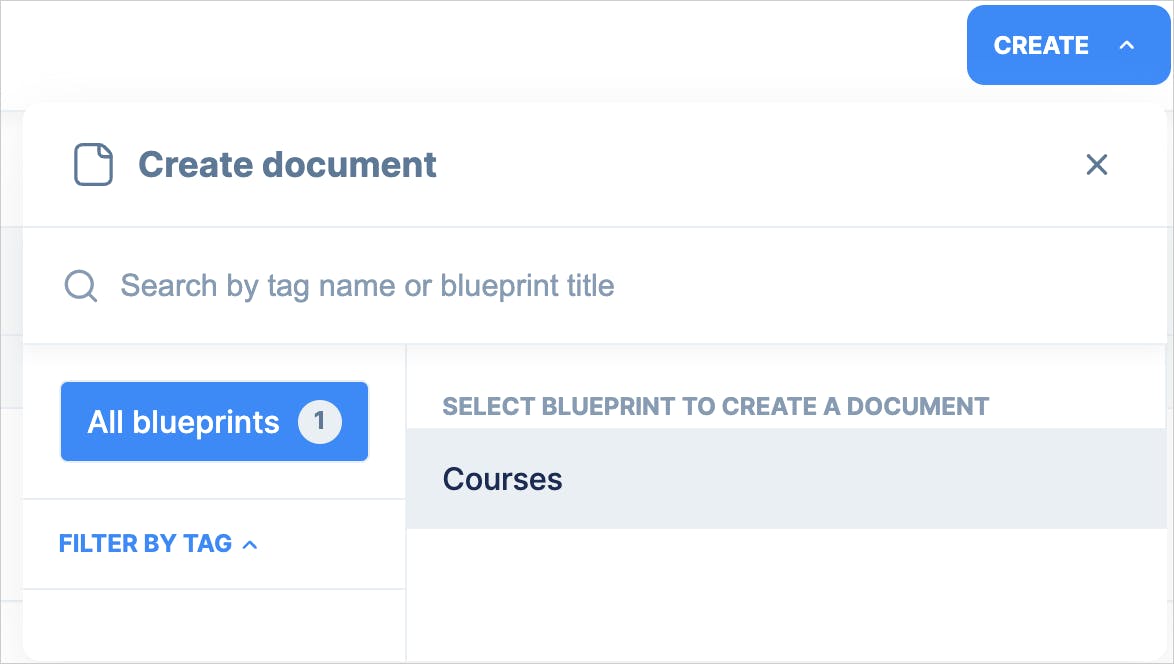
Manually using the caisy app: If you are not a developer but want to manage the application's content, caisy provides a form-based user interface for creating content quickly.Browse to the
Contentoption from the sidebar and click on theCreatebutton at the top-right. Select a blueprint to start creating the content.
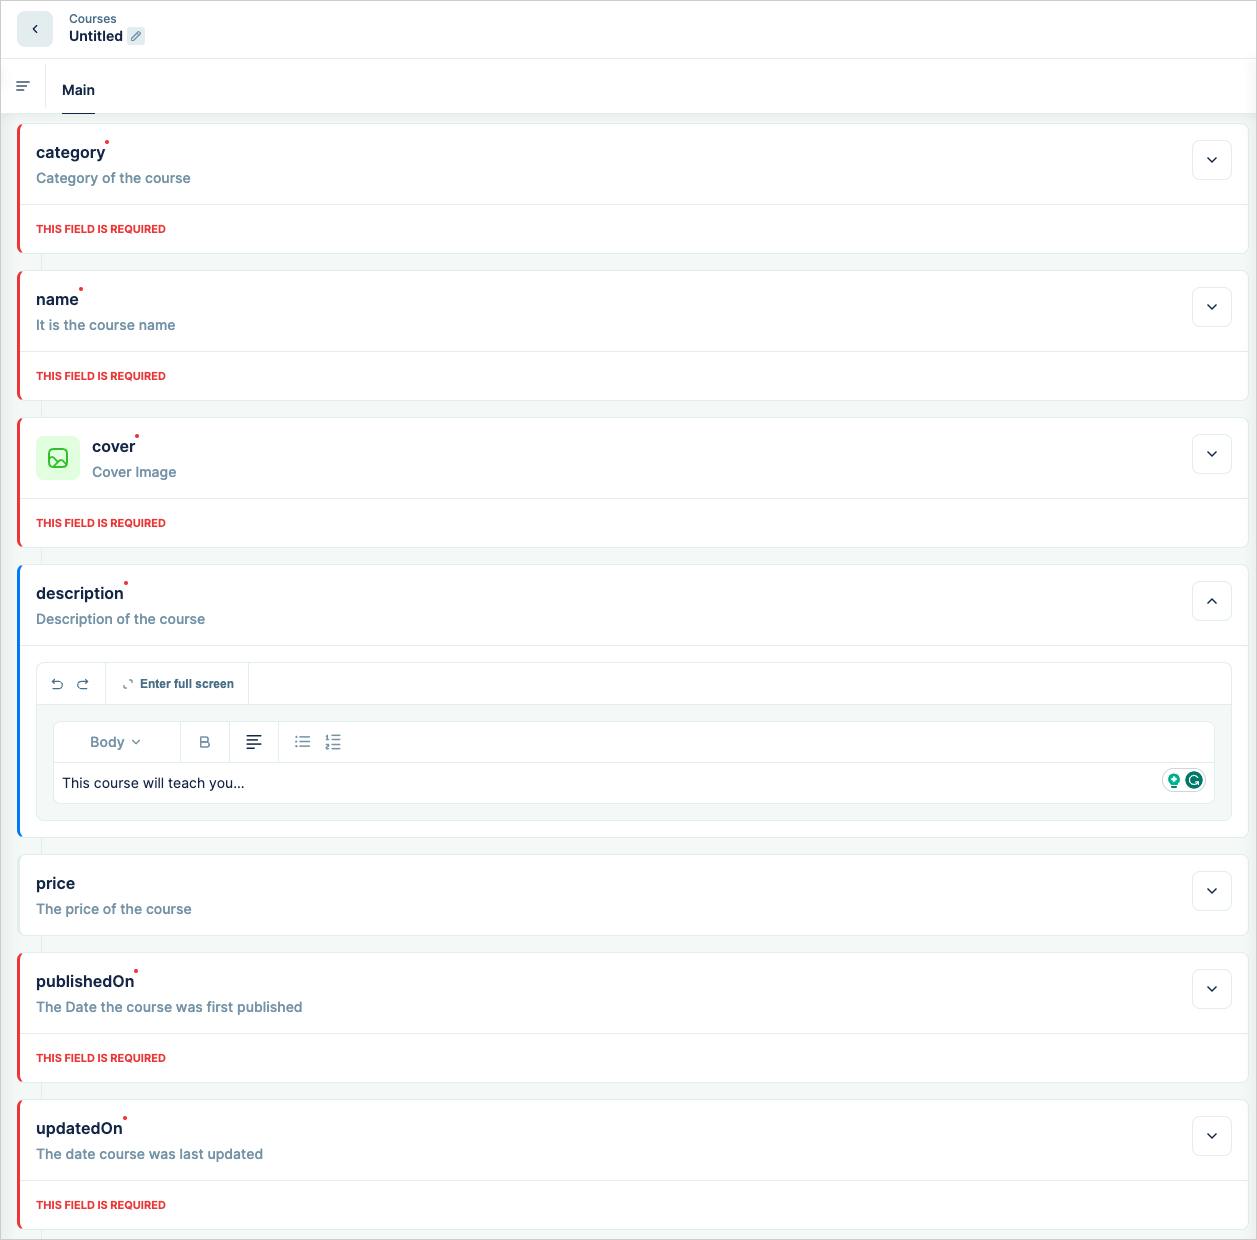
Now, start filling up the content for the courses one by one.
Programmatically using external API: You can use an external API like GraphQL to create and manage content in caisy. This is mainly for developers who want to use caisy as a backend content management system and build user interfaces on top of it. We can use this method for creating comments from our e-learning app.
API Playground to access course content
Caisy provides an API Playground for developers to query and mutate the content. It is a handy interface to realize the data responses from GraphQL API before you use them in your app development.
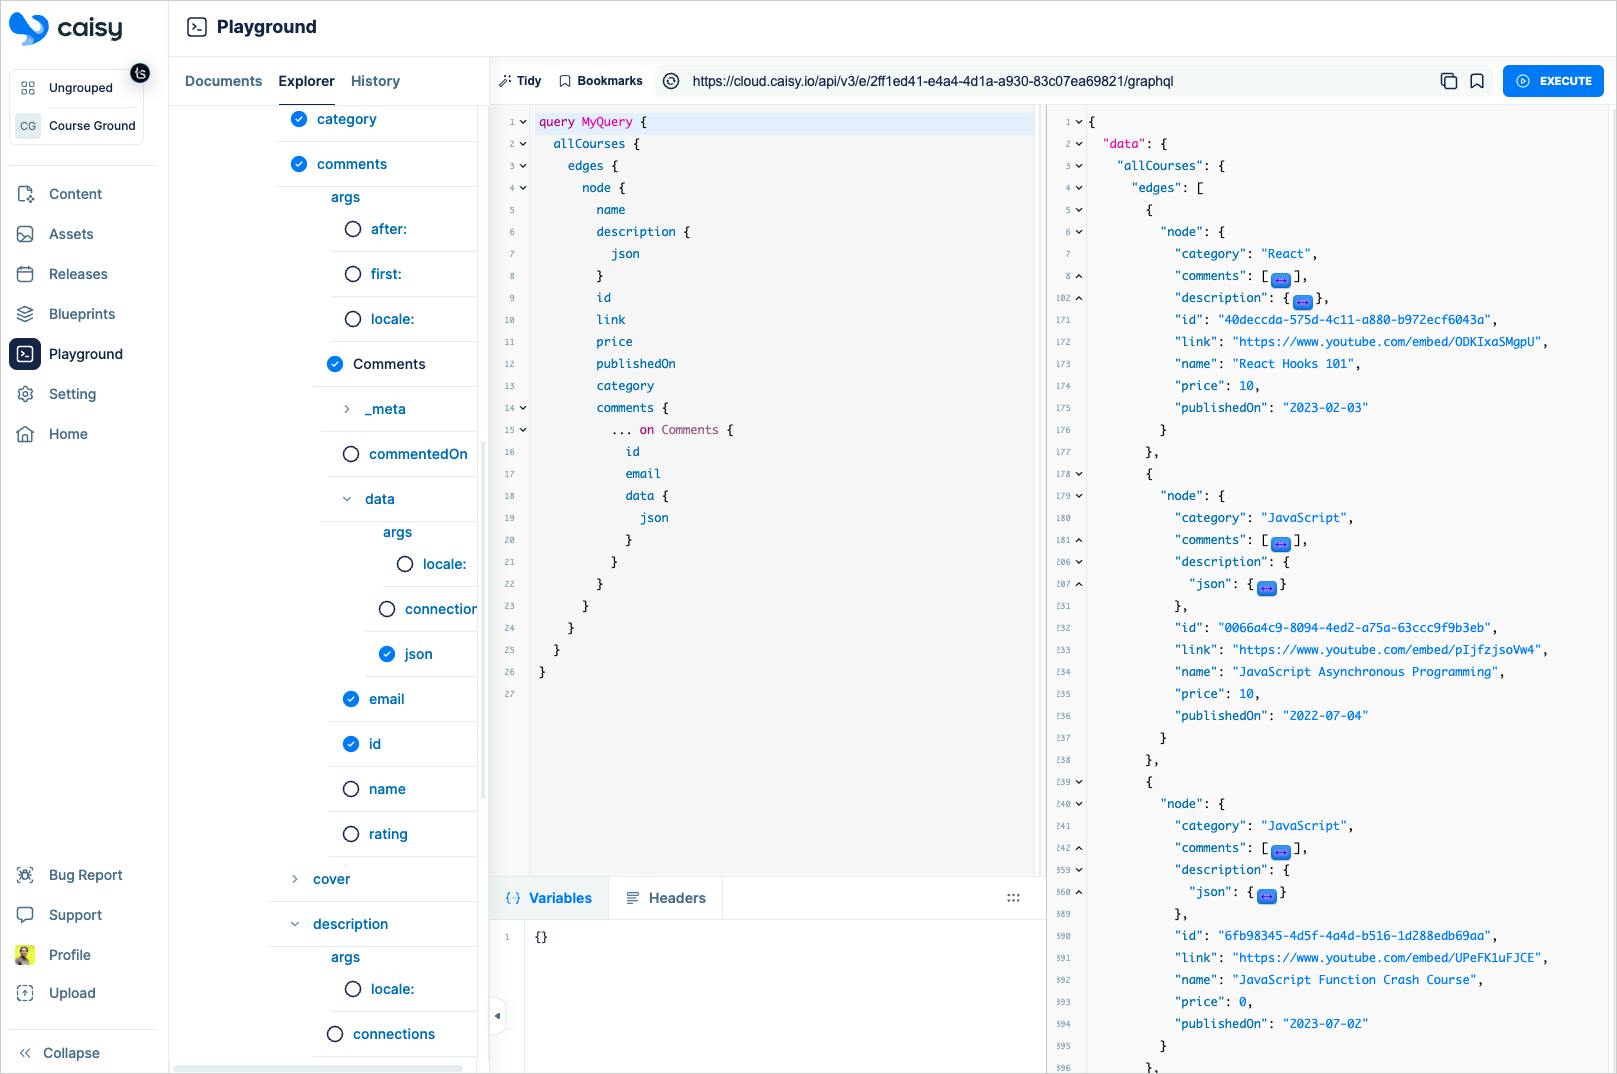
The playground has an explorer that lets you pick a blueprint and its attributes to query. As you pick them, the editor panel will automatically form a GraphQL query for you. You can then click on the Execute button to run the query and see the response.
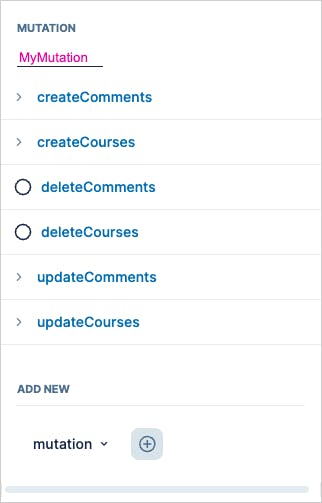
You can also select the mutation option from the bottom of the explorer for forming the mutation queries to create/edit/delete content.
Get secure access to the API
The external GraphQL API is powerful, but with great power comes great responsibility! You must protect your data so that it is not exposed to everyone publicly using the external API.
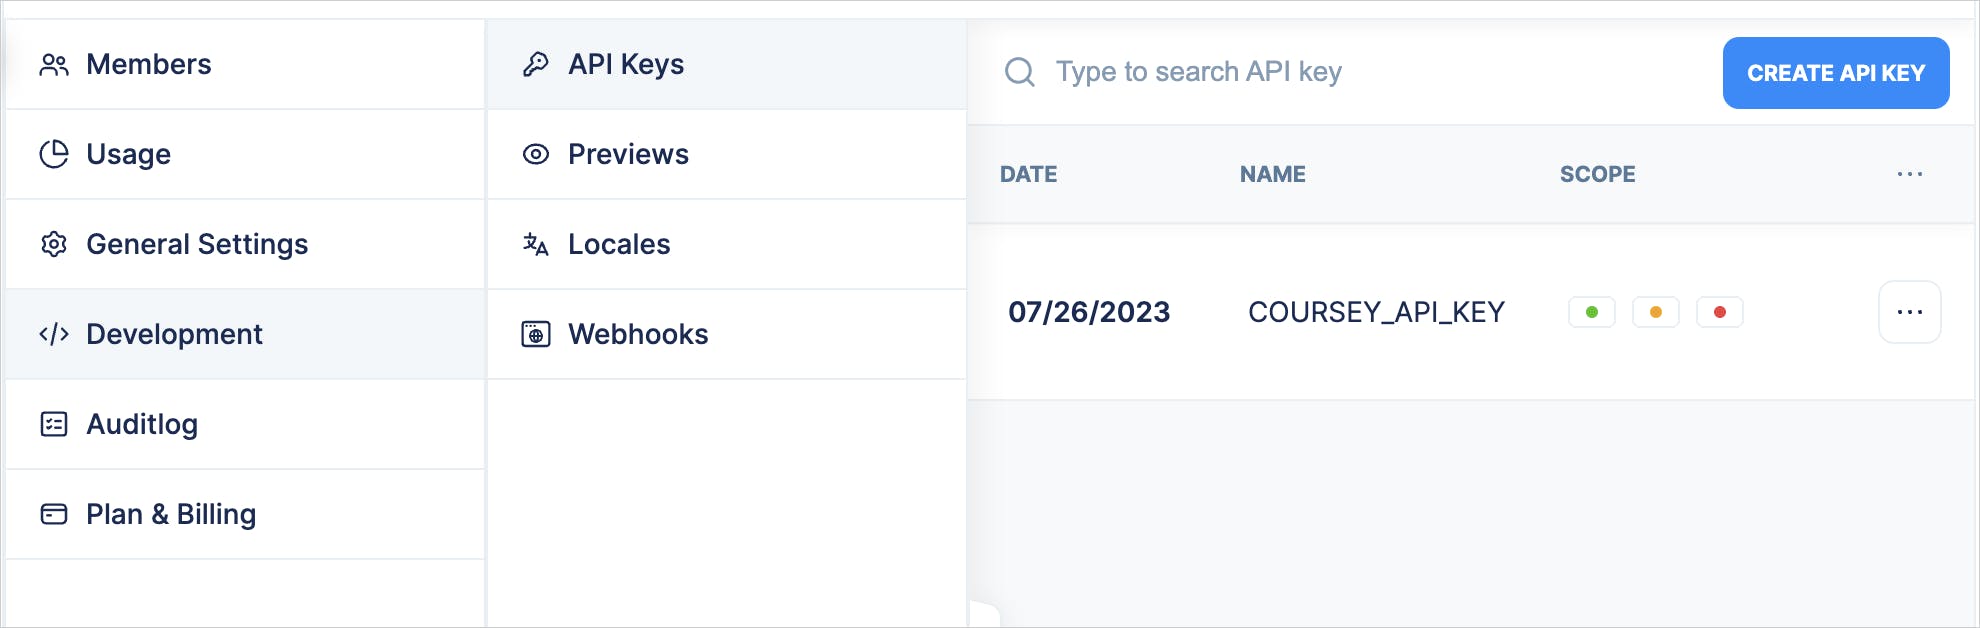
You can protect your API using the API Key. You must supply the API KEY when interacting with the content in caisy using an external API. To create an API Key, click on the Setting option in the sidebar, and then select the Development > API Keys Option. Now click on the CREATE API KEY button.
You can also find the project id from the
General Settingsoption.
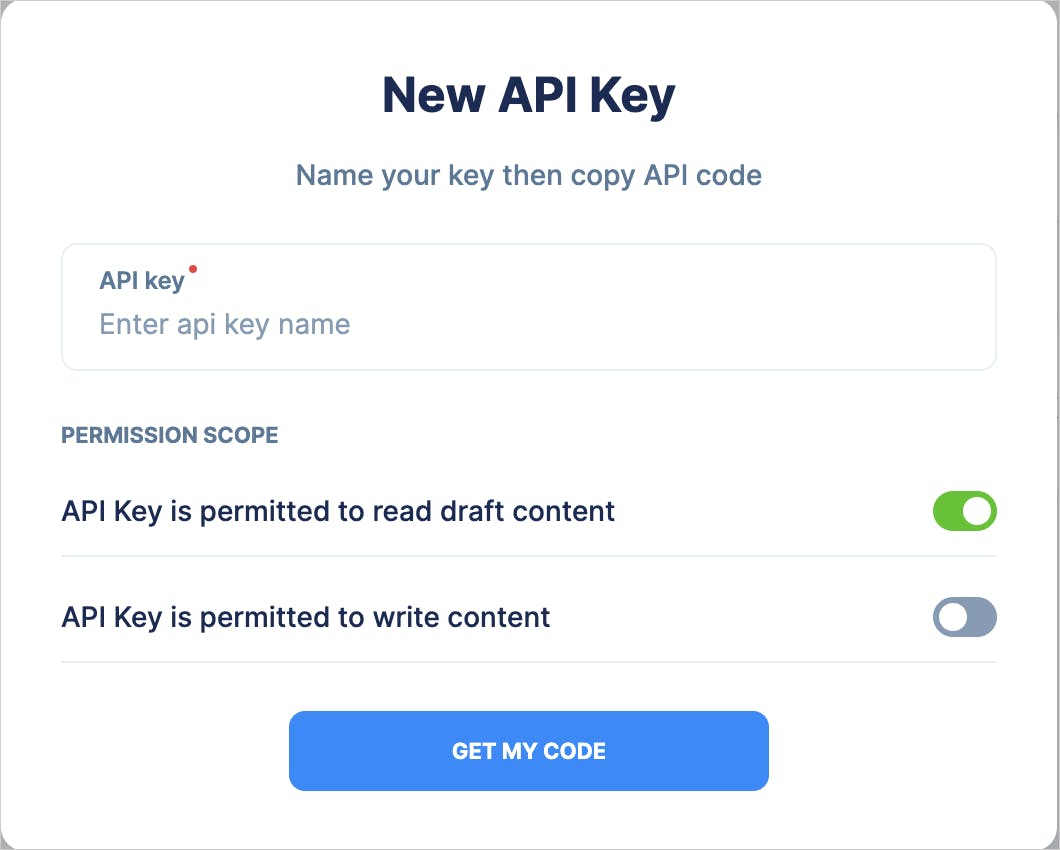
Provide a name and get the API Key Code.
A few important points to note here:
You must copy and securely save the API Key code. You will not be able to view it again at a later point in time using caisy. You must create a new API Key if you forget or lose it.
Caisy also provides a
Personal tokenwhich is available under your profile settings. Don't confuse the personal token with the API Key. While API Key is used for accessing content using external APIs like GraphQL, the personal token is for caisy's internal APIs.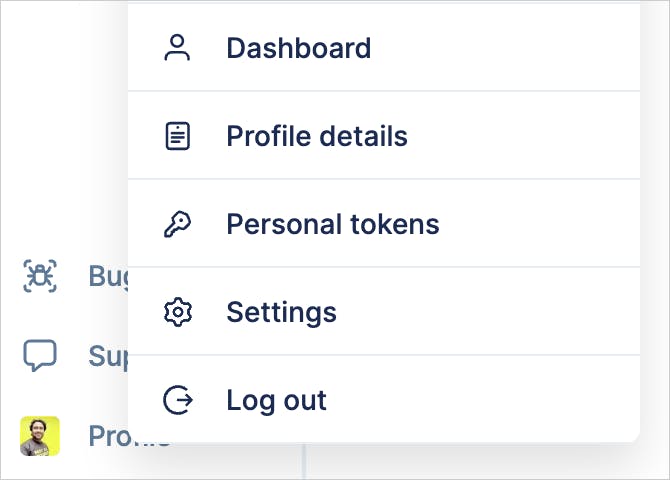
That's great! We are now done with setting up the data layer using caisy. We know how to use the GraphQL playground to form the fetch queries and mutations. We know how to get the API Key. Now, we start diving into the application building using the Next.js app router and GraphQL.
Build the course management UI using the Next.js app router and GraphQL.
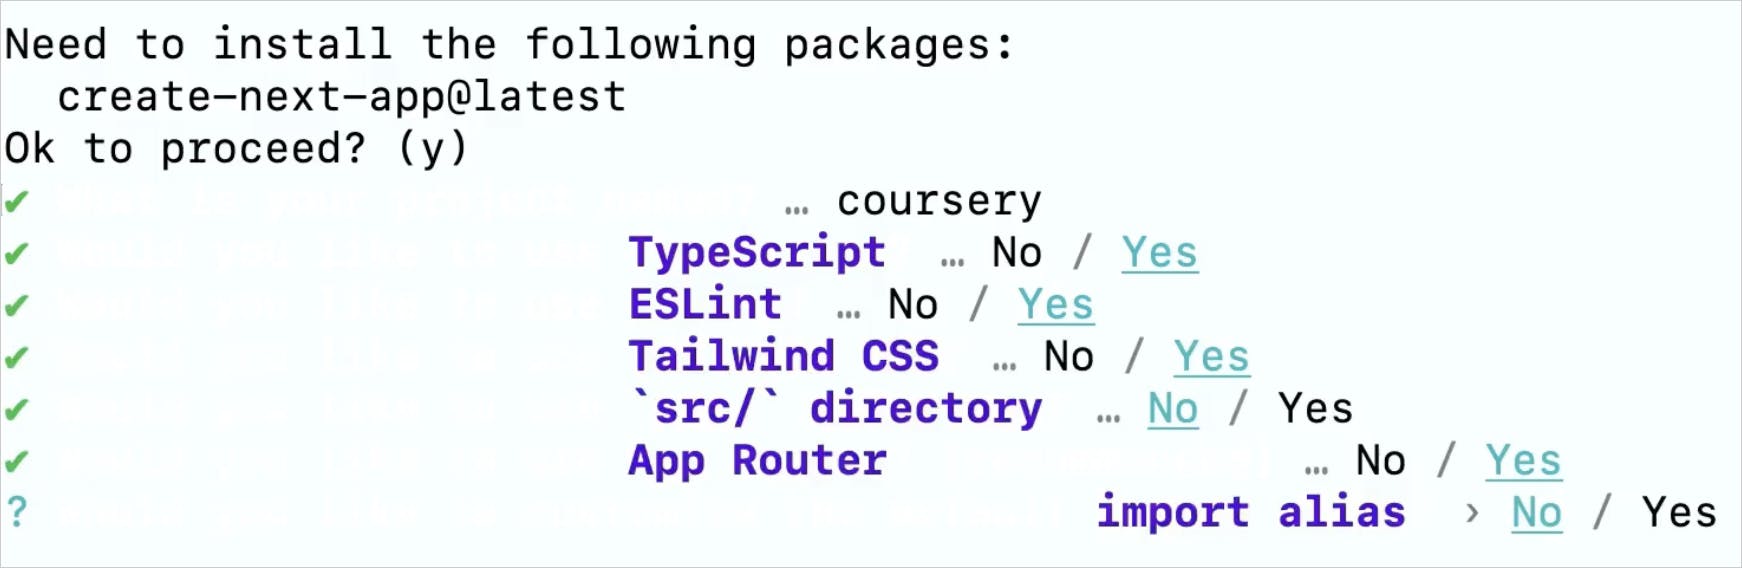
Open a terminal/command prompt and use the following command to create a Next.js project using App router support.
npx create-next-app@latest
It will ask you a few simple questions. Answer them to create the project.
You can use your favourite editor to import the project and get started. First, create a .env.local file at the root of your project folder and create these environment variables.
CAISY_PROJECT_ID=<YOUR_CAISY_PROJECT_ID>
CAISY_API_KEY=<YOUR_CAISY_PROJECT_API_KEY>
Make sure you provide the project id and the API KEY from your caisy project. We have already learned how to get both of them from the caisy app.
Create a GraphQL client
We will now write the code to interact with the content in caisy using the GraphQL API. We will need a GraphQL client to make the API calls and handle request-response.
Install these two dependencies using the following command:
npm install graphql graphql-request
Next, create a folder called service at the root of the project. Now, create a file graphQLClient.ts under the service folder with the following content.
import { GraphQLClient } from "graphql-request";

export const getClient = (preview: boolean): GraphQLClient => {
  const headers: any = {
    "x-caisy-apikey": process.env.CAISY_API_KEY!,
  };
  if (preview) {
    headers["x-caisy-preview"] = "true";
  }
  const client = new GraphQLClient(
    `https://cloud.caisy.io/api/v3/e/${process.env.CAISY_PROJECT_ID}/graphql`,
    {
      headers: headers,
    }
  );

  return client;
}
Here, we export a simple function called getClient() that creates a GraphQLClient using the API URL. Notice the API URL uses the project ID from the environment variable. We must pass a mandatory header x-caisy-apikey with the API Key value from the environment variable. Finally, we return the client.
Data Fetching using GraphQL
We will use the GraphQL client to interact with the content in caisy and fetch the courses. Create a folder called data at the root of the project folder. Create a file course.tsx under the data folder with the following content.
import { gql } from "graphql-request";
import { getClient } from '@/service/graphQLClient';

/**
 * Get all the courses from the data store
 * @returns An Array of course data
 */
export const getAllCourses = async() => {
  const client = getClient(false);
  const gqlResponse: any = await client.request(
    gql`
      query allCourses {
        allCourses {
          totalCount
          edges {
            node {
              name
              id
              slug
              category
              price
              cover {
                src
              }
            }
          }
        }
      }
    `
  );

  return {
    data: gqlResponse?.allCourses?.edges || [],
    totalCount: gqlResponse?.allCourses?.totalCount || 0,
  };
}
Let's go over the code.
We first import
gqlfrom thegraphql-requestlibrary. We will use it for the GraphQL query.Next, we import the GraphQL Client we created before.
The async function
getAllCourses()gets the client, forms the query, and makes a request using the query.We get a GraphQL response on a successful request completion.
Finally, we destructure the response and return the
dataand thetotalCountfor the course data and total number of courses, respectively.
We can get an individual course using a course ID or slug. Look at the code snippet below to get a course by slug. You can add this function to the course.tsx file.
/**
 *
 * @param slug Get a Course information by the slug
 * @returns A Course data object
 */
export const getCourse = async(slug: String) => {
  const client = getClient(false);
  const gqlResponse: any = await client.request(
    gql`
      query allCourses($slug: String) {
        allCourses(where: { slug: { eq: $slug } }) {
          edges {
            node {
              comments {
                ... on Comments {
                  id
                  email
                  name
                  rating
                  commentedOn
                  data{
                    json
                  }
                }
              }
              cover {
                src
              }
              description {
                json
              }
              duration
              id
              link
              name
              category
              price
              publishedOn
              type
              updatedOn
            }
          }
        }
      }
    `,
    { slug: slug }
  );

  return {
    data: gqlResponse?.allCourses?.edges?.[0]?.node || {},
  };
}
The code is almost similar to the function of getting all courses. Here, we use a slug to fetch a specific course. So, we must pass the slug as a variable to the request.
The Courses Page using Next.js App Router
At the core of the Next.js app router, it uses a new paradigm called React Server Components. If you are new to it, I highly recommend this video to learn about RSC(React Server Component) with examples.
At a high level, with RSC, the components are nearer to the server than the client. That allows the RSC to use the async function and call the server-side APIS directly into the components without any network roundtrips.
In Next.js, all the pages, layouts, and components are server components by default. To create a client component, you need to mark it explicitly using the 'use client' directive.
The Next.js app router skeleton project code comes with the top-level layout and route. Expand the app folder and open the layout.tsx file. It is a Layout file for a page located close to it. You will also find a page.tsx file at the same level as the layout file. Next.js will take care of applying this layout to the colocated page automatically.
Now, replace the content of the layout.tsx file with the following content.
import "./globals.css";

import type { Metadata } from "next";
import { Inter } from "next/font/google";

const inter = Inter({ subsets: ["latin"] });

export const metadata: Metadata = {
  title: "Coursery",
  description: "Get all the courses by tapaScript",
};

export default function RootLayout({
  children,
}: {
  children: React.ReactNode;
}) {
  return (
    <html lang="en">
      <body className={inter.className}>
        {children}
      </body>
    </html>
  );
}
Here, we have provided relevant metadata information for our application. Also, notice the children prop gets passed to the layout. It is the colocated page. If you want to add a Navbar or Footer, you can add them to the layout.
Now open the page.tsx file under the app folder. This file creates the top-level route(/). Replace the content of the file with the following content.
import Link from 'next/link';
import Image from 'next/image';

import { getAllCourses } from '@/data/course';
import Search from './components/Search';
import FeaturePrice from './components/FeaturePrice';

export default async function Home() {
  const courses: any = await getAllCourses();

  return (
    <main>
      <div className='container mx-auto px-4'>
        <Search />
        <div className='flex flex-wrap items-center'>
        {
          courses?.data?.map((course: any, index: number) =>(
            <Link
              key={course?.node?.id}
              href={`/${course?.node?.slug}`}
              className='md:flex md:flex-col md:mr-8 w-full md:w-[calc(50%-1rem)] lg:w-[calc(23.7%-1rem)] even:mr-0 lg:even:mr-8 mb-8 h-auto border-solid border-2 border-gray-300 rounded'>
                <div>
                  <FeaturePrice price={course?.node?.price}/>
                  <Image
                    src={course?.node?.cover?.src}
                    alt="Picture of the author"
                    width={320}
                    height={300}
                    className='w-full h-auto'
                  />
                  <div className='p-2'>
                    <p className='text-sm bg-gray-100 border border-gray-500 rounded-lg p-1 mb-1 font-semibold w-max'>{ course ?.node?.category }</p>
                    <h2 className='text-xl'>{ course?.node?.name }</h2>
                  </div>
                </div>
            </Link>
          ))

        }
        </div>
      </div>
    </main>
  )
}
A few points need your attention here:
The component is an async component.
It is making the GraphQL call directly. You do not need any
useEffectoruseStateto manage things like before. You also do not need the complexity of thegetStaticPropsandgetserversidepropsof the earlier version of Next.js.We iterate over the courses and create a card layout for each course using its cover image, name, and category.
Each course card is linked to a dynamic URL(route).
We have imported two components
SearchandFeaturePriceto show a search bar at the top and a price tag on each of the course cards.
Create a folder called components and add a file Search.tsx with the following content:
"use client";

export default function Search() {

  return(

    <div className="flex mt-3 mb-3 w-full justify-center">
      <label htmlFor="search-id"></label>
      <input
        className="border-2 border-gray-200 rounded-lg w-full py-2 px-4 text-gray-700 leading-tight focus:outline-none focus:bg-white focus:border-purple-500"
        id="search-id"
        type="text"
        placeholder="Search a Course by Name"

      />
    </div>
  )
}
Please note Search is a client component, and we have marked it using the 'use client' directive. As we will need a client interaction like a key-down search on the search textbox, it can not be a server component. The search functionality is not implemented here; I am leaving it to you to improvise and add.
Now, create a file FeaturePrice.tsx under the components folder with the following content:
const FeaturePrice = ({price}: {price: number}) => {
  return (
    <>
      {
        <div className="flex justify-end">
          <div className="z-10 py-2 px-3 text-xs bg-green-500 absolute text-center text-gray-900 font-bold uppercase leading-tight tracking-normal shadow-lg">
            {price === 0 ? 'FREE' : `$${price}`}
          </div>
        </div>
      }
    </>
  );
};

export default FeaturePrice;
It is a simple component that takes course price as a prop and shows it like a price tag on each course card.
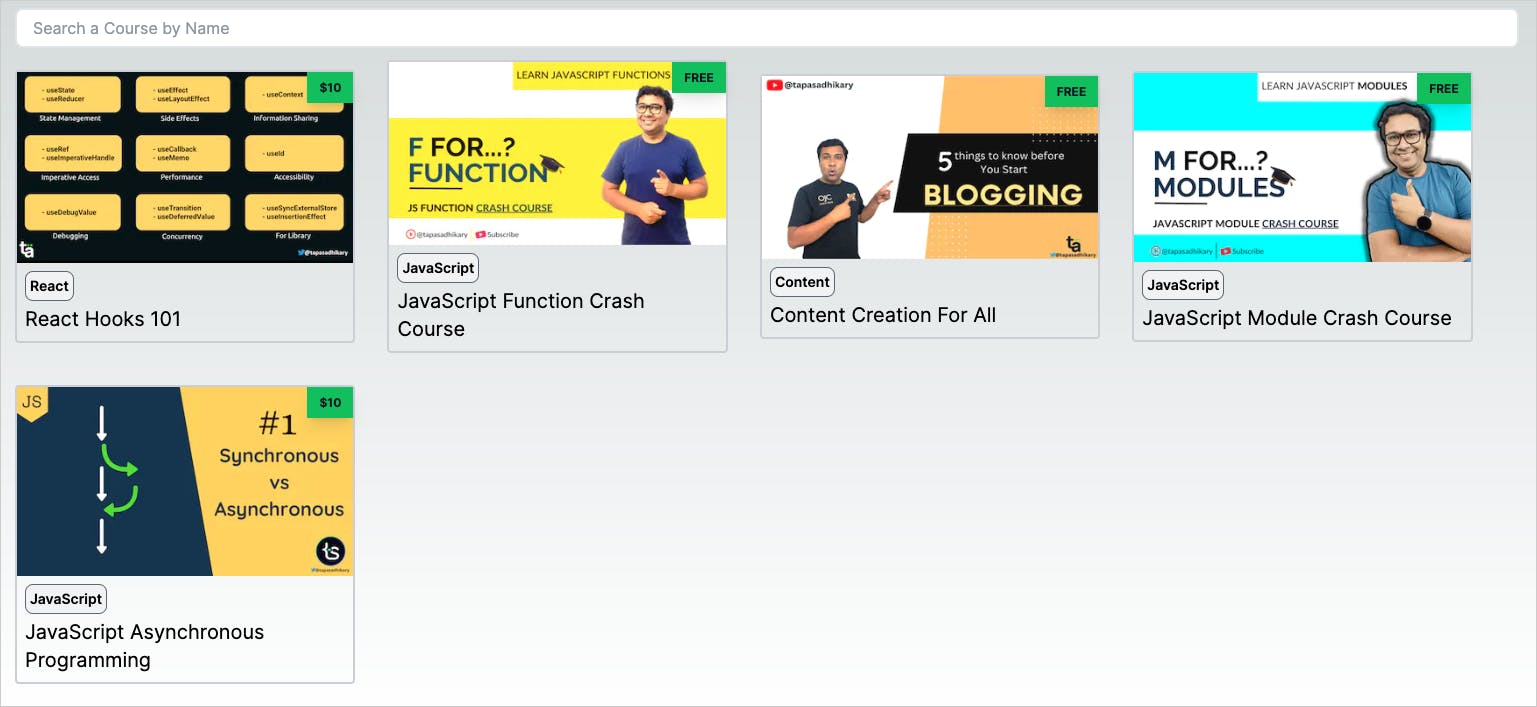
Make sure you are running the app locally. If not, use the yarn dev command to run the app locally. Now, open your browser and access the app on http://localhost:3000. You should see the content from caisy rendering on the page. In my case, the home page shows all the five courses' content I had created in caisy.
The Individual Course Page
Now, we will create a dynamic route. Whenever someone clicks on the course cards on the home page, it goes to a 404 page. Let's fix that.
Each of the courses has a slug property, and it is dynamic. Create a folder named [slug] under the app folder. The [slug] folder defines a dynamic route. We must create a page.tsx file under the [slug] folder to define the page for the dynamic route.
Create the page.tsx file under the [slug] folder with the following content.
import Image from 'next/image';
import { RichTextRenderer } from "@caisy/rich-text-react-renderer";
import { getCourse } from '@/data/course';
import YoutubeEmbed from '@/app/components/YouTubeEmbed';
import Rating from '../components/Rating';

import { BsFillClockFill } from 'react-icons/bs';
import {IoPricetags} from 'react-icons/io5'
import Link from 'next/link';


export default async function CoursePage({params}: {
  params: {slug: string}
}) {

  const course: any  = await getCourse(params?.slug);
  const comments: any = course?.data?.comments;

  const cummulativeRating = comments.reduce((accumulator: number, comment: any) => accumulator + comment.rating, 0);
  const avgRating = comments.length > 0 ? Math.ceil(cummulativeRating/comments.length) : 0;

  return(
    <div className='p-2 flex flex-col justify-center'>
      <div>
        <h2 className='text-4xl font-semibold mt-2 mb-2'>{ course?.data?.name}</h2>
        <div className='text-xl mb-2 p-2'>
          {course?.data?.description?.json
          && <RichTextRenderer node={course?.data?.description?.json} />}
        </div>
      </div>

      <YoutubeEmbed src={course?.data?.link} />

      <div className='flex flex-col flex-wrap items-center mb-2'>
        <div>
           {avgRating === 0 ? 'No Rating Available' : <Rating count={avgRating} size={32}/>}
        </div>

        <div className='flex'>
          <div className=' flex mr-7 p-1'>
            <IoPricetags size={24}/>
            <p className='text-lg ml-1'>
              <Link
                href="https://paypal.me/greenrootsinfo"
                target='_blank'>
                Get it for <strong>{course?.data?.price === 0 ? `Free` : `$${course?.data?.price}`}</strong>
              </Link>
            </p>
          </div>
          <div className='flex p-1'>
            <BsFillClockFill size={20}/>
            <p className='text-lg ml-1'>{ `${course?.data?.duration} minutes` }</p>
          </div>
        </div>
      </div>

      <div className='flex flex-col'>
        <div className='mt-2 mb-2'>
          <ul className='text-xl mb-2'>{comments.length} Comments</ul>
          <div className=' bg-gray-100 mb-6 flex flex-wrap'>
          {
            comments.length > 0 ? (
              comments.map((comment: any) => (
                <li className='m-2 bg-white max-w-xl rounded-2xl px-10 py-8 shadow-lg hover:shadow-2xl transition duration-500' key={comment?.id}>
                  <Rating count={comment?.rating} size={24}/>

                  <div className="mt-4 text-md text-gray-600">{comment?.data?.json && <RichTextRenderer node={comment?.data?.json} />}</div>

                  <div className="mt-4 flex items-center space-x-4 py-6">
                    <div>
                      <img className="w-12 h-12 rounded-full" src="https://xsgames.co/randomusers/avatar.php?g=male" alt="" />
                    </div>
                    <div className="text-sm font-semibold">{comment?.name} • <span className="font-normal"> {comment?.commentedOn} </span></div>
                  </div>

                </li>
              ))
            ) : (<p>No Comments Yet! Add One.</p>)
          }
          </div>
        </div>
      </div>
    </div>
  )
}
Things to note here:
You can destructure the slug from the params passed to the component by Next.js.
This is also an async component as it makes an asynchronous call to get course details by the slug.
Rest all is about using the course response to render the details.
The
YoutubeEmbedandRatingare two simple components you can find here.But a couple of things to pay attention to. We have imported the RichTextRenderer to handle the response from caisy's rich text editor and a bunch of react—icons icons. So, we need to install these dependencies.
npm install @caisy/rich-text-react-renderer react-icons
That's it. Now, access a course by clicking on it from the home page. You should see the details page with the course information like this:

Conclusion & What's Next?
So, to recap:
We have created content in caisy
We have exposed them using GraphQl API
We have used it in the Next.js app router and built a few pages(including dynamic routes).
All the source code used in this tutorial is in my GitHub repository. It is an open-source project, so feel free to check out, enhance, and use it.
Please give the project a star(⭐) if you like the work
Tasks for you
If you have come so long reading and implementing things, here are a few tasks to improve your understanding. You may try all or some of them if you wish.
Add the functionality of posting a comment for a course. The code is already placed in the above repo for reference.
Fork and Contribute to the above Open Source repo
Make the search functionality work.
Make the look and feel better.
Make the navbar work in the responsive mode.
Add a checkout system to buy a course.
Deploy the project and share it on social media, tagging me.
Before We End...
That's all. Thanks for reading it. I hope it was insightful. If you liked the tutorial, please post likes and share it in your circles.
Let's connect. I share web development, content creation, Open Source, and career tips on these platforms.