Comment system using React and GitHub Discussions
Learn how to add a comment system in your ReactJS app using GitHub Discussions. It allows the authenticated users to post comments.

Co-Founder, @CreoWis | Teacher, @tapaScript | Founder, @ReactPlay | YouTuber | Writer | Human
Introduction
In a user-centric application, users should get a chance to express themselves. Users need the ability to provide comments and feedback about certain things in your application. The Comment System is a powerful feature to add to your applications/websites but not a very straightforward one to build from scratch.
Fortunately, established services can plug and play a comment tool in your application. For example, Disqus, Facebook Comments, Cackle, and Metype are a few. One more smart tool called Giscus allows you to use GitHub's Discussions feature as a comment system, and it works well.
Meet Giscus
Giscus is an open-source comment system that uses GitHub's Discussions feature under the hood. It is easy to configure with a few properties such that users can comment, post reactions and all that get mapped to Discussions of a GitHub repository.
Giscus is ads-free, supports theming, is highly customizable, and you can host your own instance too. You just need the following code snippet to enable Giscus in your application,
<script src="https://giscus.app/client.js"
        data-repo="[ENTER REPO HERE]"
        data-repo-id="[ENTER REPO ID HERE]"
        data-category="[ENTER CATEGORY NAME HERE]"
        data-category-id="[ENTER CATEGORY ID HERE]"
        data-mapping="pathname"
        data-reactions-enabled="1"
        data-emit-metadata="0"
        data-input-position="bottom"
        data-theme="light"
        data-lang="en"
        crossorigin="anonymous"
        async>
</script>
Now we will learn how to set up and integrate Giscus in a React-based application, and while doing that, we will understand each of the attributes mentioned in the above code snippet.
Initial Setups
First, create a GitHub repository that Giscus should connect for saving comments and reactions. Go to the Settings tab of the repository and find the Discussions option under the General settings.
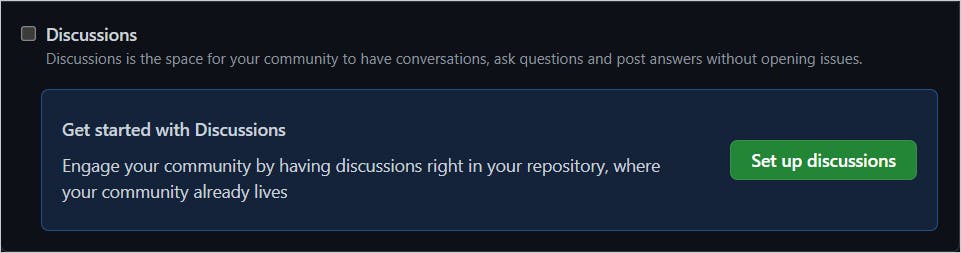
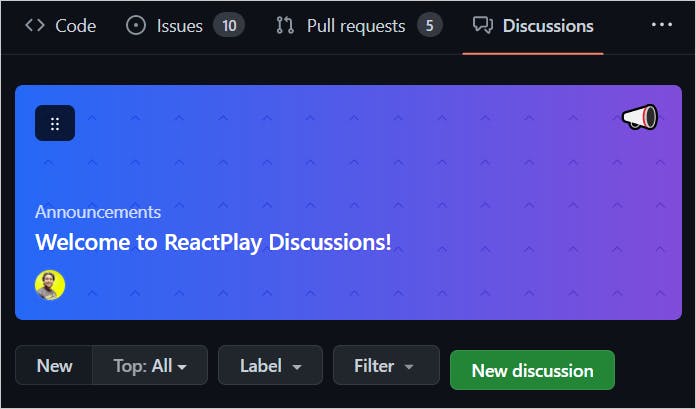
Check the checkbox and click on the Set up discussions button to start the Discussions feature. It will create a new Discussions tab for your repository.
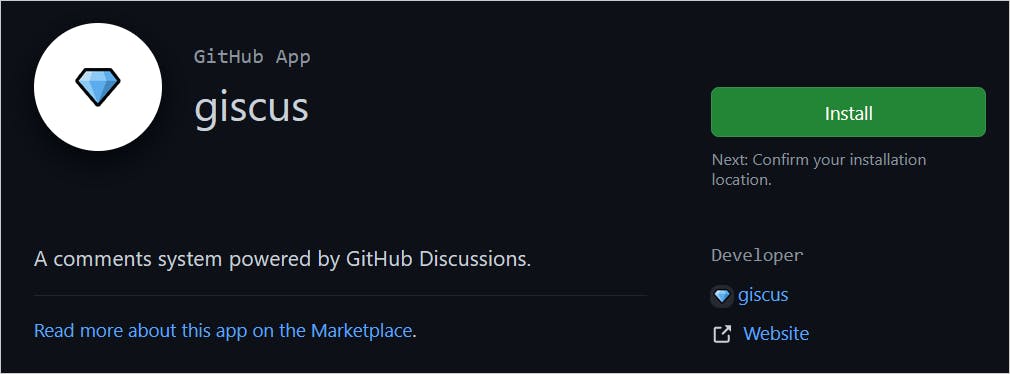
We need to install the Giscus app on your GitHub repository. Go to Giscus app page and click on the Install button.
If you have multiple organizations for one GitHub account, you can select the organization to proceed to the installation.
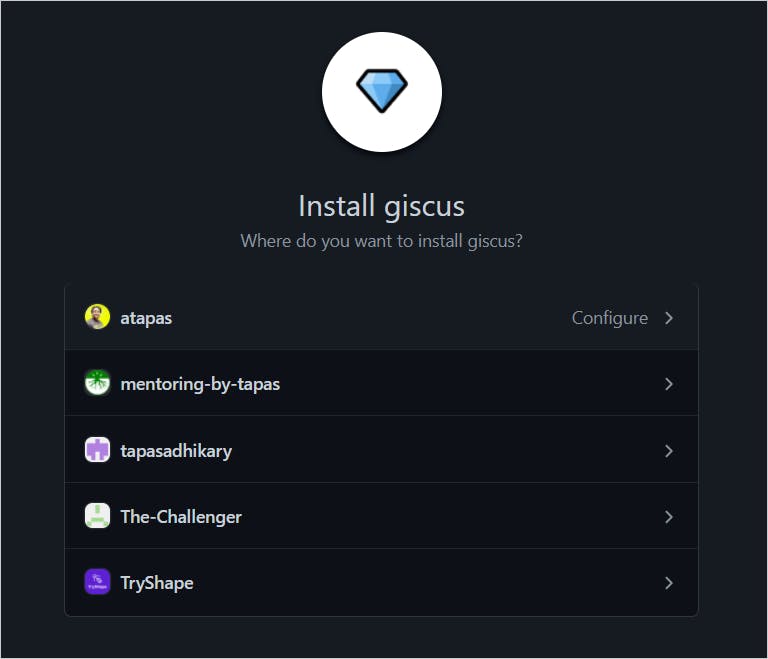
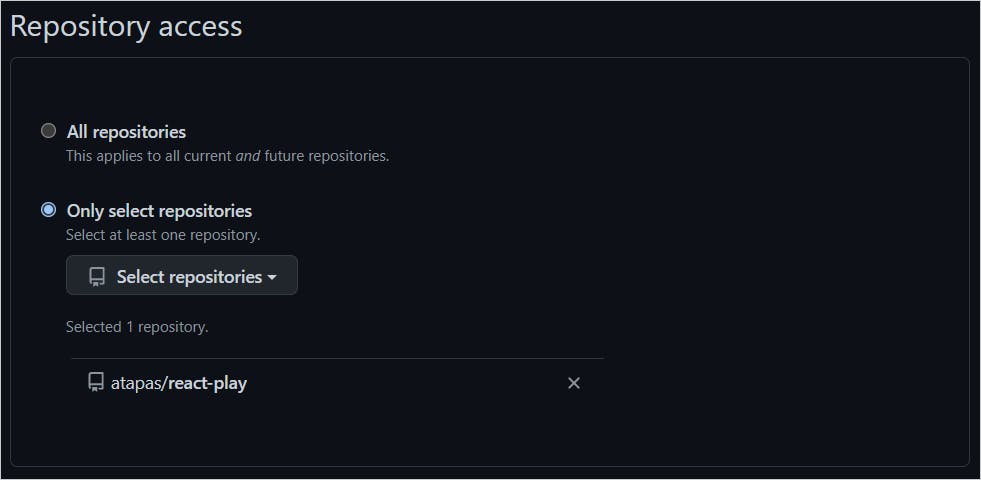
Finally, select the repositories you want the Giscus tool to install on. Alternatively, you can install it on all your repositories.
React Component for Giscus
Giscus has wrappers for React, Vue, Svelte, and Web Components. All the wrappers are available under the giscus-component project. For the React apps, first, install the wrapper using the npm or yarn command,
npm i @giscus/react

# Or

yarn add @giscus/react
Next, import the Giscus component from the wrapper library into your component,
import Giscus from '@giscus/react';
Finally, you can use the Giscus component like this,
export default function MyApp() {
  // some code
  return (
    <Giscus
      id="comments"
      repo="[ENTER REPO HERE]"
      repoId="[ENTER REPO ID HERE]"
      category="[ENTER CATEGORY NAME HERE]"
      categoryId="[ENTER CATEGORY ID HERE]"
      mapping="pathname"
      reactionsEnabled="1"
      emitMetadata="0"
      inputPosition="top"
      theme="light"
      lang="en"
      loading="lazy"
    />
  );
}
Let's understand each of these attributes defined in the Giscus component.
id: An unique identifier. Any alphanumeric string.repo: The repository's name you have installed the Giscus app and want to connect to it.repoId: The unique identifier of your repository.category: The discussion category name under which Giscus must create the comments.categoryId: The id of the discussion category.mapping: It is a mapping between your application page and the discussion. The values can be path, URL, title, og:title, a specific term, or a number.reactionsEnabled: If set to1, you will be able to add reactions with emojis. Setting the value0will not show the reaction option.emitMetadata: If set to1, Giscus will send the discussion metadata periodically to your application page.inputPosition: Based on the value set to it, you can position the comment input field at the top or bottom of the existing comment list.theme: The theme can be light, dark, high contrast, or any custom theme.lang: It supports 15+ languages. Specify the language giscus will be displayed in.loading: If you set the valuelazy, comments loading will be delayed until the user scrolls near the comments container.
So as we know about them now, you may wonder how do we get information about these three attributes?
repoId: The unique identifier of your repository.category: The discussion category name under which the comments must be created.categoryId: The id of the discussion category.
Alright, let's learn that.
How to get the GitHub Repository and Discussion Information
GitHub provides GraphQL APIs to query these details. You can use the GitHub GraphQL Explorer to find these details. You must authenticate yourself with your GitHub credentials to use this explorer.
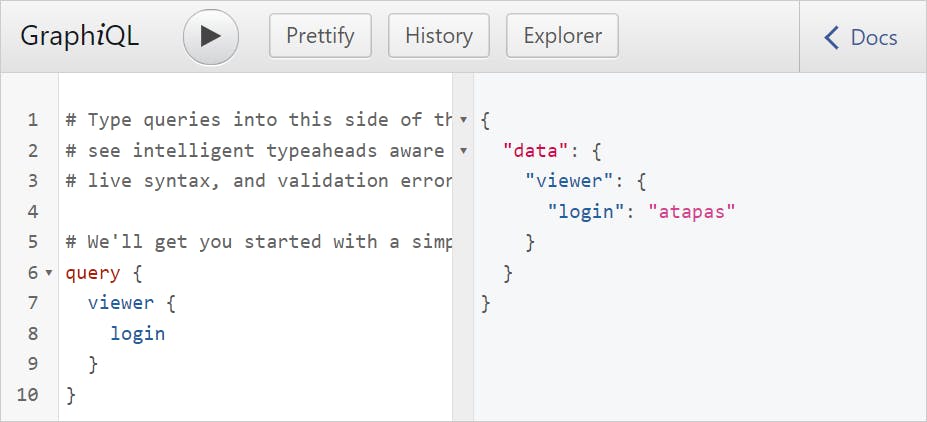
Try the following query to fetch the repository id, discussion category name and category id for a repository. Please replace the <REPOSITORY-NAME> and <GITHUB-USER-NAME> with your repository name and user name.
query {
  repository(name:"<REPOSITORY-NAME>", owner: "<GITHUB-USER-NAME>"){
   id
    discussionCategories(first:10) {
      edges {
        node {
          id
          name
        }
      }
    }
  }
}
You will get a JSON response with the repository id(starts with R_), discussion id(starts with DIC_) and name. Pick one discussion category you want to use in the Giscus configuration to create the comments under it. For example, you can select the General category name and id. You can also create a custom discussion category from GitHub's Discussions tab and use that instead.
{
  "data": {
    "repository": {
      "id": "R_l4AEGpo4qw",
      "discussionCategories": {
        "edges": [
          {
            "node": {
              "id": "DIC_kwYOGpo4q04DAp3f",
              "name": "Announcements"
            }
          },
          {
            "node": {
              "id": "DIC_kwYOGpo4q04DAp1g",
              "name": "General"
            }
          },
          {
            "node": {
              "id": "DIC_kwYOGpo4q04DApxi",
              "name": "Ideas"
            }
          }
        ]
      }
    }
  }
}
Note: All the IDs shown above are tampered so, do not try to use them. They will not work.
Comment System - Bring Everything Together
Now let us use these values in the React app. It is better to keep this sensitive information in the environment variable and not make it public. For example, if you are using create-react-app to build your React project, you can keep them in a .env file,
REACT_APP_GISCUS_PROJECT_REPO=react-play
REACT_APP_GISCUS_PROJECT_REPO_ID=R_l4AEGpo4qw
REACT_APP_GISCUS_DISCUSSION_CATEGORY_ID=DIC_kwYOGpo4q04DAp1g
REACT_APP_GISCUS_DISCUSSION_CATEGORY_NAME=General
Again, all the above ids are imaginary or tampered with. Please don't use them as-is. Next, use these in the React component,
import Giscus from "@giscus/react";

const Comment = () => {
  const projectRepo = process.env.REACT_APP_GISCUS_PROJECT_REPO;
  const projectRepoId = process.env.REACT_APP_GISCUS_PROJECT_REPO_ID;
  const discussionCategoryId =
    process.env.REACT_APP_GISCUS_DISCUSSION_CATEGORY_ID;
  const discussionCategoryName =
    process.env.REACT_APP_GISCUS_DISCUSSION_CATEGORY_NAME;

  return (
    <>
      <Giscus
        id="comment-id"
        repo={projectRepo}
        repoId={projectRepoId}
        category={discussionCategoryName}
        categoryId={discussionCategoryId}
        mapping="pathname"
        reactionsEnabled="0"
        emitMetadata="0"
        inputPosition="top"
        theme="light"
        lang="en"
        loading="lazy"
      />
    </>
  );
};

export default Comment;
That's it. Now, you will see the comment widget appearing on your application page.
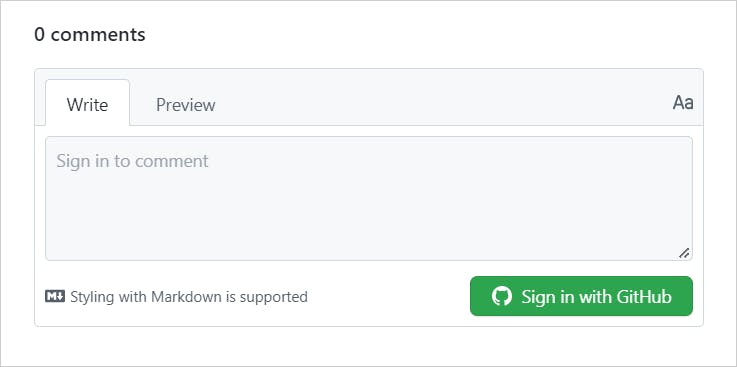
You need to sign in with GitHub to post a comment.
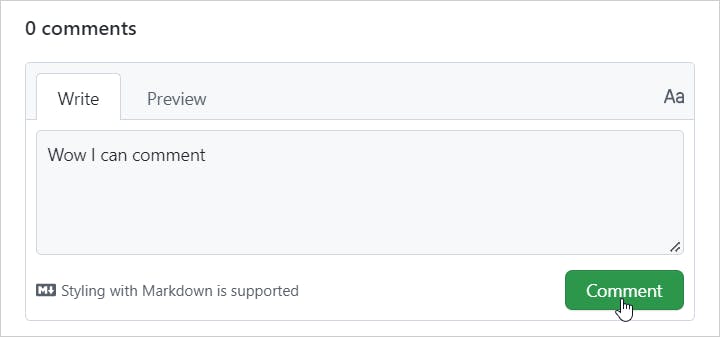
Once you start posting the comments, you can see them appearing in the comment widget.
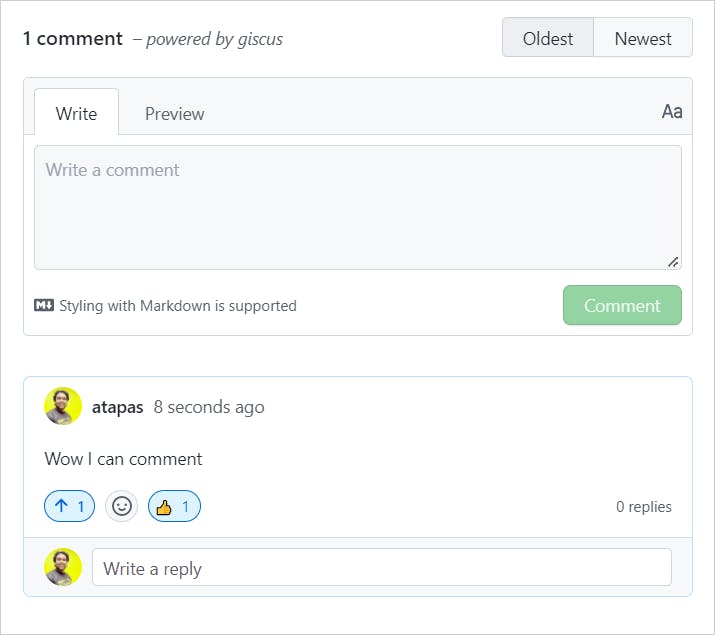
You can see these comments on your repository's discussion page and, if needed, can moderate/delete them.
That's all. I hope you use these steps well and integrate the Giscus comment system with your application.
Before I wrap up, it's time to thank a few people. Thank you, Edo for letting me know about Giscus while searching for a comment system to integrate with ReactPlay. Thanks to Melvin for writing this piece. It helped me learn about the GitHub GraphQL API and how to get the repository and discussion category ids. You folks are fantastic.
What's Next
Here is something for you:
Learn React, Practically
I've been developing professional apps using ReactJS for many years now. My learning says you need to understand ReactJS fundamentally, under the hood to use it practically.
With that vision, I have created a ReactJS PlayLIst that is available for the developer community for FREE. Take a look:
🌐 Web Development(JavaScript, ReactJS, Next.js, Node.js, so on...)
🛡️ Web Security
💼 Career Development
🌱 Opensource
✍️ Content Creation
Let's connect,