
Step by Step Guide: Blend Redux with ReactJs

Co-Founder, @CreoWis | Teacher, @tapaScript | Founder, @ReactPlay | YouTuber | Writer | Human
Introduction
This is the second post of the series: A blend of Redux and ReactJs - State Management Made Easy!
If you are already comfortable with the core concepts of Redux, great! If you are just getting started with Redux, I would like to encourage you to read the first post of the series from here:
Redux and ReactJs: Let us build a Counter app
As the saying goes, "Small change wins equal Big things", let us focus on a small and simple app, Counter App using Reactjs and Redux concepts. In the future post of the series, we will make the same app bit more complex and fun.
Here is a sneak peek at it. It is as simple as this:
Build it Step by Step - Get the foundation ready
We will be using the Create React App to build a new reactJs application so that, we focus on the learning at hand than other nitty-gritty.
✔️ Create the app structure and switch to the app directory.
 npx create-react-app blend-redux-react
 cd blend-redux-react/
✔️ Install redux and react-redux libraries.
yarn add redux react-redux --save
react-redux is the official React bindings for Redux. The recent update with hooks makes things unbelievably simpler as we will see in a while.
At this time, your package.json file must have these(the versions may differ though):
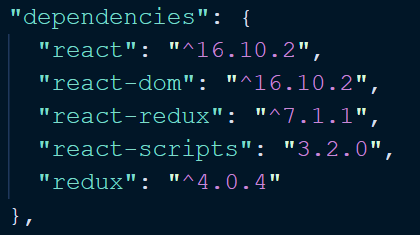
✔️ Clean up: As the create-react-app comes with lots of boilerplate that we will not be using, let us do some cleanup. Remove things from the App.js file such that, it has only these:
import React from 'react';

function App() {
  return (
    <div className="App">
      <h1> Blend Redux with ReactJS </h1>
    </div>
  );
}

export default App;
Time to start the app by doing:
yarn start
This should launch the browser and up the app @ http://localhost:300:
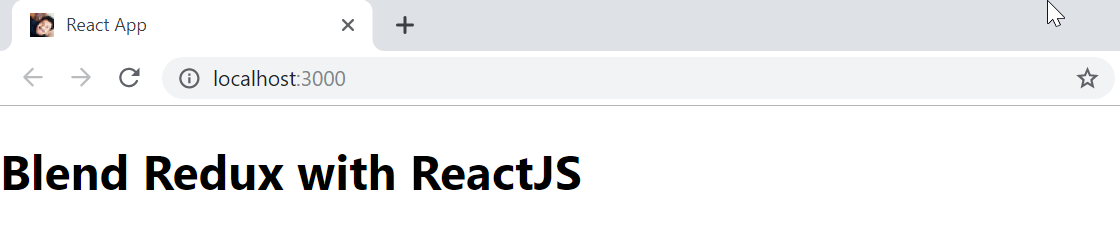 Counter App at the beginning
Build it Step by Step - Include Redux to the App
We have installed redux in the previous step. We will first create two fundamental components of redux, action and reducer.
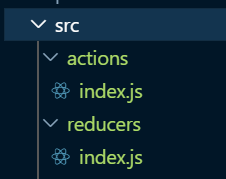
✔️ Create two folders called actions and reducers under src and create the files as shown in this image:
✔️ Modify the index.js file under the actions folder and add the following actions:
export const increment = () => {
    return {
        type: 'INCREMENT'
    }
};

export const decrement = () => {
    return {
        type: 'DECREMENT'
    }
};
For our Counter app, we need two actions, INCREMENT and DECREMENT.
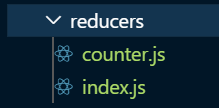
✔️ We are all set with the actions. Let's create the reducer. As you have seen in the React core concepts post, reducers are actually responsible to execute the actions and change state. We will be creating a reducer to increment and decrement Counts.
create a file called counter.js as shown in the picture below:
Let's create a reducer as:
const counterReducer = (state = 0, action) => {
    switch(action.type) {
        case 'INCREMENT':
            return state + 1;
        case 'DECREMENT':
            return state -1;
        default:
            return state;
    }
}

export default counterReducer;
Few things going on here,
- The count state is initialized to zero.
- We have actions as an additional parameter so that, we can increment and decrement the state based on the action's
type. - If no actions performed, we just return the default state value which is zero.
✔️ Cool, so we have our reducer ready. But wait, what if we have multiple reducers in our app? Can we combine them into one so that, it can be exported and imported as one?
Why not? We can use combineReducers from redux to achieve the same. Modify the index.js file under the reducers folder to add this code:
import counterReducer from './counter';
import { combineReducers } from 'redux';

const allReducers = combineReducers({
    counter: counterReducer
});
Note: We are creating a key for counterReducer so that, we can use that short-hand key to call our reducer. We will see that in a while. Imagine we have another reducer called, 'userReducer'. In that case, the allReducers to be created as,
const allReducers = combineReducers({
    counter: counterReducer,
    user: userReducer
});
Build it Step by Step - How about the Store?
Right, How about the Store? Where do we create it? Remember, we want to create the store and make it available to the entire app? This thought takes us to index.js where we are bootstrapping the app as,
ReactDOM.render(
        <App />,
    document.getElementById('root')
);
✔️ First thing first, let's create a Redux Store so that we can Provide the store to App.
import { createStore } from 'redux';
import allReducers from './reducers';

const store = createStore(allReducers);
So we are using our reducers and creating a Store.
✔️ Provide the Store to the App: As we explained that react-redux is a binder of React with Redux, it gives a mechanism(using Provider) to provide the store to your react components. Here is how we provide the store to our App component by adding this code to the index.js file.
import { Provider } from 'react-redux';

ReactDOM.render(
    <Provider store={store}>
        <App />
    </Provider>,
    document.getElementById('root')
);
Build it Step by Step - Let's wrap things up in App.js
Well, we have created the Actions, Reducers, and Store. The store is also made available to our App component. Let's use it and build an interactive Counter.
✔️ In App.js file, let us add 2 buttons one for increment and another for decrement. We will also add a placeholder for printing the Counter value as below:
return (
    <div className="App">
      <h1> Blend Redux with ReactJS</h1>
      <h1>Counter: 0</h1>
      <button>+</button>
      <button>-</button>
    </div>
  );
✔️ We will be using two special hooks from react-redux to,
- Retrieve State from the Store for reading it.
- Dispatching an action such that, the reducer act on it based on the type of actions.
So, let is import them first:
import { useSelector, useDispatch } from 'react-redux';
Also import the actions as we have to dispatch to them on button clicks. Here is how the App component looks like:
import { increment, decrement} from './actions';
import { useSelector, useDispatch } from 'react-redux';

function App() {
  const counter = useSelector(state => state.counter);
  const dispatch = useDispatch();
  return (
    <div className="App">
      <h1> Blend Redux with ReactJS</h1>
      <h1>Counter: {counter}</h1>
      <button onClick={() => dispatch(increment())}>+</button>
      <button onClick={() => dispatch(decrement())}>-</button>
    </div>
  );
}
That's all! The button click will dispatch the actions. Dispatching Actions will change the state in the Store using the Reducer. We select the counter state value and render it in our component.
How about Debugging?
You can debug this app the same way you would debug any React based web app. But here is an awesome Chrome Extension for Redux.
- Install it from here for Chrome Browser.
- Now you can find it under Chrome Developer Tool options as
Redux. Modify your
createStorecall inindex.jsfile this way to enable the debugger option for your app,// Pay attention to the second parameter. const store = createStore( allReducers, window.__REDUX_DEVTOOLS_EXTENSION__ && window.__REDUX_DEVTOOLS_EXTENSION__() );
With this, you will be able to track the State changes and debug things with ease. Here is a demonstration of the Counter app we just built.
Code
All that we have done so far can be found in my GitHub Repo.
Hope you liked the post. In the next post, we will structure the app with more components and manage the state in a more complex scenario. Stay Tuned.