
How to Deploy your Sails.js app on Heroku and live longer

Co-Founder, @CreoWis | Teacher, @tapaScript | Founder, @ReactPlay | YouTuber | Writer | Human
Introduction
Continuous integration (CI) and Continuous delivery/deployment (CD) are important modern development practices. As developers, just limiting ourselves in the boundary of implementation is not fair. A neat build process, tool integration, deployment, test and delivery - we have a stake in all of these.
In this post, we will learn about getting started with a famous framework called, Sails.js(aka, sailsJS) and how to integrate and continuously deploy the changes to a hosted service called, Heroku.
This is going to be a fun learning, keep reading 👇👇👇.
Sails.js

Sails.js is a data-oriented, modern, frontend agnostic, MVC based framework to build custom, enterprise-grade Node.js apps. The MVC pattern is based on Socket.IO and Express.
Using Sails.js framework you should be able to:
- Automatically generate REST APIs from models.
- Connect to multiple databases supported out-of-the-box.
- Write policies to provide security.
- Support WebSockets for real time app development.
- Build MVC based architecture.
- Build Web Application.
I will strongly encourage you to look into the Sails.js documentation and architecture to understand it better.
Let's Build a Sails.js app in record time
Ok, enough of theory so far. Let us see things in action.
We will be building a small app based on Sails.js. Our app will expose a REST endpoint(say, users) using an API(say, /api/users) to fetch user data from a store(say, JSON store in our example). Let us do it in next couple of minutes!
Install Sails.js
npm install sails -g
Create a sails project
There are few ways to create a sails project. You can opt for a full web application using sails or you may want to create the project without any web application related files. As our app deals with the REST API, we will go with the latter case:
sails new test-rest-app --no-frontend
This will create a project structure for you. The project structure will look like this:
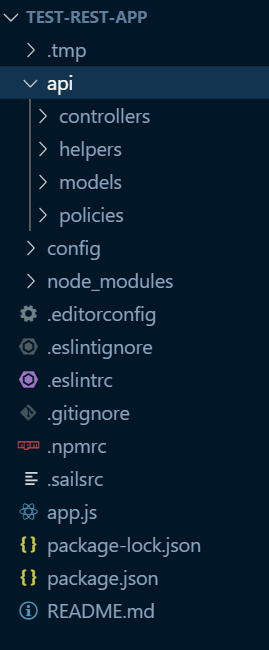
First run
Change to the project directory
cd test-rest-app
and run this command
sails lift
You should see the output as:
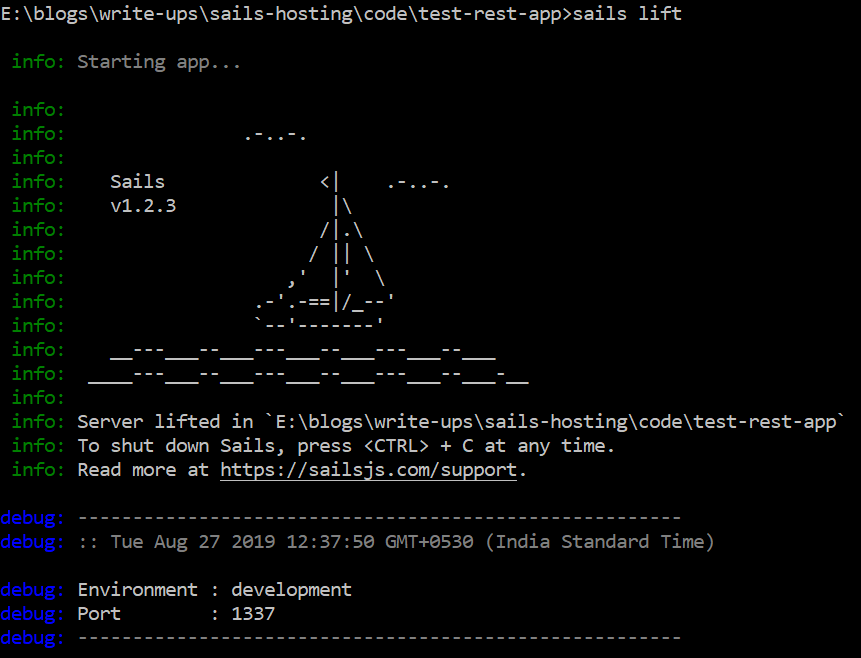
Now let us try accessing the app: http://localhost:1337. Well.. what you see is not so great, right? It is because, we haven't done anything yet!
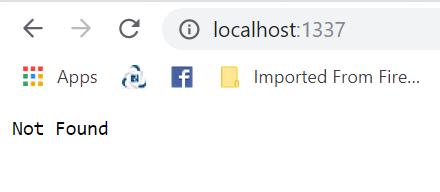
Time for our first REST API: The User service
Create routes: The URI to access our endpoint is
users. Let us create the route to reach that first. Go toconfig/routes.jsand add following lines of code:module.exports.routes = { 'get /': '/api/users', 'get /api/users': 'UserController.getUsers' };Create UserController: As you see in the above section, our route points to a controller called,
UserControllerand to be precise a method from it called,getUsers. Also note that, we have created a route called/which is simply for redirecting to/api/users.Go to
/api/controllersand create a file called,UserController.js. Copy-Paste the following code to set-up the controller.const users = require('../services/user'); module.exports = { getUsers: function(req, res) { return res.json({ users: users.getAll() }); } };Create User Service: As you notice in the code above, we are requiring a service called,
userand calling a method called,getAll()from the service. Also note, we are returning a JSON response. Hence, time to create theuserservice.Create a folder under
apifolder called,servicesand create a file called,user.jsfile. Copy-paste this code:const users = require('./users.json'); module.exports.getAll = function() { return users; }Create a Data Store: For our example we will be using JSON data store and pull the data from a simple JSON file called,
users.json. You can easily use any other data store like mySQL, mongo DB, MS Sql Server etc. Here is the comprehensive list of all supported databases and store.The
users.jsonis an array of simple user objects, like:[ { "name": "Tapas Adhikary", "hobbies": [ "blogging", "eating", "sleeping" ], "job": "Writing Software", "Salary": 100, "id": 1 }, { "name": "James Bond", "hobbies": [ "investigating", "spying", "romancing" ], "job": "Spy", "Salary": 67890800000, "id": 2 }, { "name": "Mr. Trump", "hobbies": [ "NA" ], "job": "I know it best", "Salary": 5673099094800238094932083, "id": 3 }, { "name": "Harry Gibson", "hobbies": [ "Soccer" ], "job": "Dentist", "Salary": 10084038403, "id": 4 }, { "name": "Alex", "hobbies": [ "Music", "dance" ], "job": "Technical Writer", "Salary": 500, "id": 5 } ]
We are all set. Time to run the app. If sails lift is running, please terminate it and run again. Access the app over http://localhost:1337. You will notice two things:
- The URL gets redirected to
http://localhost:1337/api/usersas per the routes specified. - You should see the response as:
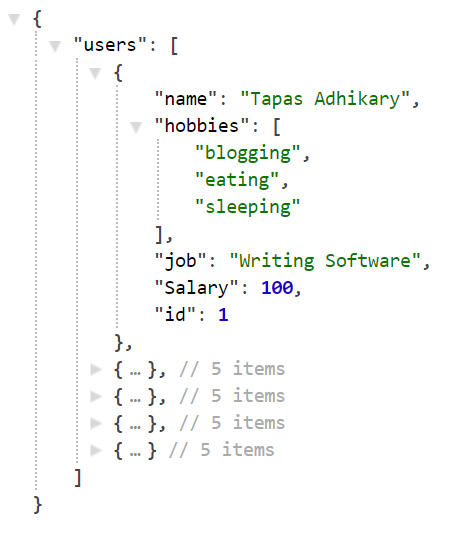
TADA! We have developed a REST API in record time 😊😊😊.
Sails in Production
As we have a Sails.js app locally running in development mode, next logical step is to deploy it on a hosting service called, Heroku. Heroku expects couple of things from our app to run it successfully. We will be doing those configurations now.
Setting
trustProxyto true: Open the fileconfig/env/production.jsand search for the wordtrustProxy. You will see a linetrustProxy: truecommented by default. Uncomment it.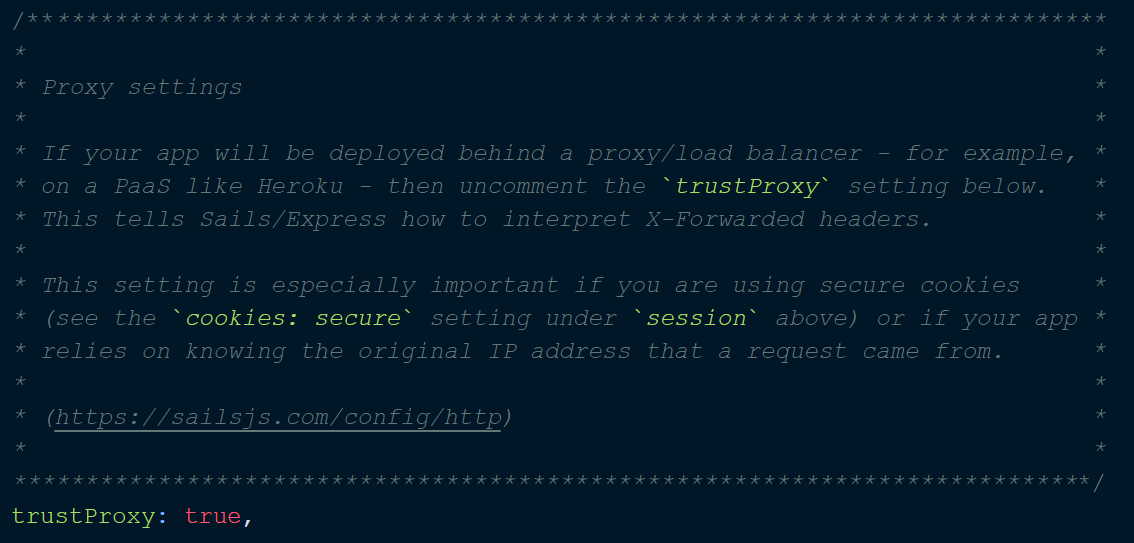
Setting value for
onlyAllowOrigins: In the same fileconfig/env/production.js, search for the text,onlyAllowOrigins. You will find it commented by default. Please uncomment it and provide the "origins" are allowed to open socket connections to your Sails app. For example app, you can leave the default values as is.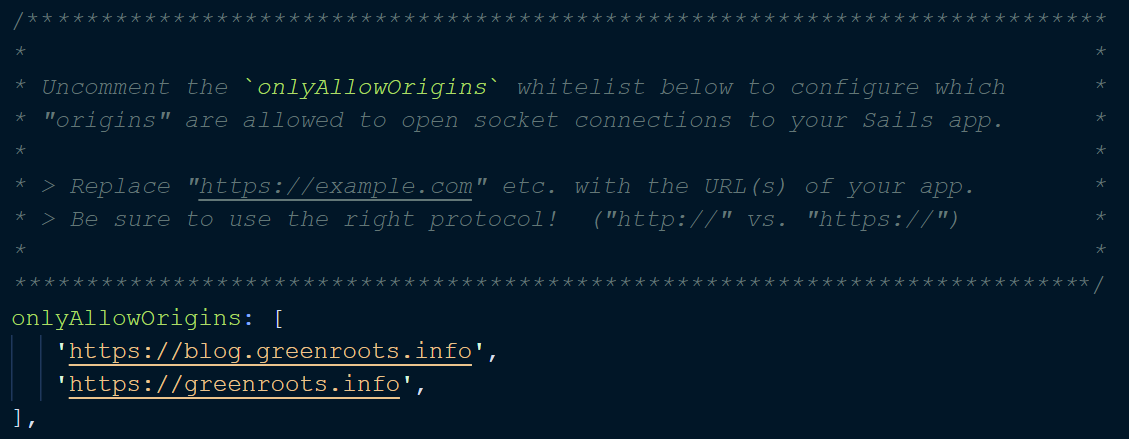
We are done with all the required configurations for our app to get deployed and run on Heroku. Note, there are many other settings like security, https etc you need to perform for a production ready app. But for the sake of our example, we have done enough that are required.
Important Step: At this stage, push your app code to git so that, we get to see a workflow of proper CI/CD at the end. My project is here.
Heroku

Heroku is a container-based cloud Platform as a Service (PaaS). We can use Heroku to deploy, manage, and scale modern apps. This platform is elegant, flexible, and easy to use, offering developers the simplest path to getting their apps to market.
Let's Deploy
- First thing first, Sign up and login to Heroku.
- Download and Install
heroku-clifrom here. This tool will set all the required path for your existing CLI. Open a command prompt and browse to your project directory. Perform
heroku login.
This will ask you for Heroku credentials. Please enter. Alternatively, it may direct you to a web page to login and come back to the terminal.
Create a Heroku project for your app. Use the command
heroku create.
Heroku will create a project with a random name(which you can change later) and provide you a confirmation as above. You can also login to Heroku dashboard to see the project listed:

Once the next step is done, your app will be hosted on the project url created by Heroku. In my case it is:
https://fathomless-chamber-59085.herokuapp.comHeroku Push: The last thing is to push it Heroku to deploy.
git push heroku masterOpen the url on browser and see your app running there.
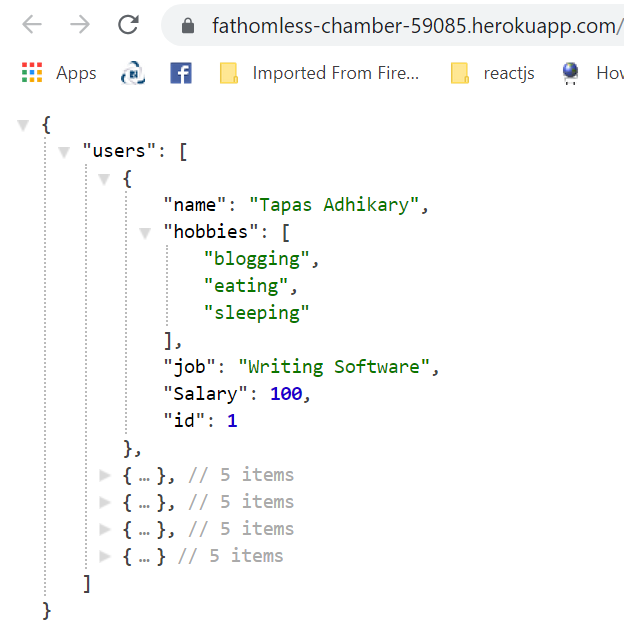 Congratulations!!! You have successfully deployed your Sails.js app on Heroku!
CI/CD cycle
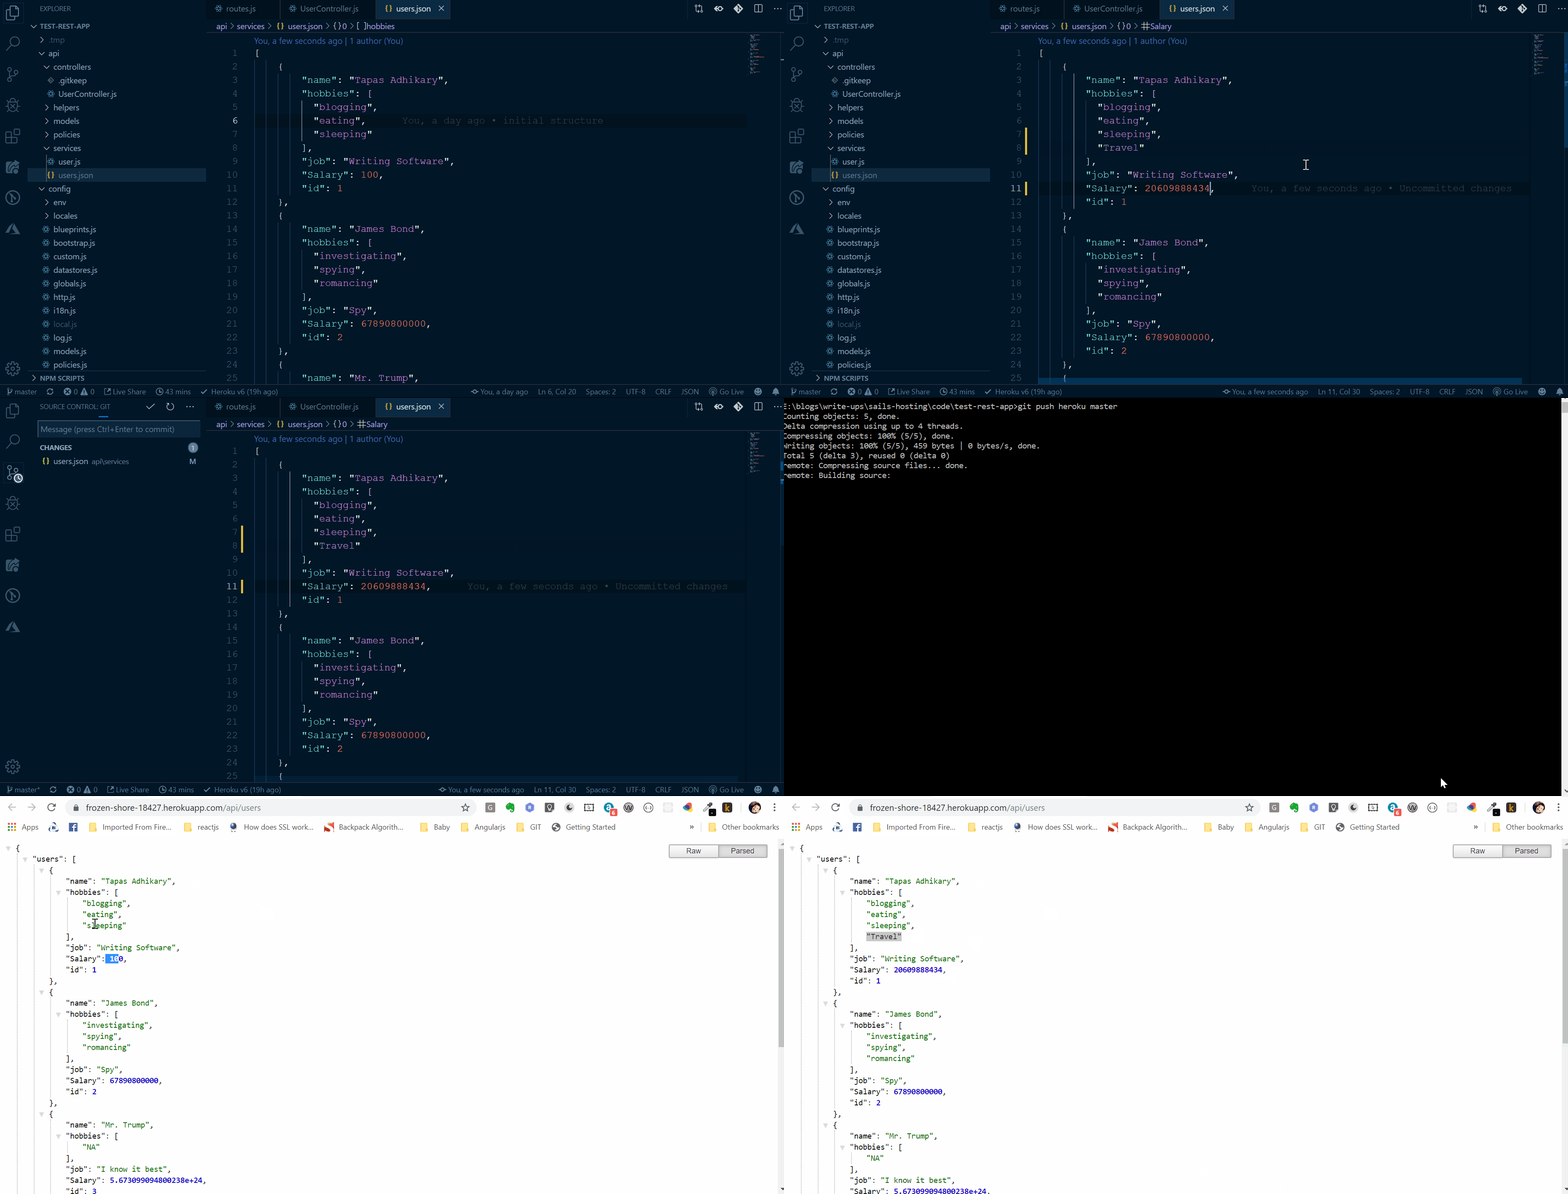
With all that we have learned so far, let us see a workflow where we will be able to:
- Modify Code
- Commit to Git
- Publish to Heroku
- See the Changes.
See it in action:
Conclusion
You can even write hooks to reduce the effort of publishing to Heroku. The git hook should take care of the commit pushed to Git and auto deploy. Here is the detailed documentation on how to do it.
Please like/share the post if it was useful. Btw, the title of the post says about living longer. That is just the exaggeration of the fact that, if you automate things, you will be hassle-free, tension free and thus, live longer 😄😄😄!


