
How to create a countdown timer using React Hooks
Learn how to use the standard and custom hooks of ReactJS to create a countdown timer. React Hooks are the cool thing from the library.

Co-Founder, @CreoWis | Teacher, @tapaScript | Founder, @ReactPlay | YouTuber | Writer | Human
⭐ Introduction
React(aka ReactJS) is a library that builds declarative and component-based user interfaces. With the inclusion of functional components and hooks, it is even more potent in reusability, better code organization, and data flow.
Web developers widely use React's standard hooks like useState, useEffect to manage state within the components. However, the practice of writing custom hooks seems to be a bit lesser. This article aims to explain the usages of the custom hook in a beginner-friendly manner. What could be better than learning it by developing a small but practical application?
We will create a countdown timer that will allow us to set an initial date and time to start the countdown. Once the date and time expire, it will show an expiry notice. The image below shows a working example of the app.
Please note, if you are a newbie to React and planning to follow along with this article, you will learn the concepts like,
- How to structure Components
- Basic State Management using Standard Hooks
- Custom Hook to Manage the Countdown
- Conditional Rendering to show Expiry
- Basic CSS styling
Sounds exciting? Let's get started.
⭐ The Countdown app
When you are learning React, you need "Thinking in React".
It means,
- Start with the application design.
- Break it into possible components.
- Decide on the component's
stateand data to pass aspropsamong the components. - Decide on reusable logic that you can isolate and reuse among components, welcome custom hooks.
Here goes the design and component breakdown of the countdown application. Please note how we can identify and mark the components.
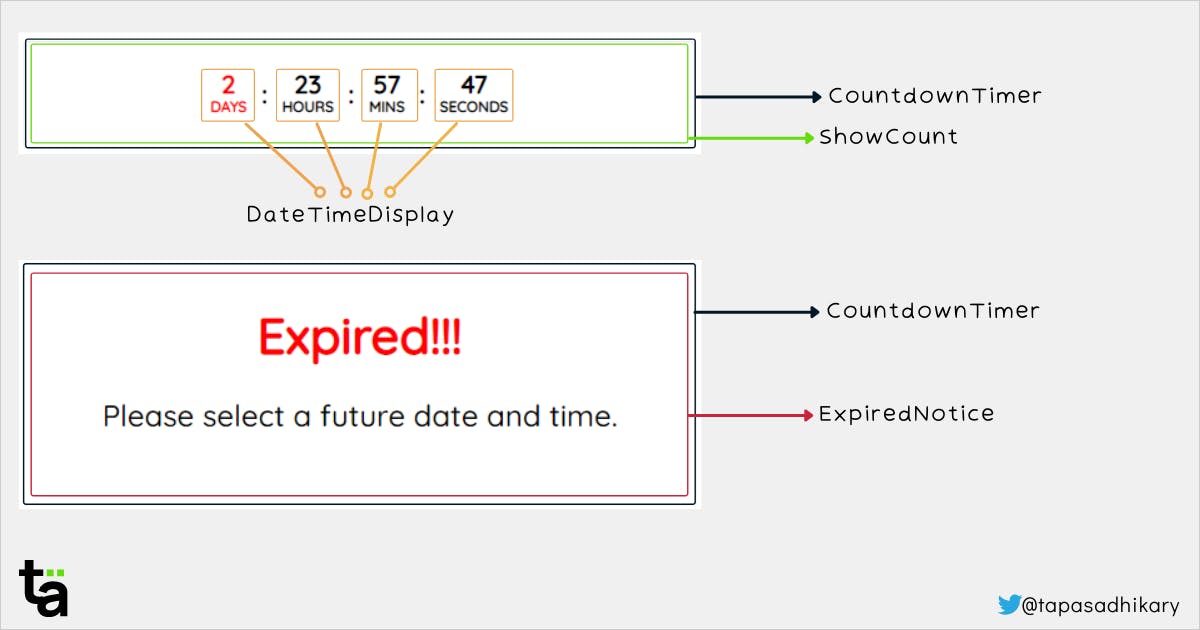
The application has a user interface to show the countdown numbers. It shows an expiry notice when the countdown expires. So, we can separate the responsibilities into the following components,
CountdownTimer: A parent component that conditionally renders the countdown or the expiry notice.ShowCount: A component to show the countdown count for days, hours, minutes, and seconds.DateTimeDisplay: A reusable presentational component to show the number of days, hours, minutes, and seconds along with its labels.ExpiredNotice: A component that shows the warning text saying the timer is expired and what action to take.
Please note we can do the entire countdown computation inside CountdownTimer or ShowCount components. But think about it, you may need this countdown calculation elsewhere in your app in the future. So, you shouldn't keep this tightly coupled with any components.
Let's welcome Custom Hook to solve the problem. We can isolate the countdown calculation in a custom hook called useCountdown. The custom hook accepts the initial date and time and returns the count of days, hours, minutes, and seconds in the interval of our choice(say, in every 1000 ms).
With that, now take a look at the following diagram.
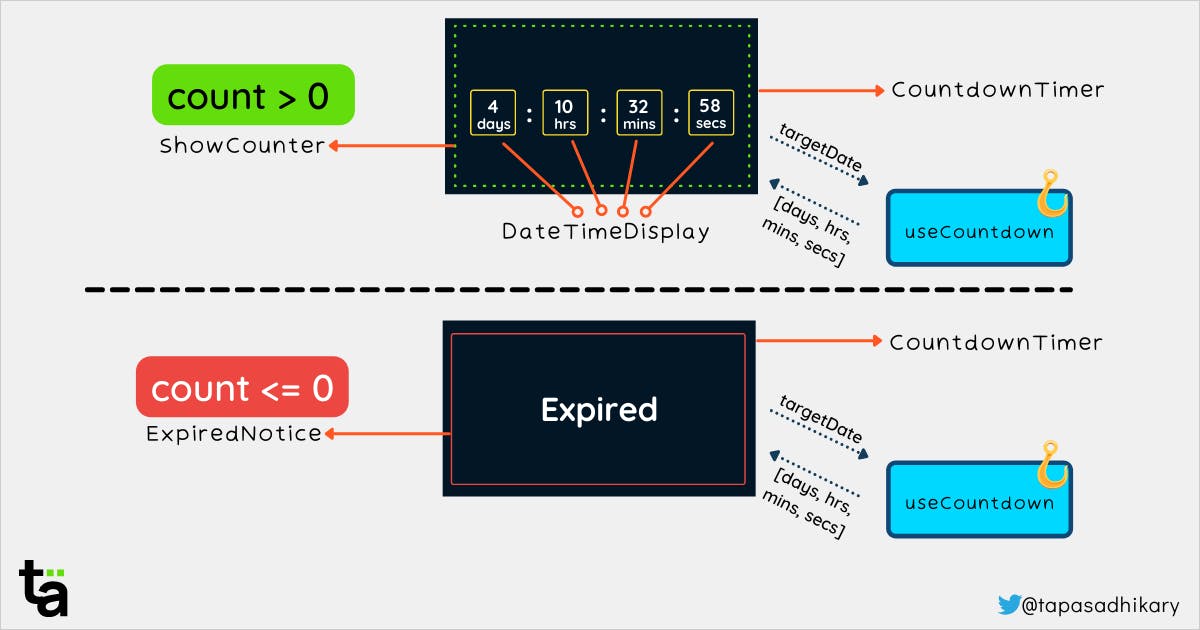
We see the useCountdown hook isolated from the component hierarchy. It supplies the required data to the component as needed. We also see the conditional rendering of ShowCounter and ExpiredNotice based on the counter value. We will determine the counter value based on the individual values of days, hours, minutes, and seconds.
I hope you have started "Thinking in React" already! Let's start putting things in code.
⭐ Project Environment Set up
To follow along, you can use the Create React App(CRA) to create your initial project structure. Make sure you have Node.js installed. Open the command prompt/terminal and execute this command,
npx create-react-app countdown
This command will take a while, and create the project structure for you. Once done, please browse to the countdown directory and start the app locally using the following command,
npm run start
Or
yarn start
You should have a browser tab opened automatically that runs the app @ http://localhost:3000 URL. Please note the Create React App supports hot reloading. It means your app on the browser will update automatically when you make any changes to the project source code and save it.
⭐ The Custom Hook to Perform the Countdown
The custom hooks are regular JavaScript functions to isolate a reusable component logic. The vital point to note here, we can share stateful logic between components without polluting the states. If you have been using React for a while now, you are making the same using patterns like Higher-Order Component, Render Props. Custom hooks are much more straightforward.
Let us create a hook to compute the countdown in an interval. Create a folder called hooks under your project's src folder. Create a file called useCountdown.js with the following content.
import { useEffect, useState } from 'react';

const useCountdown = (targetDate) => {
  const countDownDate = new Date(targetDate).getTime();

  const [countDown, setCountDown] = useState(
    countDownDate - new Date().getTime()
  );

  useEffect(() => {
    const interval = setInterval(() => {
      setCountDown(countDownDate - new Date().getTime());
    }, 1000);

    return () => clearInterval(interval);
  }, [countDownDate]);

  return getReturnValues(countDown);
};

const getReturnValues = (countDown) => {
  // calculate time left
  const days = Math.floor(countDown / (1000 * 60 * 60 * 24));
  const hours = Math.floor(
    (countDown % (1000 * 60 * 60 * 24)) / (1000 * 60 * 60)
  );
  const minutes = Math.floor((countDown % (1000 * 60 * 60)) / (1000 * 60));
  const seconds = Math.floor((countDown % (1000 * 60)) / 1000);

  return [days, hours, minutes, seconds];
};

export { useCountdown };
Here are a few things to mention about the code above,
- It is a regular JavaScript function that accepts a target date-time to start the countdown. However, notice the function(hook) name. It must start with the word
useto satisfy React conventions. - It uses the
setIntervalbrowser API method to calculate the spare time every second(1000 milliseconds). - It performs the calculation to find the days, hours, minutes, and seconds.
- Finally, it returns the value of days, hours, minutes, and seconds in each interval. Please note, as we have to return multiple values here, we can return them as an array or object. We have decided to return all the values in an array.
- The standard hook
useEffectalso helps with the component's life-cycle and performs necessary cleanup like clearing the interval.
Alright, now it's time to use this hook.
⭐ The Breakdown of CountdownTimer Component
We will now use the useCountdown hook into a component. Please create the file CountdownTimer.js under the src folder with the following content,
import React from 'react';
import { useCountdown } from './hooks/useCountdown';

const CountdownTimer = ({ targetDate }) => {
  const [days, hours, minutes, seconds] = useCountdown(targetDate);

  if (days + hours + minutes + seconds <= 0) {
    return <ExpiredNotice />;
  } else {
    return (
      <ShowCounter
        days={days}
        hours={hours}
        minutes={minutes}
        seconds={seconds}
      />
    );
  }
};
As you see in the code above,
- We first import the
useCountdownhook to use it. - In the component function, we call the hook by passing a
targetDate. We will supply thistargetDatein a while from another component. This mechanism of sharing information between components is called sharing byprops. Here thetargetDateis a prop. - Next, we check if the time has expired. In case of time expiry, we render the
ExpriredNoticecomponent. Otherwise, we render theShowCountercomponent with all the data from the hook. This mechanism of conditionally returning components is calledConditional Rendering.
Next, we will create the ExpiredNotice and ShowCounter components.
⭐ The Component to Show the Expiry Message
Please add the following code after the import statements in the CountdownTimer.js file.
const ExpiredNotice = () => {
  return (
    <div className="expired-notice">
      <span>Expired!!!</span>
      <p>Please select a future date and time.</p>
    </div>
  );
};
A simple component shows the text Expired!!! with a note.
⭐ The Component to Show the Countdown
Now we will add the component to show the actual countdown. Please add the following code after the ExpiredNotice component we have created above.
const ShowCounter = ({ days, hours, minutes, seconds }) => {
  return (
    <div className="show-counter">
      <a
        href="https://tapasadhikary.com"
        target="_blank"
        rel="noopener noreferrer"
        className="countdown-link"
      >
        <DateTimeDisplay value={days} type={'Days'} isDanger={days <= 3} />
        <p>:</p>
        <DateTimeDisplay value={hours} type={'Hours'} isDanger={false} />
        <p>:</p>
        <DateTimeDisplay value={minutes} type={'Mins'} isDanger={false} />
        <p>:</p>
        <DateTimeDisplay value={seconds} type={'Seconds'} isDanger={false} />
      </a>
    </div>
  );
};
Take a closer look at the code above. It displays each of the values(days, hours, minutes, and seconds) using a component called DateTimeDisplay that we create now. But notice the props we pass to that component, especially the isDanger.
We can pass an expression using the isDanger props to style a particular display when the expression evaluates as true. For example, we want the days to turn red when the countdown reaches the last 3 days!
Create a file called DateTimeDisplay.js under the src folder with the following content,
import React from 'react';

const DateTimeDisplay = ({ value, type, isDanger }) => {
  return (
    <div className={isDanger ? 'countdown danger' : 'countdown'}>
      <p>{value}</p>
      <span>{type}</span>
    </div>
  );
};

export default DateTimeDisplay;
It is another simple component that renders the value and the type. Now we can just import this component into the parent component(CountdownTimer) as,
import DateTimeDisplay from './DateTimeDisplay';
That's most of it.
⭐ The Complete CountdownTimer Component
Here is what the CountdownTimer.js content looks like by now.
import React from 'react';
import DateTimeDisplay from './DateTimeDisplay';
import { useCountdown } from './hooks/useCountdown';

const ExpiredNotice = () => {
  return (
    <div className="expired-notice">
      <span>Expired!!!</span>
      <p>Please select a future date and time.</p>
    </div>
  );
};

const ShowCounter = ({ days, hours, minutes, seconds }) => {
  return (
    <div className="show-counter">
      <a
        href="https://tapasadhikary.com"
        target="_blank"
        rel="noopener noreferrer"
        className="countdown-link"
      >
        <DateTimeDisplay value={days} type={'Days'} isDanger={days <= 3} />
        <p>:</p>
        <DateTimeDisplay value={hours} type={'Hours'} isDanger={false} />
        <p>:</p>
        <DateTimeDisplay value={minutes} type={'Mins'} isDanger={false} />
        <p>:</p>
        <DateTimeDisplay value={seconds} type={'Seconds'} isDanger={false} />
      </a>
    </div>
  );
};

const CountdownTimer = ({ targetDate }) => {
  const [days, hours, minutes, seconds] = useCountdown(targetDate);

  if (days + hours + minutes + seconds <= 0) {
    return <ExpiredNotice />;
  } else {
    return (
      <ShowCounter
        days={days}
        hours={hours}
        minutes={minutes}
        seconds={seconds}
      />
    );
  }
};

export default CountdownTimer;
⭐ Using the CountdownTimer
Let us now use the CountdownTimer component with a target date and see how it works! Please open the App.js file and replace its content with the following code,
import React from 'react';
import CountdownTimer from './CountdownTimer';

import './App.css';

export default function App() {
  const THREE_DAYS_IN_MS = 3 * 24 * 60 * 60 * 1000;
  const NOW_IN_MS = new Date().getTime();

  const dateTimeAfterThreeDays = NOW_IN_MS + THREE_DAYS_IN_MS;

  return (
    <div>
      <h1>Countdown Timer</h1>
      <CountdownTimer targetDate={dateTimeAfterThreeDays} />
    </div>
  );
}
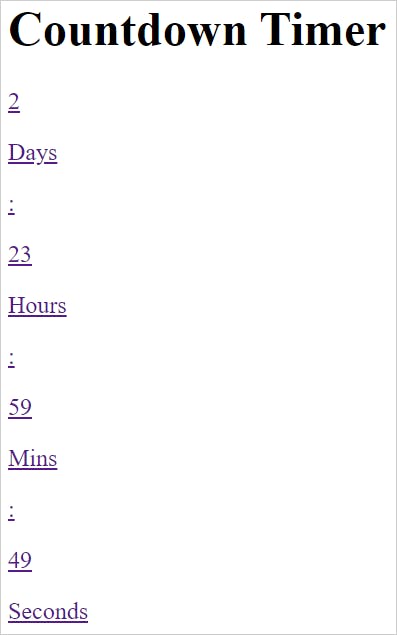
As you see, we are using the CountdownTimer component with a target date of three days from now. Please check the application in the browser. You should find the countdown is working. It doesn't look pleasant, but it works!
⭐ Let's Add Styles
Let us make the look-and-feel a bit better. Let's add some styles. Please open the file App.css in your editor and replace the content with the following,
.expired-notice {
  text-align: center;
  padding: 2rem;
  border: 1px solid #ebebeb;
  border-radius: 0.25rem;
  margin: 0.5rem;
}

.expired-notice > span {
  font-size: 2.5rem;
  font-weight: bold;
  color: red;
}

.expired-notice > p {
  font-size: 1.5rem;
}

.show-counter {
  padding: 0.5rem;
}

.show-counter .countdown-link {
  display: flex;
  flex-direction: row;
  justify-content: center;
  align-items: center;
  font-weight: 700;
  font-size: 1.25rem;
  line-height: 1.75rem;
  padding: 0.5rem;
  border: 1px solid #ebebeb;
  border-radius: 0.25rem;
  text-decoration: none;
  color: #000;
}

.show-counter .countdown {
  line-height: 1.25rem;
  padding: 0 0.75rem 0 0.75rem;
  align-items: center;
  display: flex;
  flex-direction: column;
}

.show-counter .countdown.danger {
  color: #ff0000;
}

.show-counter .countdown > p {
  margin: 0;
}

.show-counter .countdown > span {
  text-transform: uppercase;
  font-size: 0.75rem;
  line-height: 1rem;
}
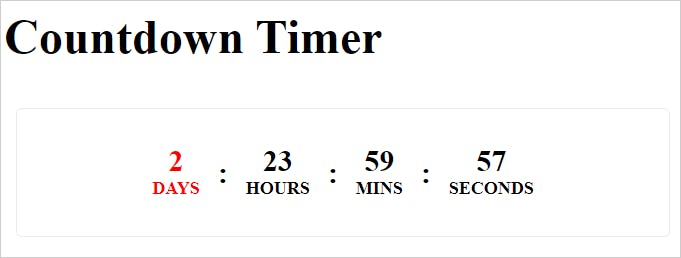
It should do. Now the app will look much better. Here is the changed look of the countdown timer when it shows the counters.
Here is how when the countdown expired. You can test it by changing the target date to some past date in the App.js file.

That's it. Great news, you have developed a super cool countdown timer using a custom hook, and other React concepts.
⭐ Task for You: Extend the App
You can find all the source code used in this article from this stackblitz project. Please fork, change, and improve it.
Here is an idea to extend the app further. You can use a Date-Time Picker to select a date and time of your choice and pass it to the countdown timer. Here is the suggested interface of the improved feature. Please give it a try.
In case you get stuck or need help, you can find the working code from this repository.
⭐ Conclusion
The best way to learn React is by learning it practically with many simple but effective projects like the one we discussed here. You must recognize and plan the React concepts you can use in such projects. Look for opportunities to apply various React concepts into one. Do not make the projects a huge one at the same time.
Please use the potential of Custom Hooks. Wherever you feel a need for stateful reusable logic inside your component, time to think of creating it as hooks.
Here is something for you:
Learn React, Practically
I've been developing professional apps using ReactJS for many years now. My learning says you need to understand ReactJS fundamentally, under the hood to use it practically.
With that vision, I have created a ReactJS PlayLIst that is available for the developer community for FREE. Take a look:
Let's connect. I share my learnings on JavaScript, Web Development, Career, and Content Creation on these platforms as well,