# How to build a serverless app with Gatsby, Netlify and FaunaDB - Part 3
# Every story has an end
Finally, we are at the end of the series, [Go Serverless](https://hashnode.com/series/go-serverless-ckf15vq040510sus1amb3goa2). Thank you for reading and liking previous articles of the series. Truly appreciate.
If you are new to the series, here is a quick recap of what we have covered so far:
👉 [How to build a serverless app with Gatsby, Netlify and FaunaDB - Part 1](https://blog.greenroots.info/how-to-build-a-serverless-app-with-gatsby-netlify-and-faunadb-part-1-ckf2dpwy200idbns1fbgpg7kx)
- Created a database, schema, data-set and the server key with `FaunaDB`.
- Tested the testimonial data-set with, create and fetch operations.
- Written `serverless` functions using `Netlify Function` capability to fetch, create, update and delete testimonials.
- Tested these functions like APIs.
👉 [How to build a serverless app with Gatsby, Netlify and FaunaDB - Part 2](https://blog.greenroots.info/how-to-build-a-serverless-app-with-gatsby-netlify-and-faunadb-part-2-ckf3xvyo000x1bos16t415jy7)
- Explored `Gatsby` to write the client side testimonial app.
- Fetched the testimonials in the app using the `serverless` function.
- Deployed the app with `Netlify`.
In this article, we will continue the app development to add an authentication layer. We will allow our users to create a testimonial only after they authenticate to our app.
# Our Testimonial app
Our plan is to,
- Add a `Login` button to the user interface.
- Allow users to create an account using email id and password.
- Allow users to enter credentials when they try to log-in.
- Show the `Create Testimonial` option on successful login and allow users to create testimonials.
- Add the newly created testimonial to the list.
- Allow the logged-in user to log-out.
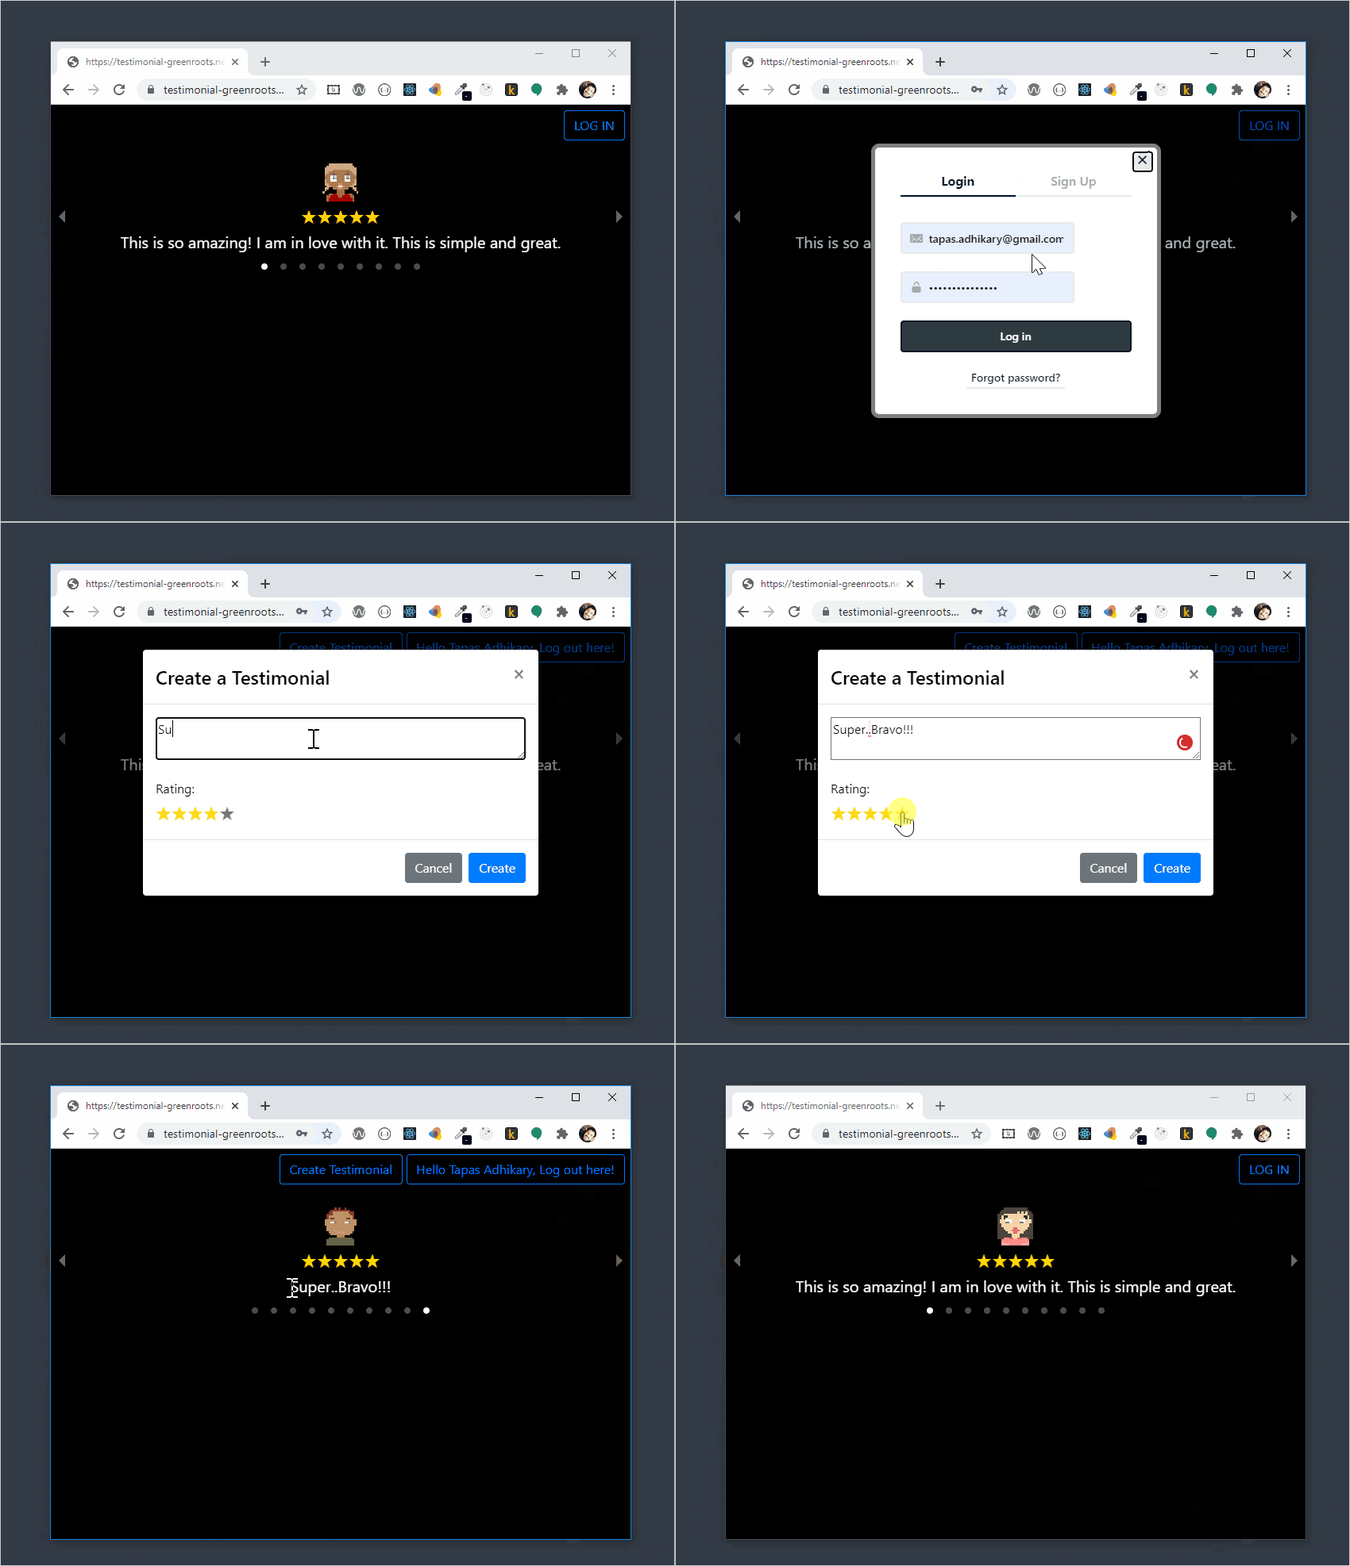
At the end, the testimonial app may behave like this:
# But, we are Serverless!
So how about the Authentication module? Do we need to implement one? Who is going to manage identities(i,e, account creation, role provisioning etc.)?
> 70% - 80% of the features that once required a custom back-end can now be done entirely on the front-end. More details from [here](https://blog.greenroots.info/how-to-use-jamstack-with-the-server-side-and-enterprise-app-ckeqn913900fw0ys1g0vda7as).
Authentication and Authorization modules are among them. It powers `going serverless` too. We are not going to implement any of these by ourselves. Rather, we are going to use one.
# Netlify Identity
We are going to explore `Netlify Identity`.
> Netlify Identity service brings a full suite of authentication functionality, backed by the [GoTrue API](https://github.com/netlify/gotrue). This allows you to manage and authenticate users on your site or app, without requiring them to be users of Netlify or any other service.
- Login to your `Netlify` account and browse to the `testimonial` app we have created in the previous article.
- Go to the `identity` tab and click on the `Enable Identity` button.
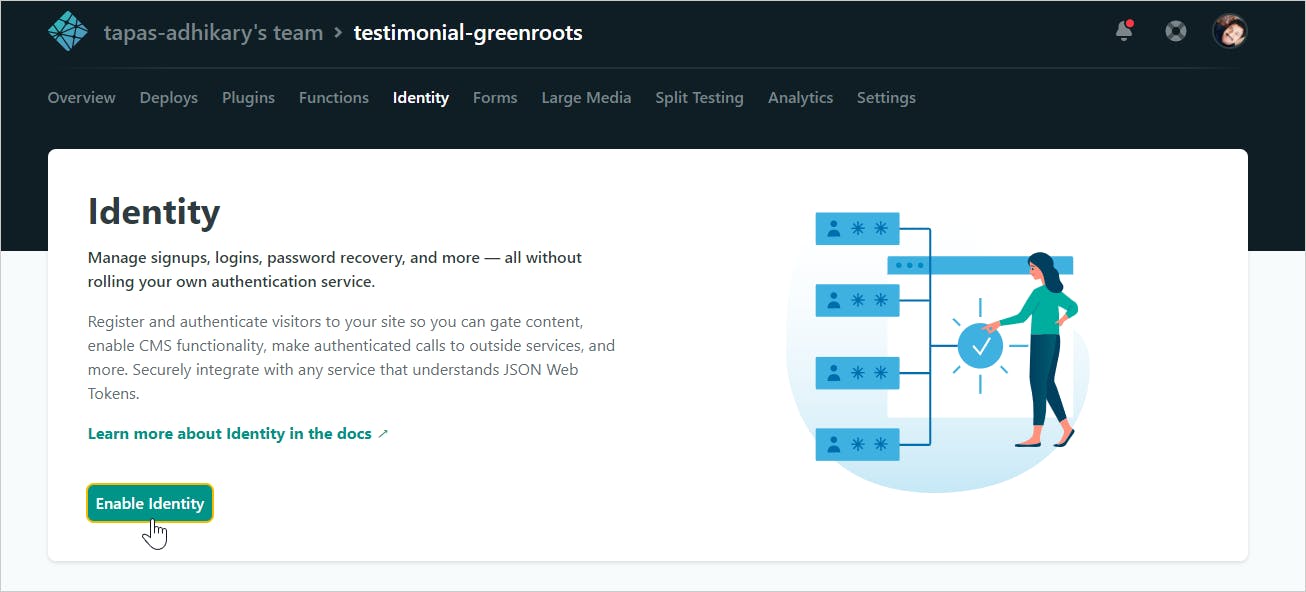
That's all. You have enabled the identity services for the testimonial app successfully. Let us now make use of it by modifying the `testimonial` app a bit.
## Install dependencies
We have to install few sets of dependencies to use the Netlify Identity in our app.
- `react-netlify-identity-widget`: A React component used to authenticate with Netlify's Identity service. It also has some peer dependencies like, `@reach/dialog`, `@reach/tabs`, `@reach/visually-hidden`.
- `gatsby-plugin-netlify-identity`: A Gatsby plugin which adds a React Netlify Identity Widget Provider for us.
Open a command prompt at the root of the project folder and install the dependencies using:
```shell
yarn add gatsby-plugin-netlify-identity react-netlify-identity-widget @reach/dialog @reach/tabs @reach/visually-hidden
```
We will use a modal dialog to allow users for creating a testimonial. I am using `react-bootstrap` for that purpose. Please install it too,
```shell
yarn add react-bootstrap bootstrap
```
## Configure Gatsby
Next, we have to tell `Gatsby` that, we will use the idenity service from Netlify. For that, edit the `gatsby-config.js` file and add the `plugins` section as shown below:
```js
module.exports = {
plugins: [
{
resolve: `gatsby-plugin-netlify-identity`,
options: {
url: `https://your-project-identity.netlify.app/`
}
}
]
}
```
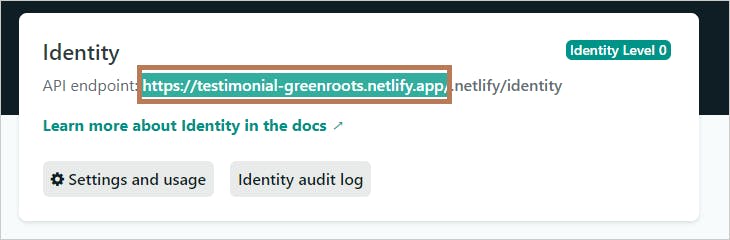
Please note, the url in the above configuration should match the domain name of your app. Here is an example of what you need to select and specify as the url in the `gatsby-config.js` file:
# Let's include it in the code
Time to modify the `index.js` file to use the identity service from Netlify.
- First, import required packages
```js
import IdentityModal, { useIdentityContext }
from "react-netlify-identity-widget";
import "react-netlify-identity-widget/styles.css";
import 'bootstrap/dist/css/bootstrap.min.css';
import Button from 'react-bootstrap/Button';
import Modal from 'react-bootstrap/Modal';
```
- The `react-netlify-identity-widget` provides a modal dialog-box for providing credentials and creating account. We need to capture if the user is correctly authenticated using it and then, show the `Create Testimonial` button.
```js
// identity code to get if the user logged-in
const identity = useIdentityContext();
const [dialog, setDialog] = useState(false);
const name =
(identity && identity.user && identity.user.user_metadata &&
identity.user.user_metadata.full_name) || "Untitled";
const isLoggedIn = identity && identity.isLoggedIn;
```
```js
{
identity && identity.isLoggedIn ? (
{ ' '}
) : (
)
}
```
- This is how to add the identity dialog:
```js
setDialog(false)} />
```
- Last, modify the `index.css` file to add these classes:
```js
.auth-btn-grp {
float: right;
padding: 5px;
}
.create-testimonial {
color: #000000;
}
.create-form {
display: flex;
justify-content: center;
flex-direction: column;
}
```
That's all for including the identity service from `Netlify` to the `testimonial` app!
Here is the complete `index.js` file after the modification. You can notice the way we are calling the `/api/create-testimonial` for creating a testimonial after a successful authentication.
```js
import React, { useEffect, useState } from 'react';
import axios from "axios";
import ReactStars from 'react-stars';
import "react-responsive-carousel/lib/styles/carousel.min.css";
import { Carousel } from "react-responsive-carousel";
import IdentityModal, { useIdentityContext } from "react-netlify-identity-widget";
import "react-netlify-identity-widget/styles.css";
import 'bootstrap/dist/css/bootstrap.min.css';
import Button from 'react-bootstrap/Button';
import Modal from 'react-bootstrap/Modal';
import './index.css';
export default () => {
const [status, setStatus ] = useState('loading...');
const [testimonials, setTestimonials] = useState(null);
useEffect(() => {
if (status !== "loading...") return;
axios("/api/get-testimonials").then(result => {
if (result.status !== 200) {
console.error("Error loading testimonials");
console.error(result);
return;
}
setTestimonials(result.data.messages);
setStatus("loaded");
});
}, [status]);
const getAvatar = () => {
const random = Math.floor(Math.random() * (testimonials.length - 0 + 1) + 0);
const imgUrl = `https://avatars.dicebear.com/api/human/${random}.svg?mood[]=happy`;
return imgUrl;
}
// identity code
const identity = useIdentityContext();
const [dialog, setDialog] = useState(false);
const name =
(identity && identity.user && identity.user.user_metadata && identity.user.user_metadata.full_name) || "Untitled";
const isLoggedIn = identity && identity.isLoggedIn;
// create testimonial
const [show, setShow] = useState(false);
const [rating, setRating] = useState(4);
const [text, setText] = useState('');
const handleClose = () => setShow(false);
const handleShow = () => setShow(true);
const ratingChanged = (newRating) => {
setRating(newRating);
}
const textChanged = evt => {
const val = evt.target.value;
setText(val);
}
const handleCreate = async event => {
if(text === '') return;
await axios.post('/api/create-testimonial', { text, rating });
const newList = testimonials.concat({ text, rating });
setTestimonials(newList);
setShow(false);
}
return (
<>
{
identity && identity.isLoggedIn ? (